LiDAR + Imagery Registration Options with PixElement
In this article we will be looking at the options you have when registering your LiDAR data. The video version of this article is available above.
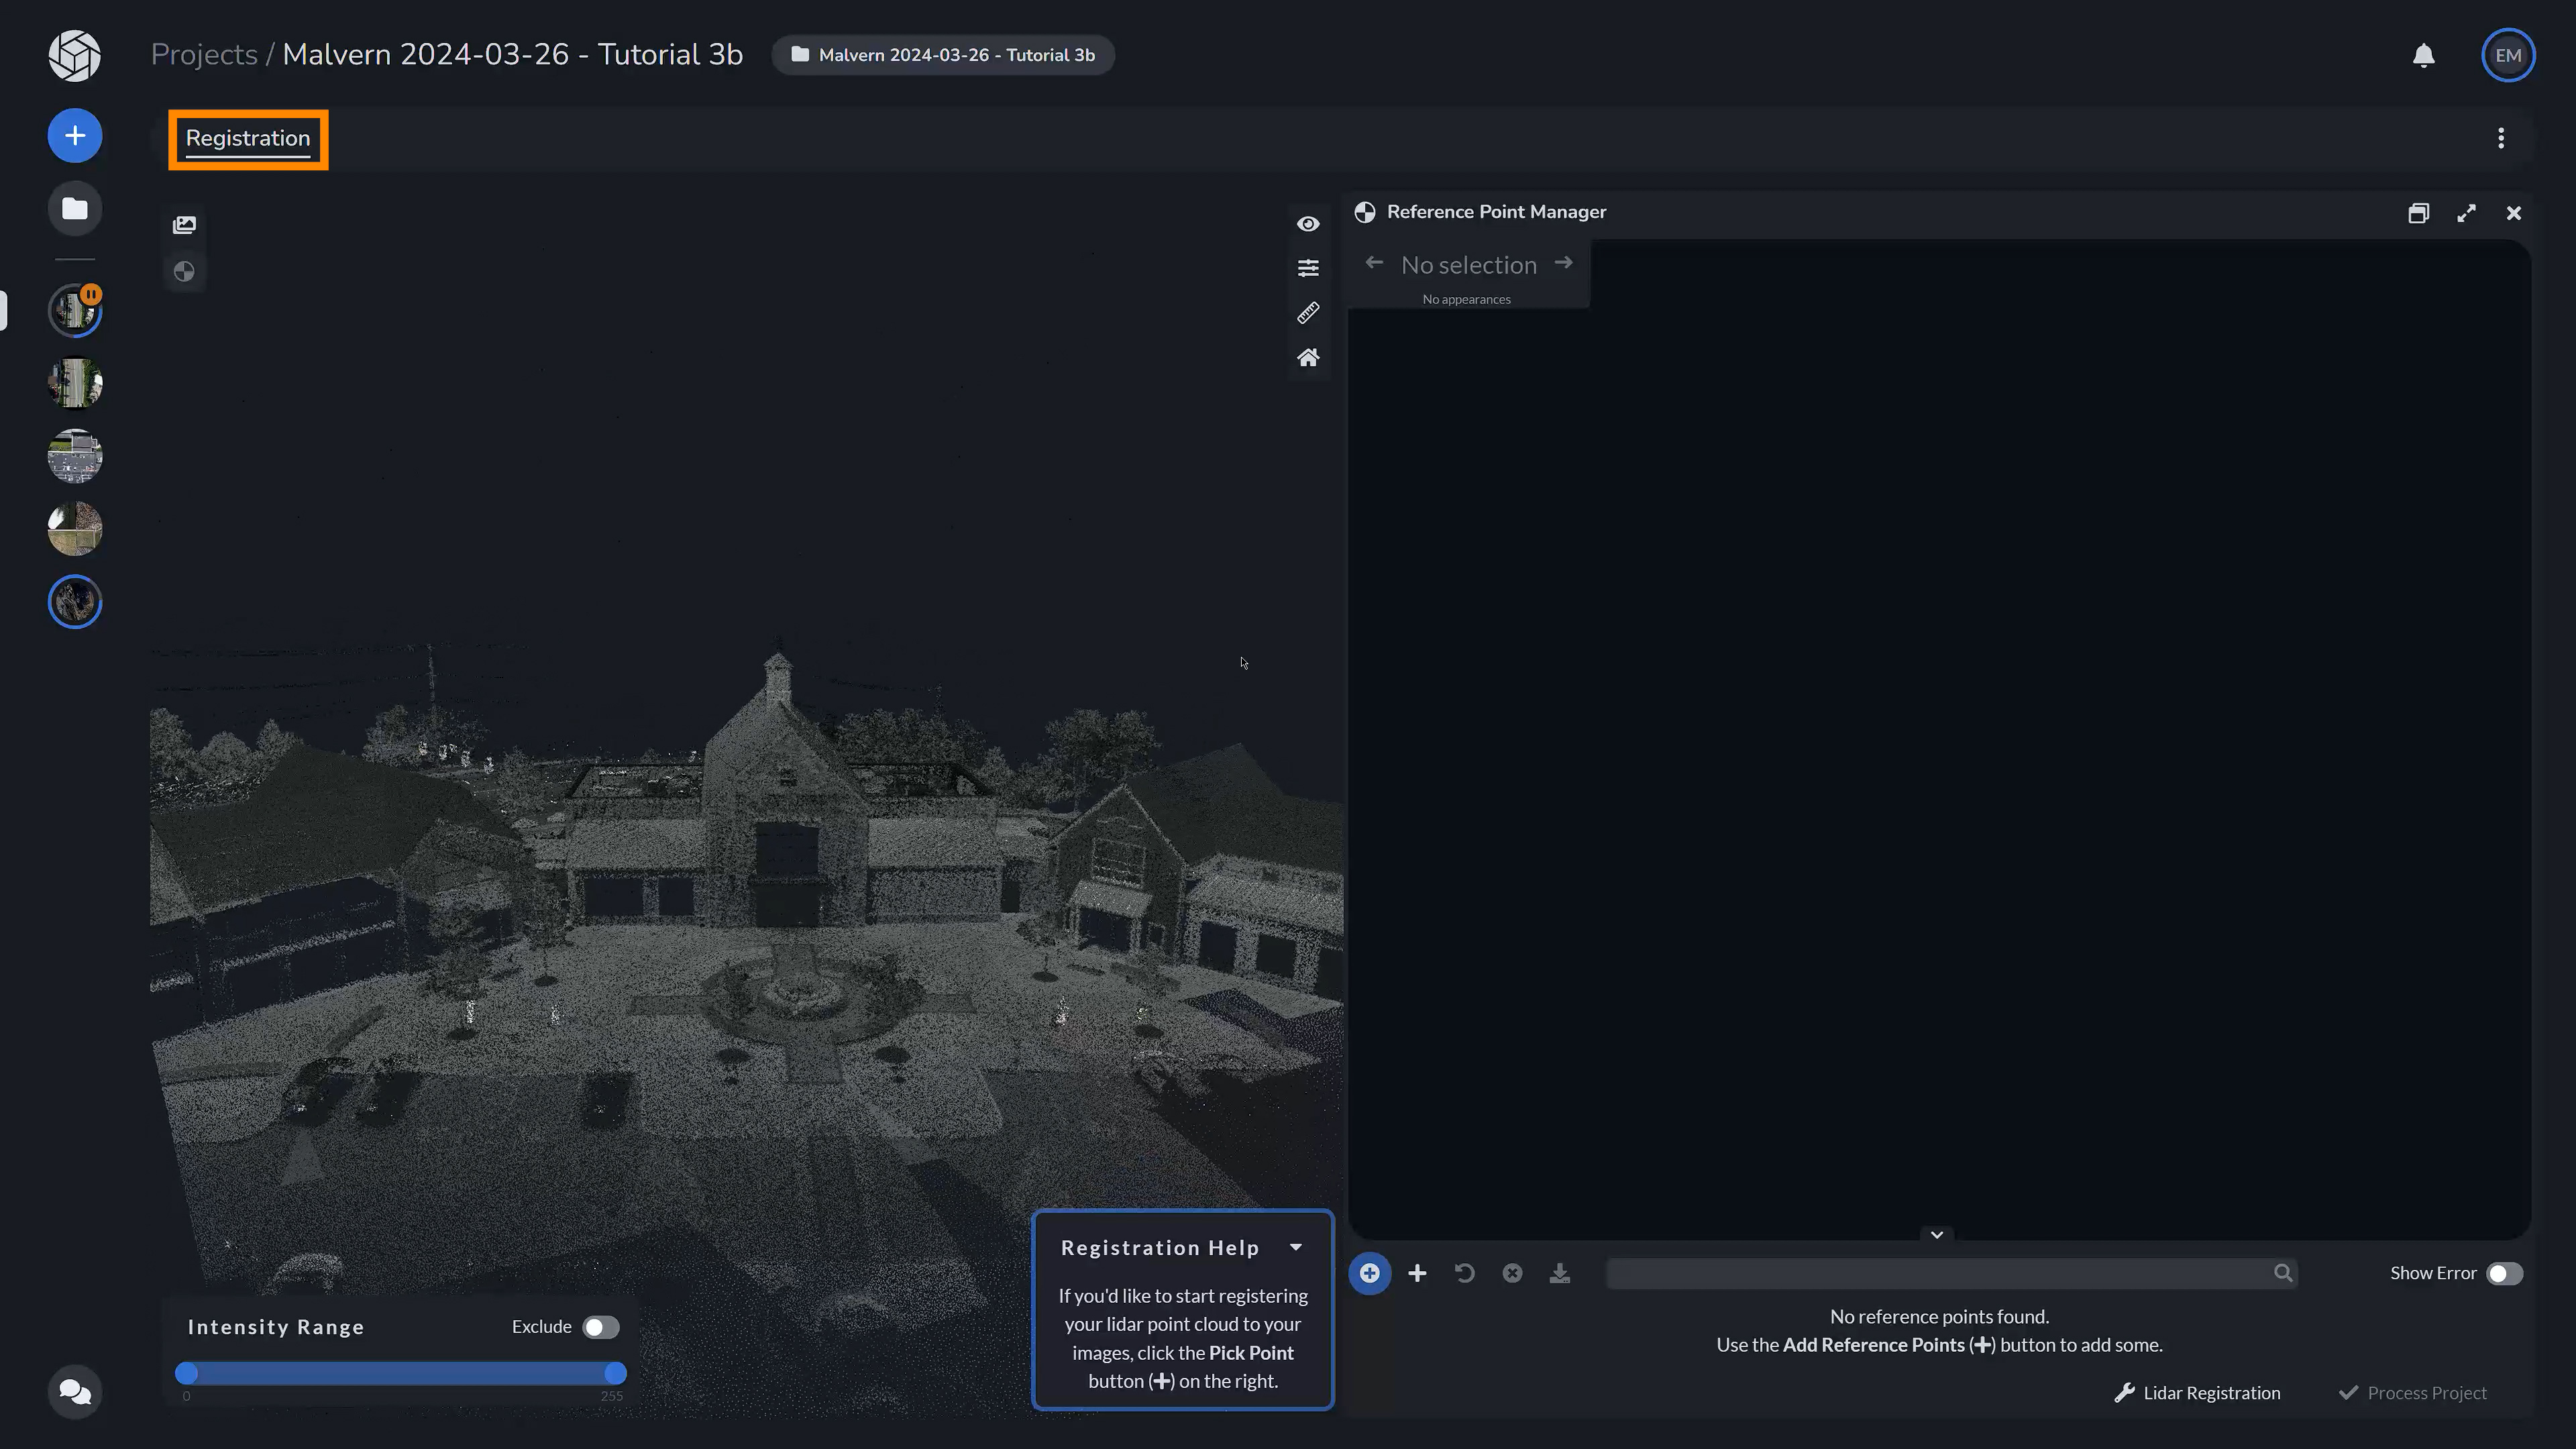
Once your project is uploaded, you will be taken to the registration tab where you will be able to to align the coordinate system of the LiDAR cloud with the coordinate system of the images. To do this, you will need to match at least one point in the photos and the point cloud.
Users have two main ways of doing registration for their dataset: the first one being that you have no GCPS and only LiDAR tiepoints. Or secondly that you have your LiDAR GCPs as coordinates and points already (as an uploaded GCP file in project creation) in the analyzer tab.
No GCPS but LiDAR Tiepoints
So let’s look at an example of when we do not have GCPs:
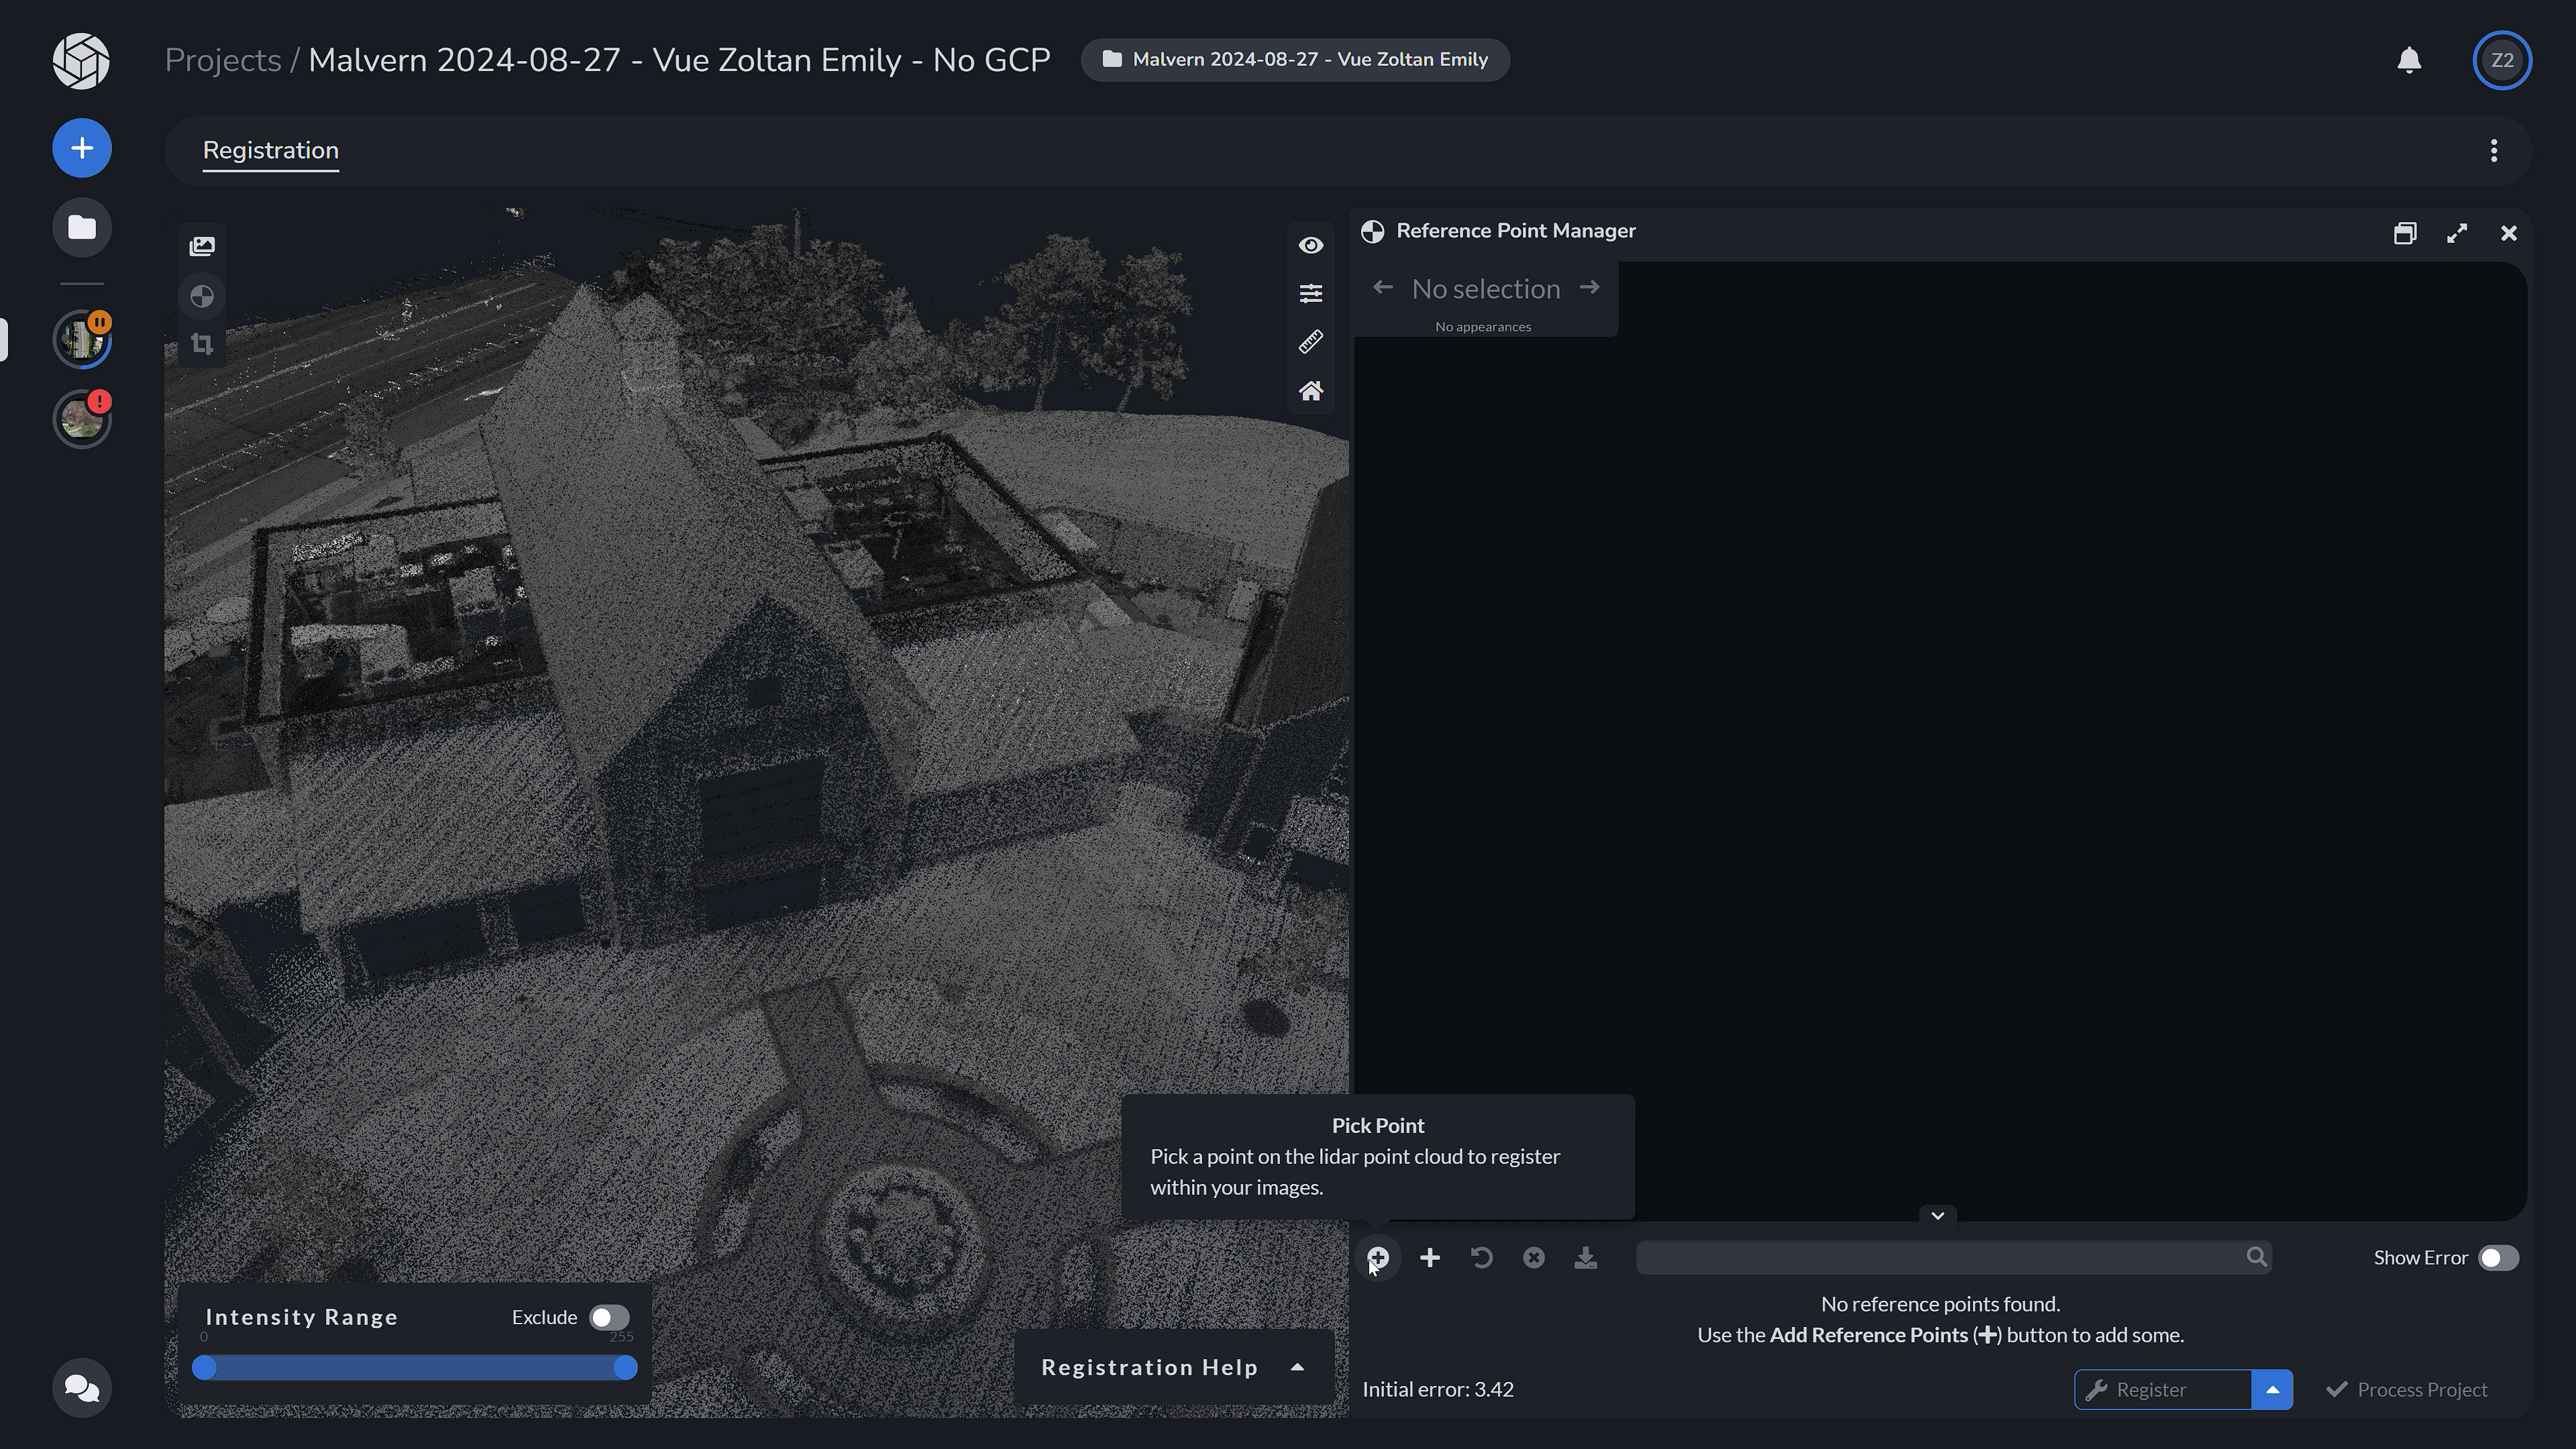
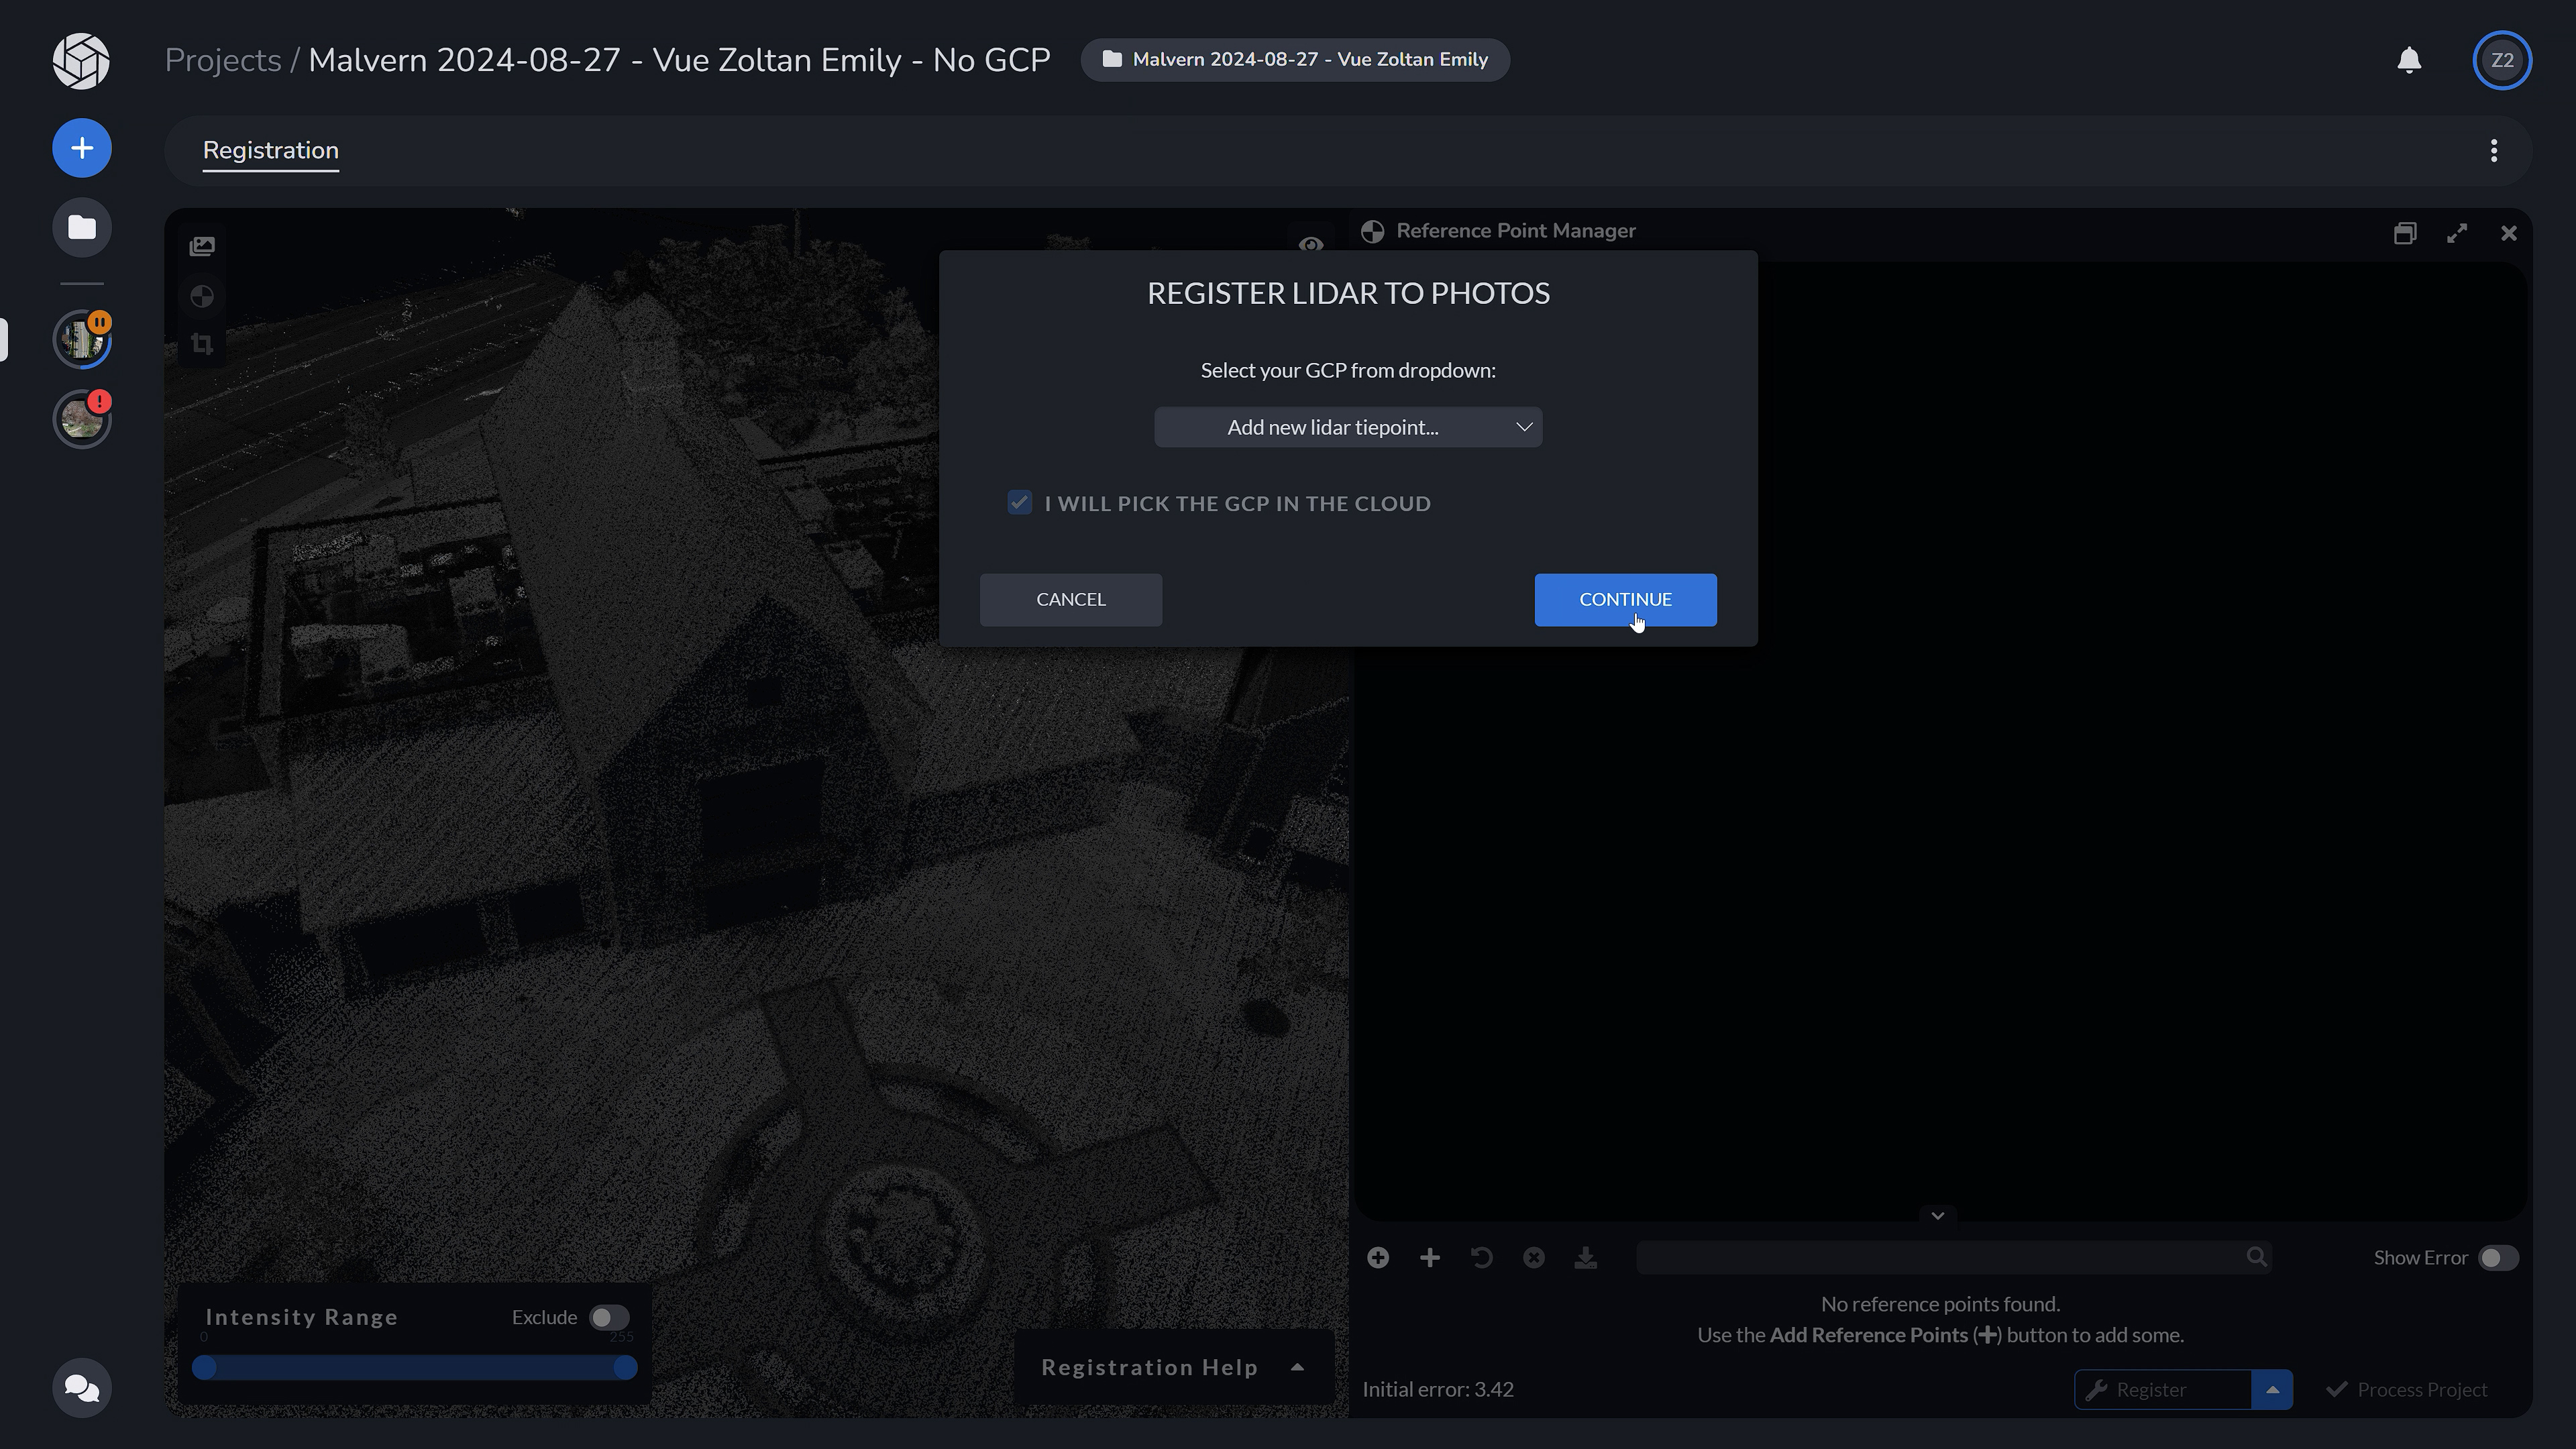
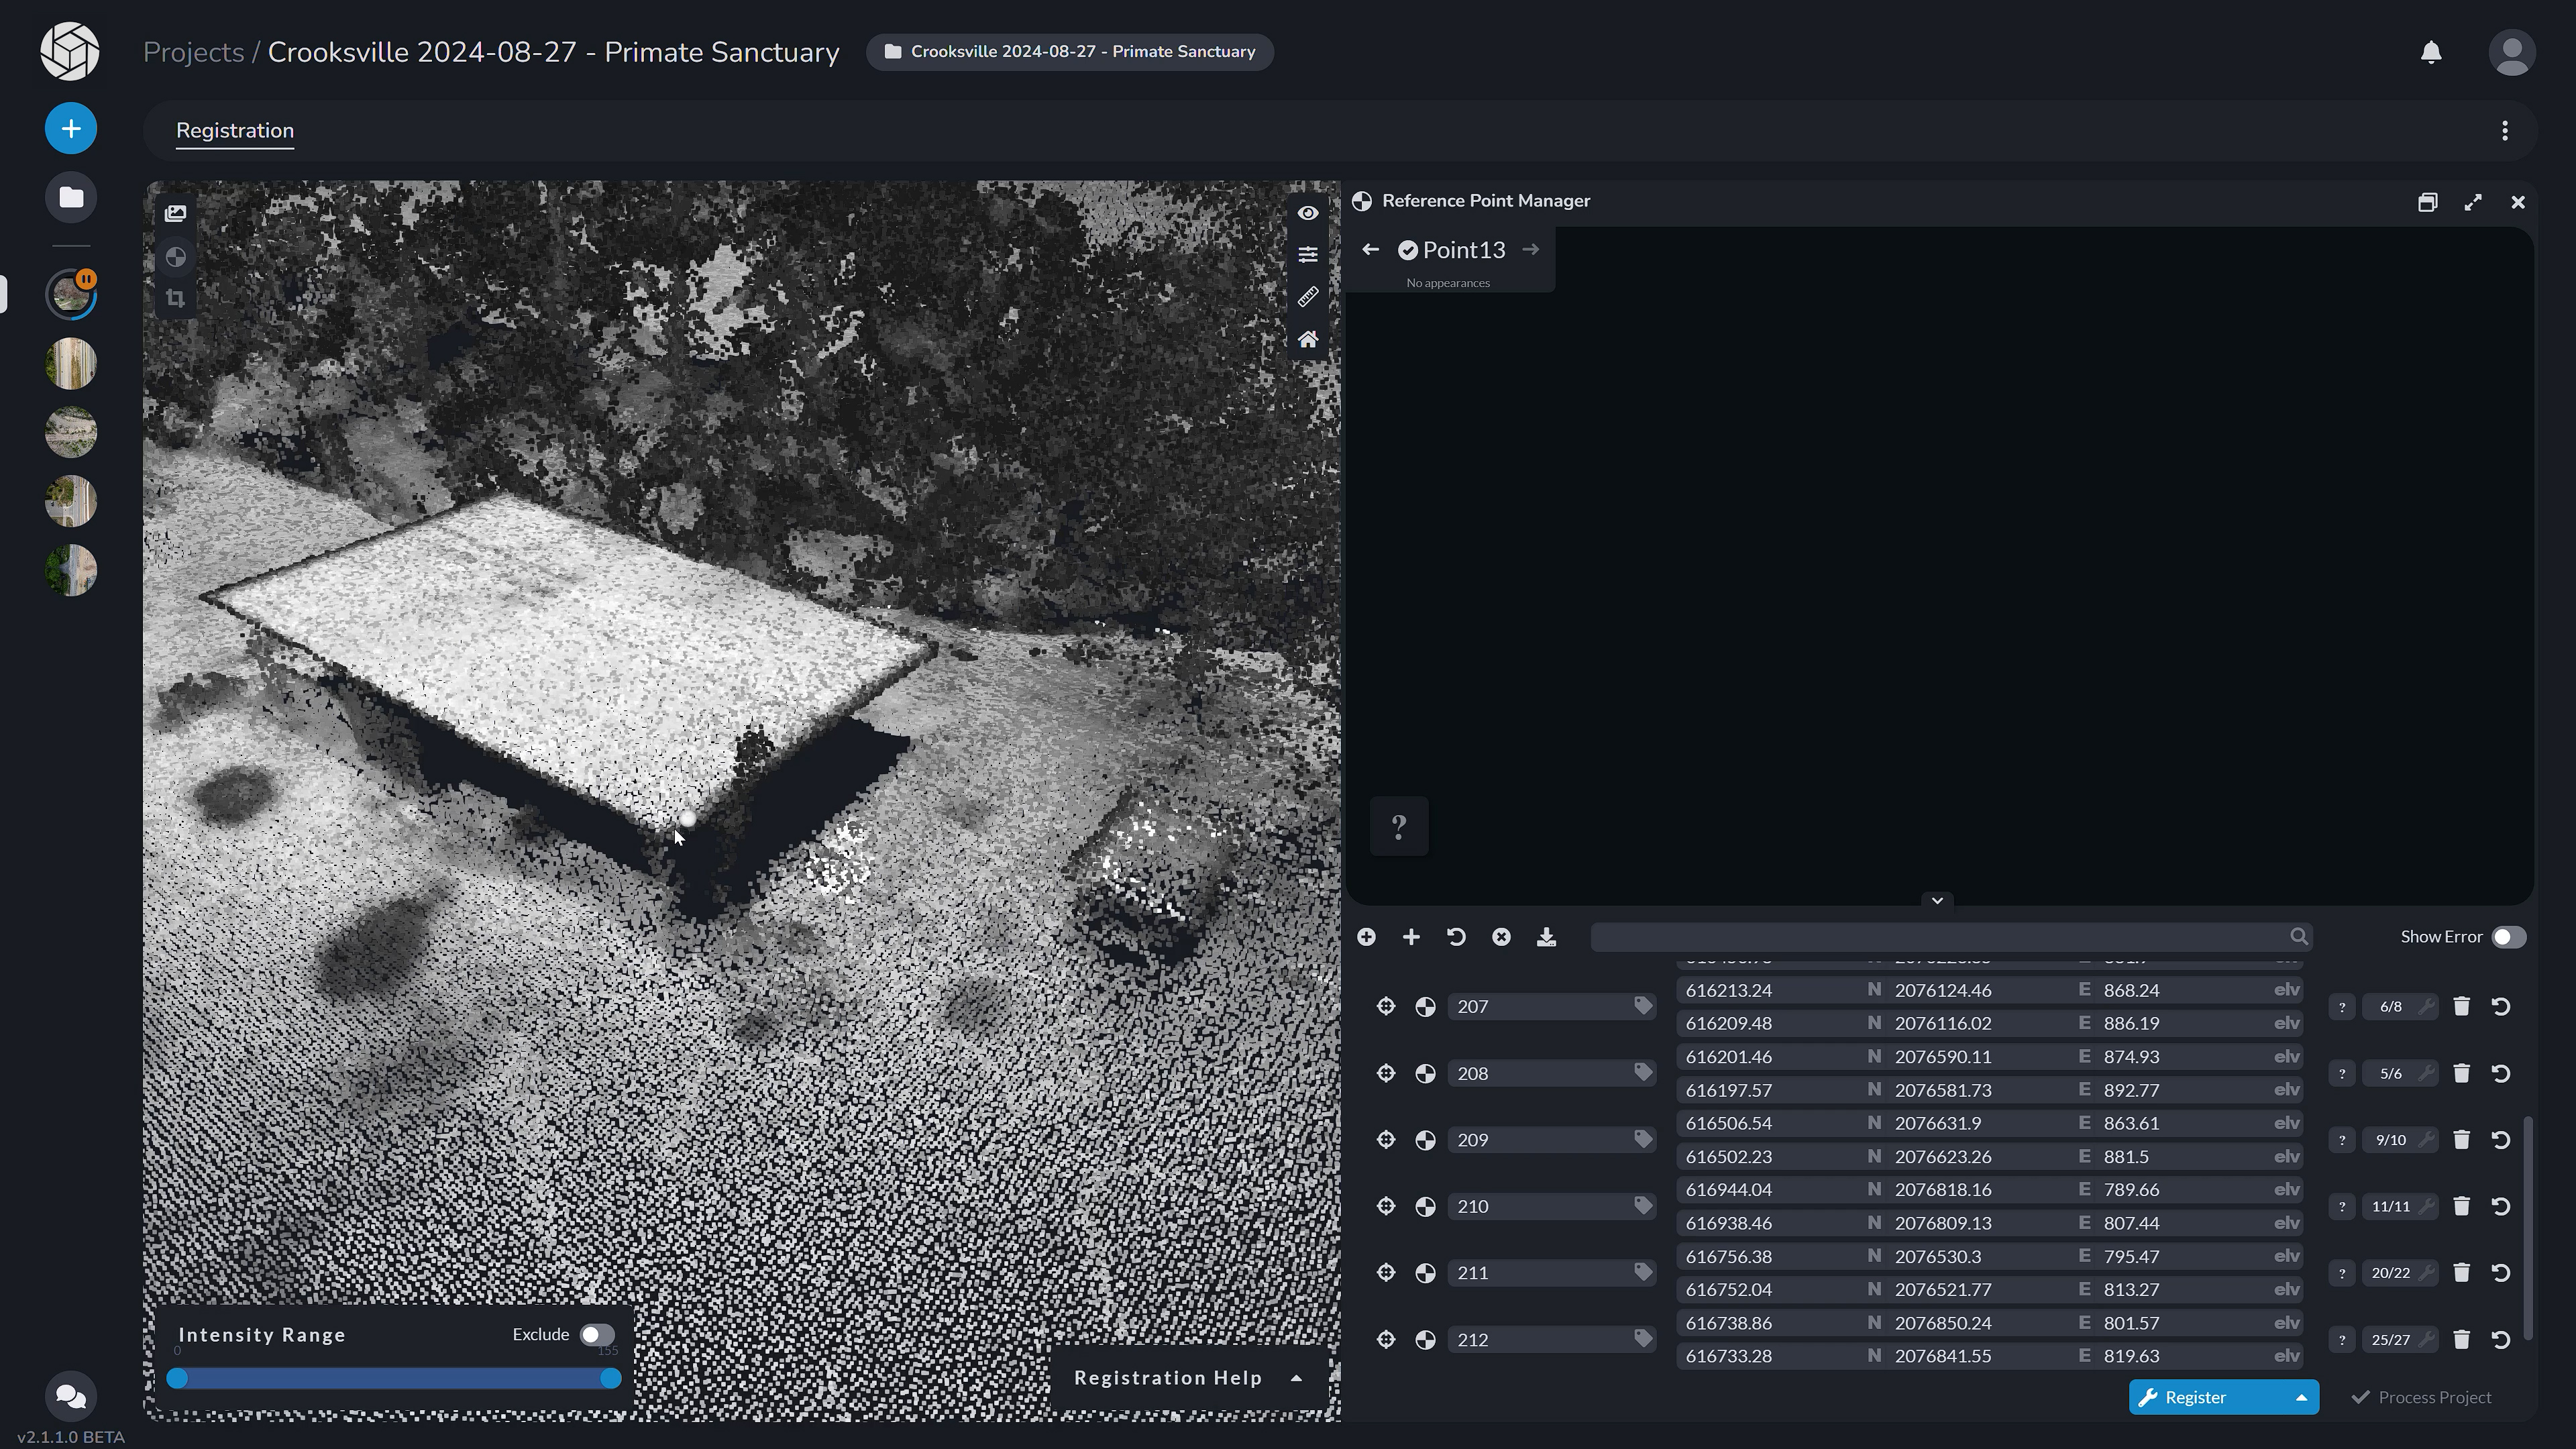
We will pick Tiepoints to establish connection between the LiDAR and photo systems. You can add Tiepoints by hitting the plus button, but then selecting the “Add LiDAR Tiepoint” in the drop down. Now let’s pick the point in the cloud.
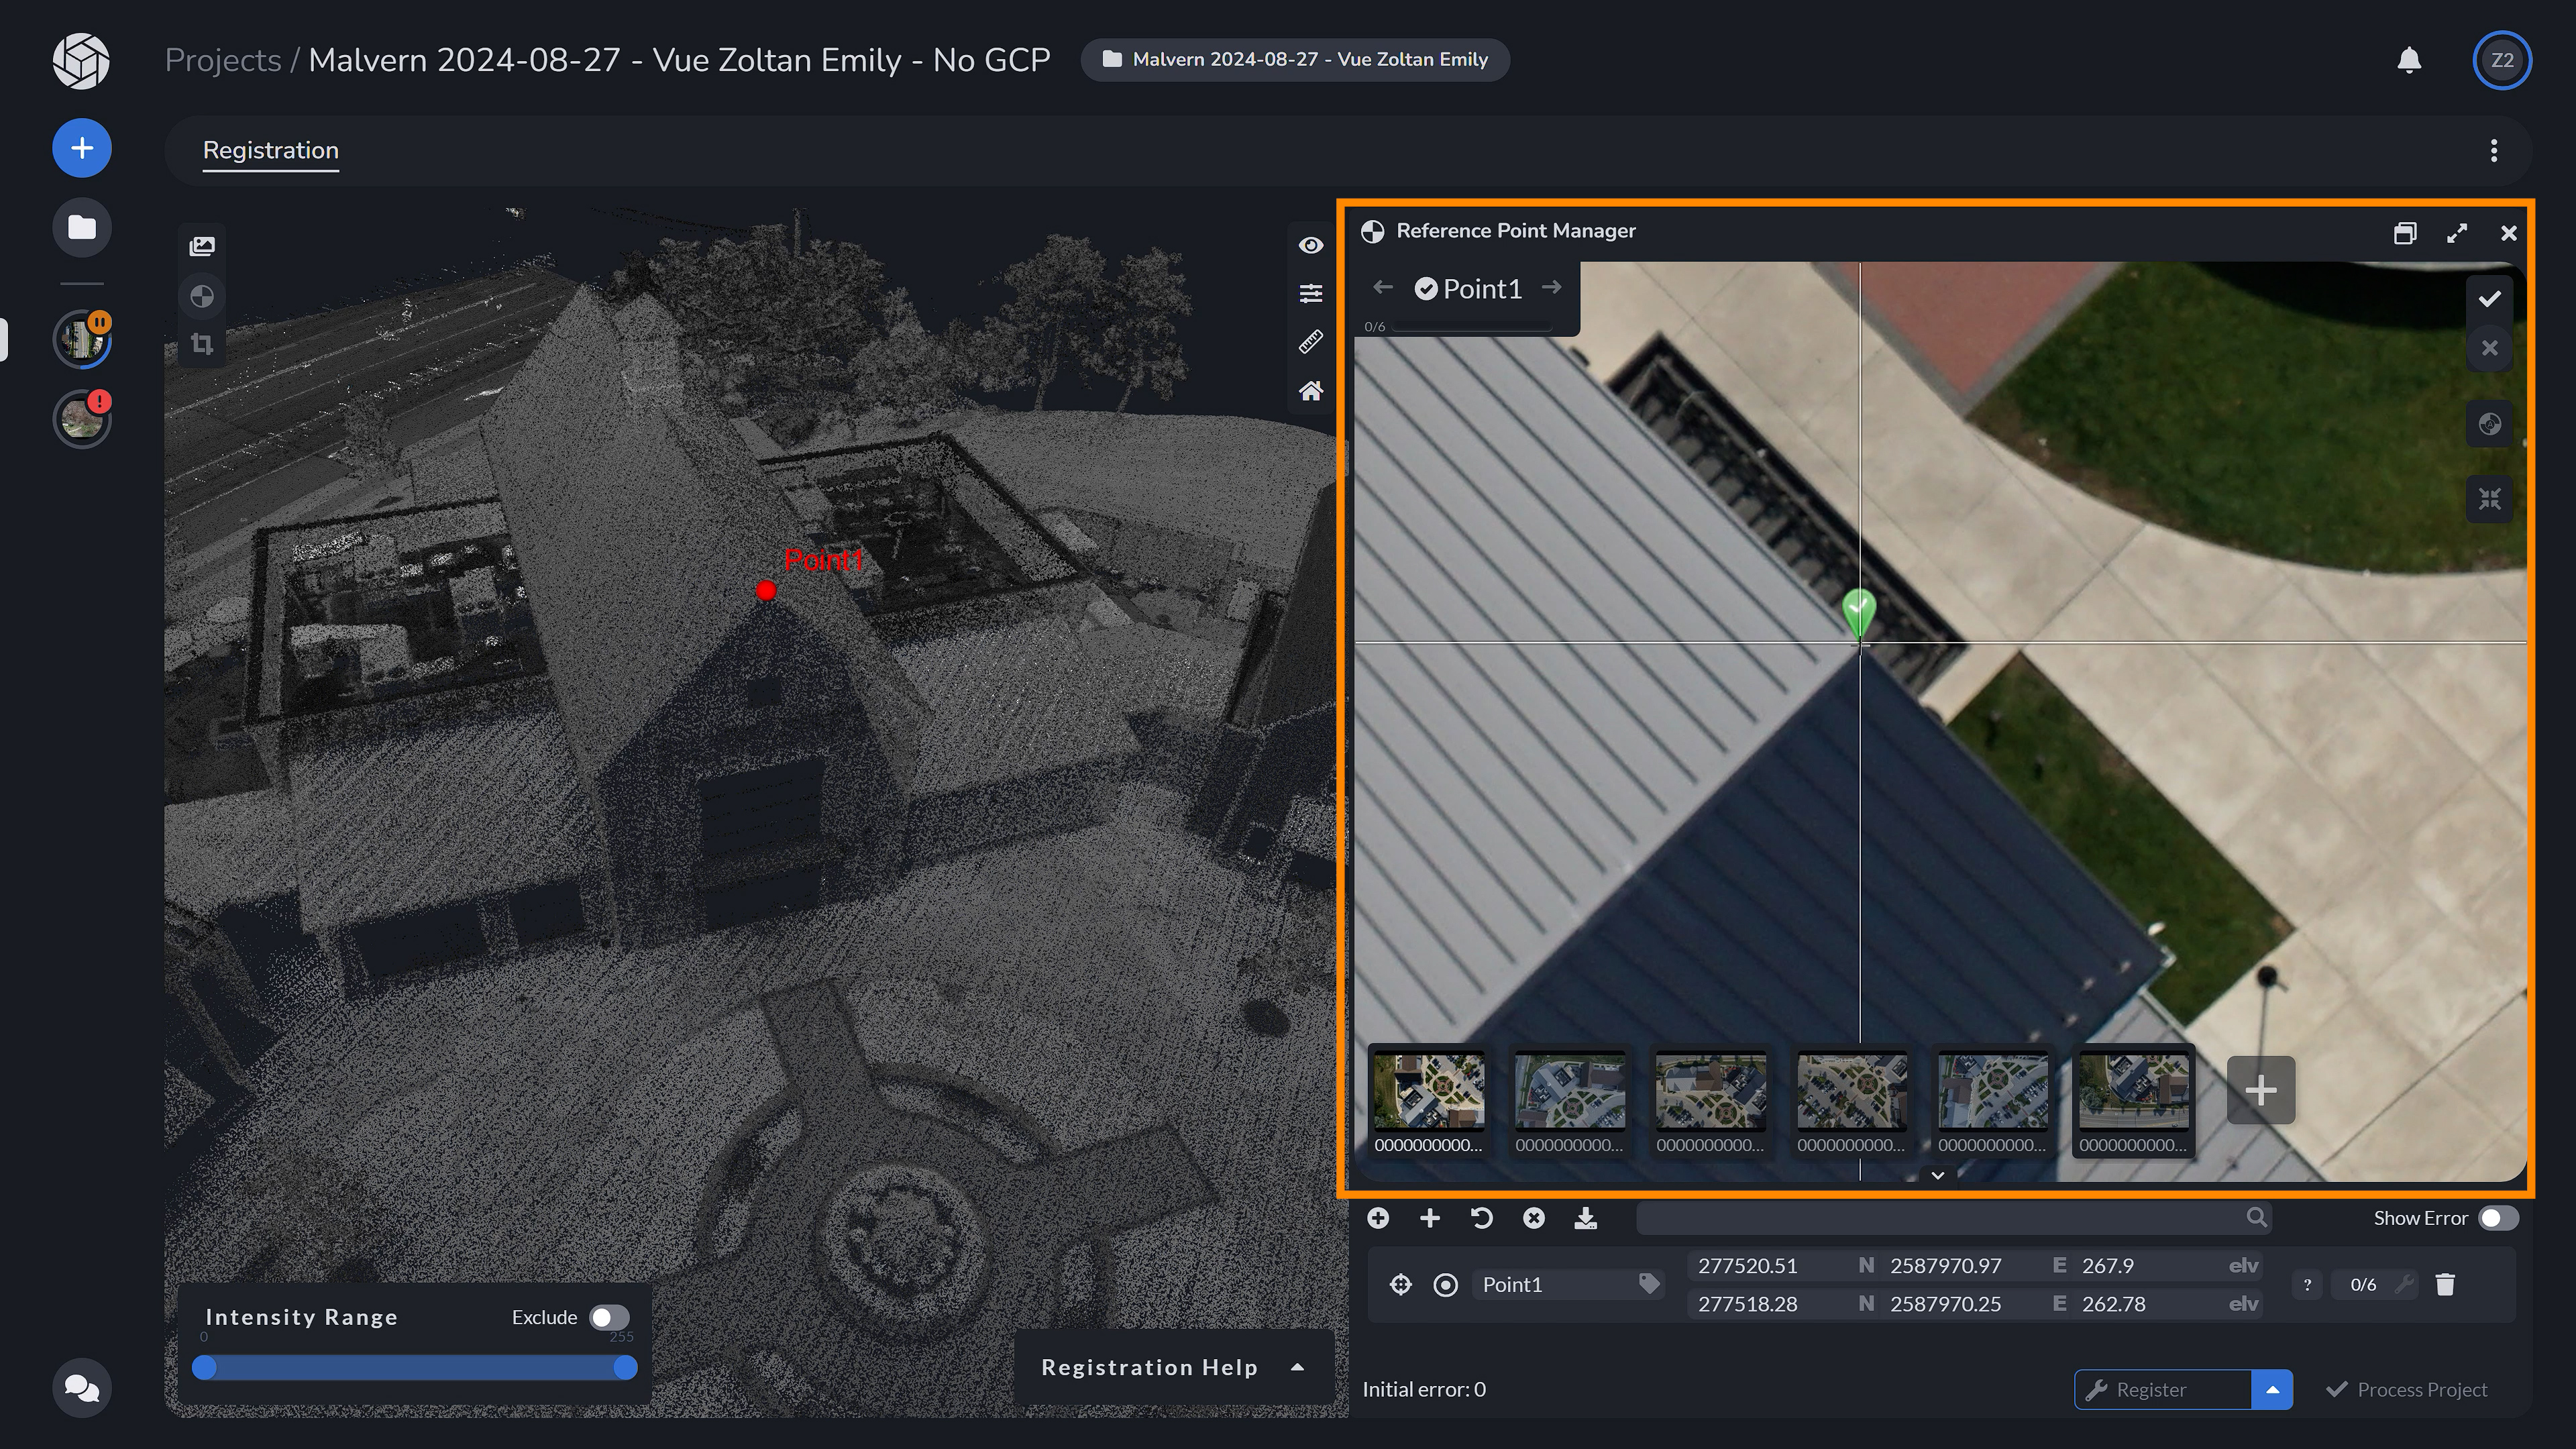
Afterwards, we can see that the images (that can see that point) appear in the image viewer. Next, pick the point on each image. If you have a coordinate file you would like to import, or if you would like to put in the points manually, you can also hit the second plus button.
Sometimes, LiDAR points are not properly aligned initially, so when you pick a point from the cloud, there are no images identified for where you picked the point on the photos. In this case we manually have to add images to the point.
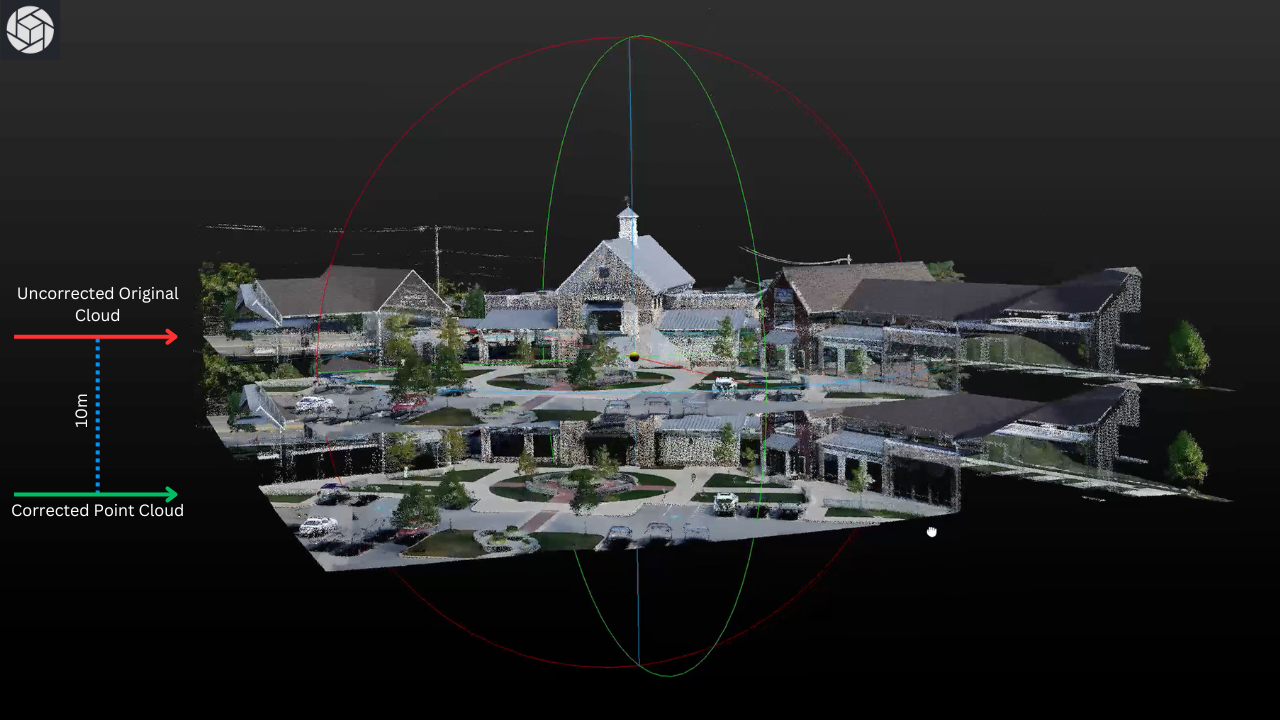
An example of this can be seen above, where the model was shifted 10 meters - therefore, we need to correct for this.
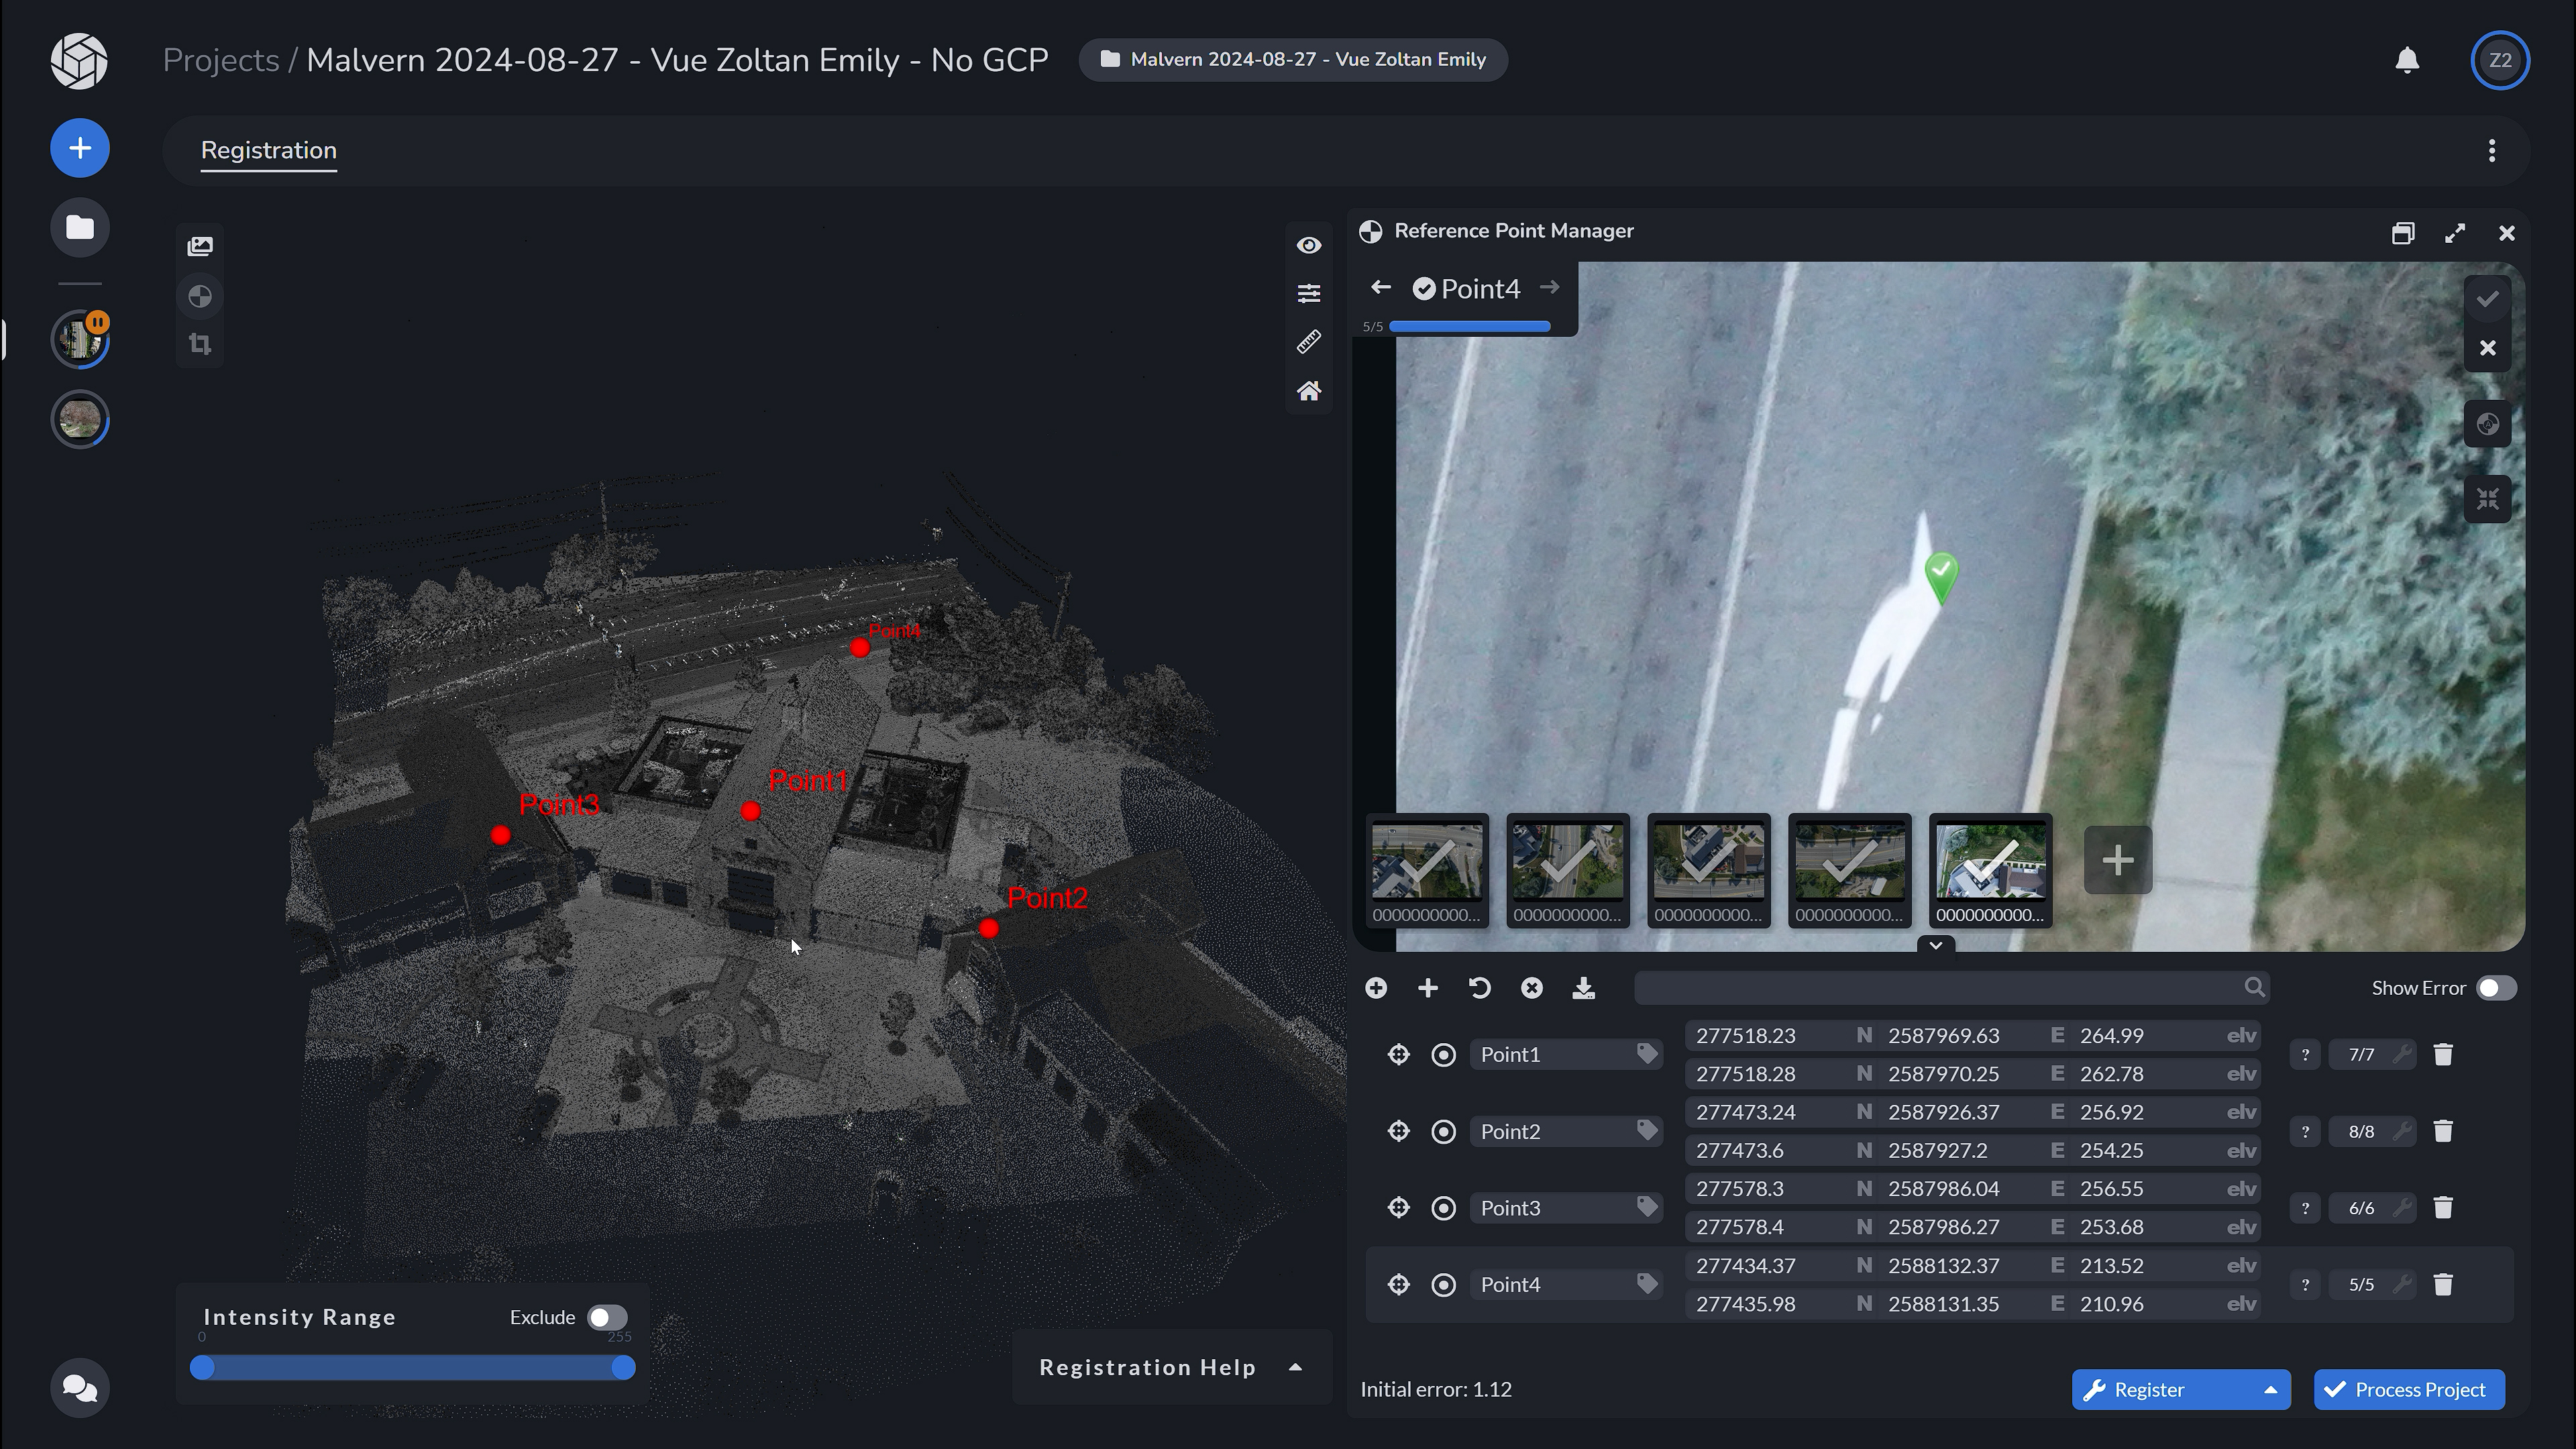
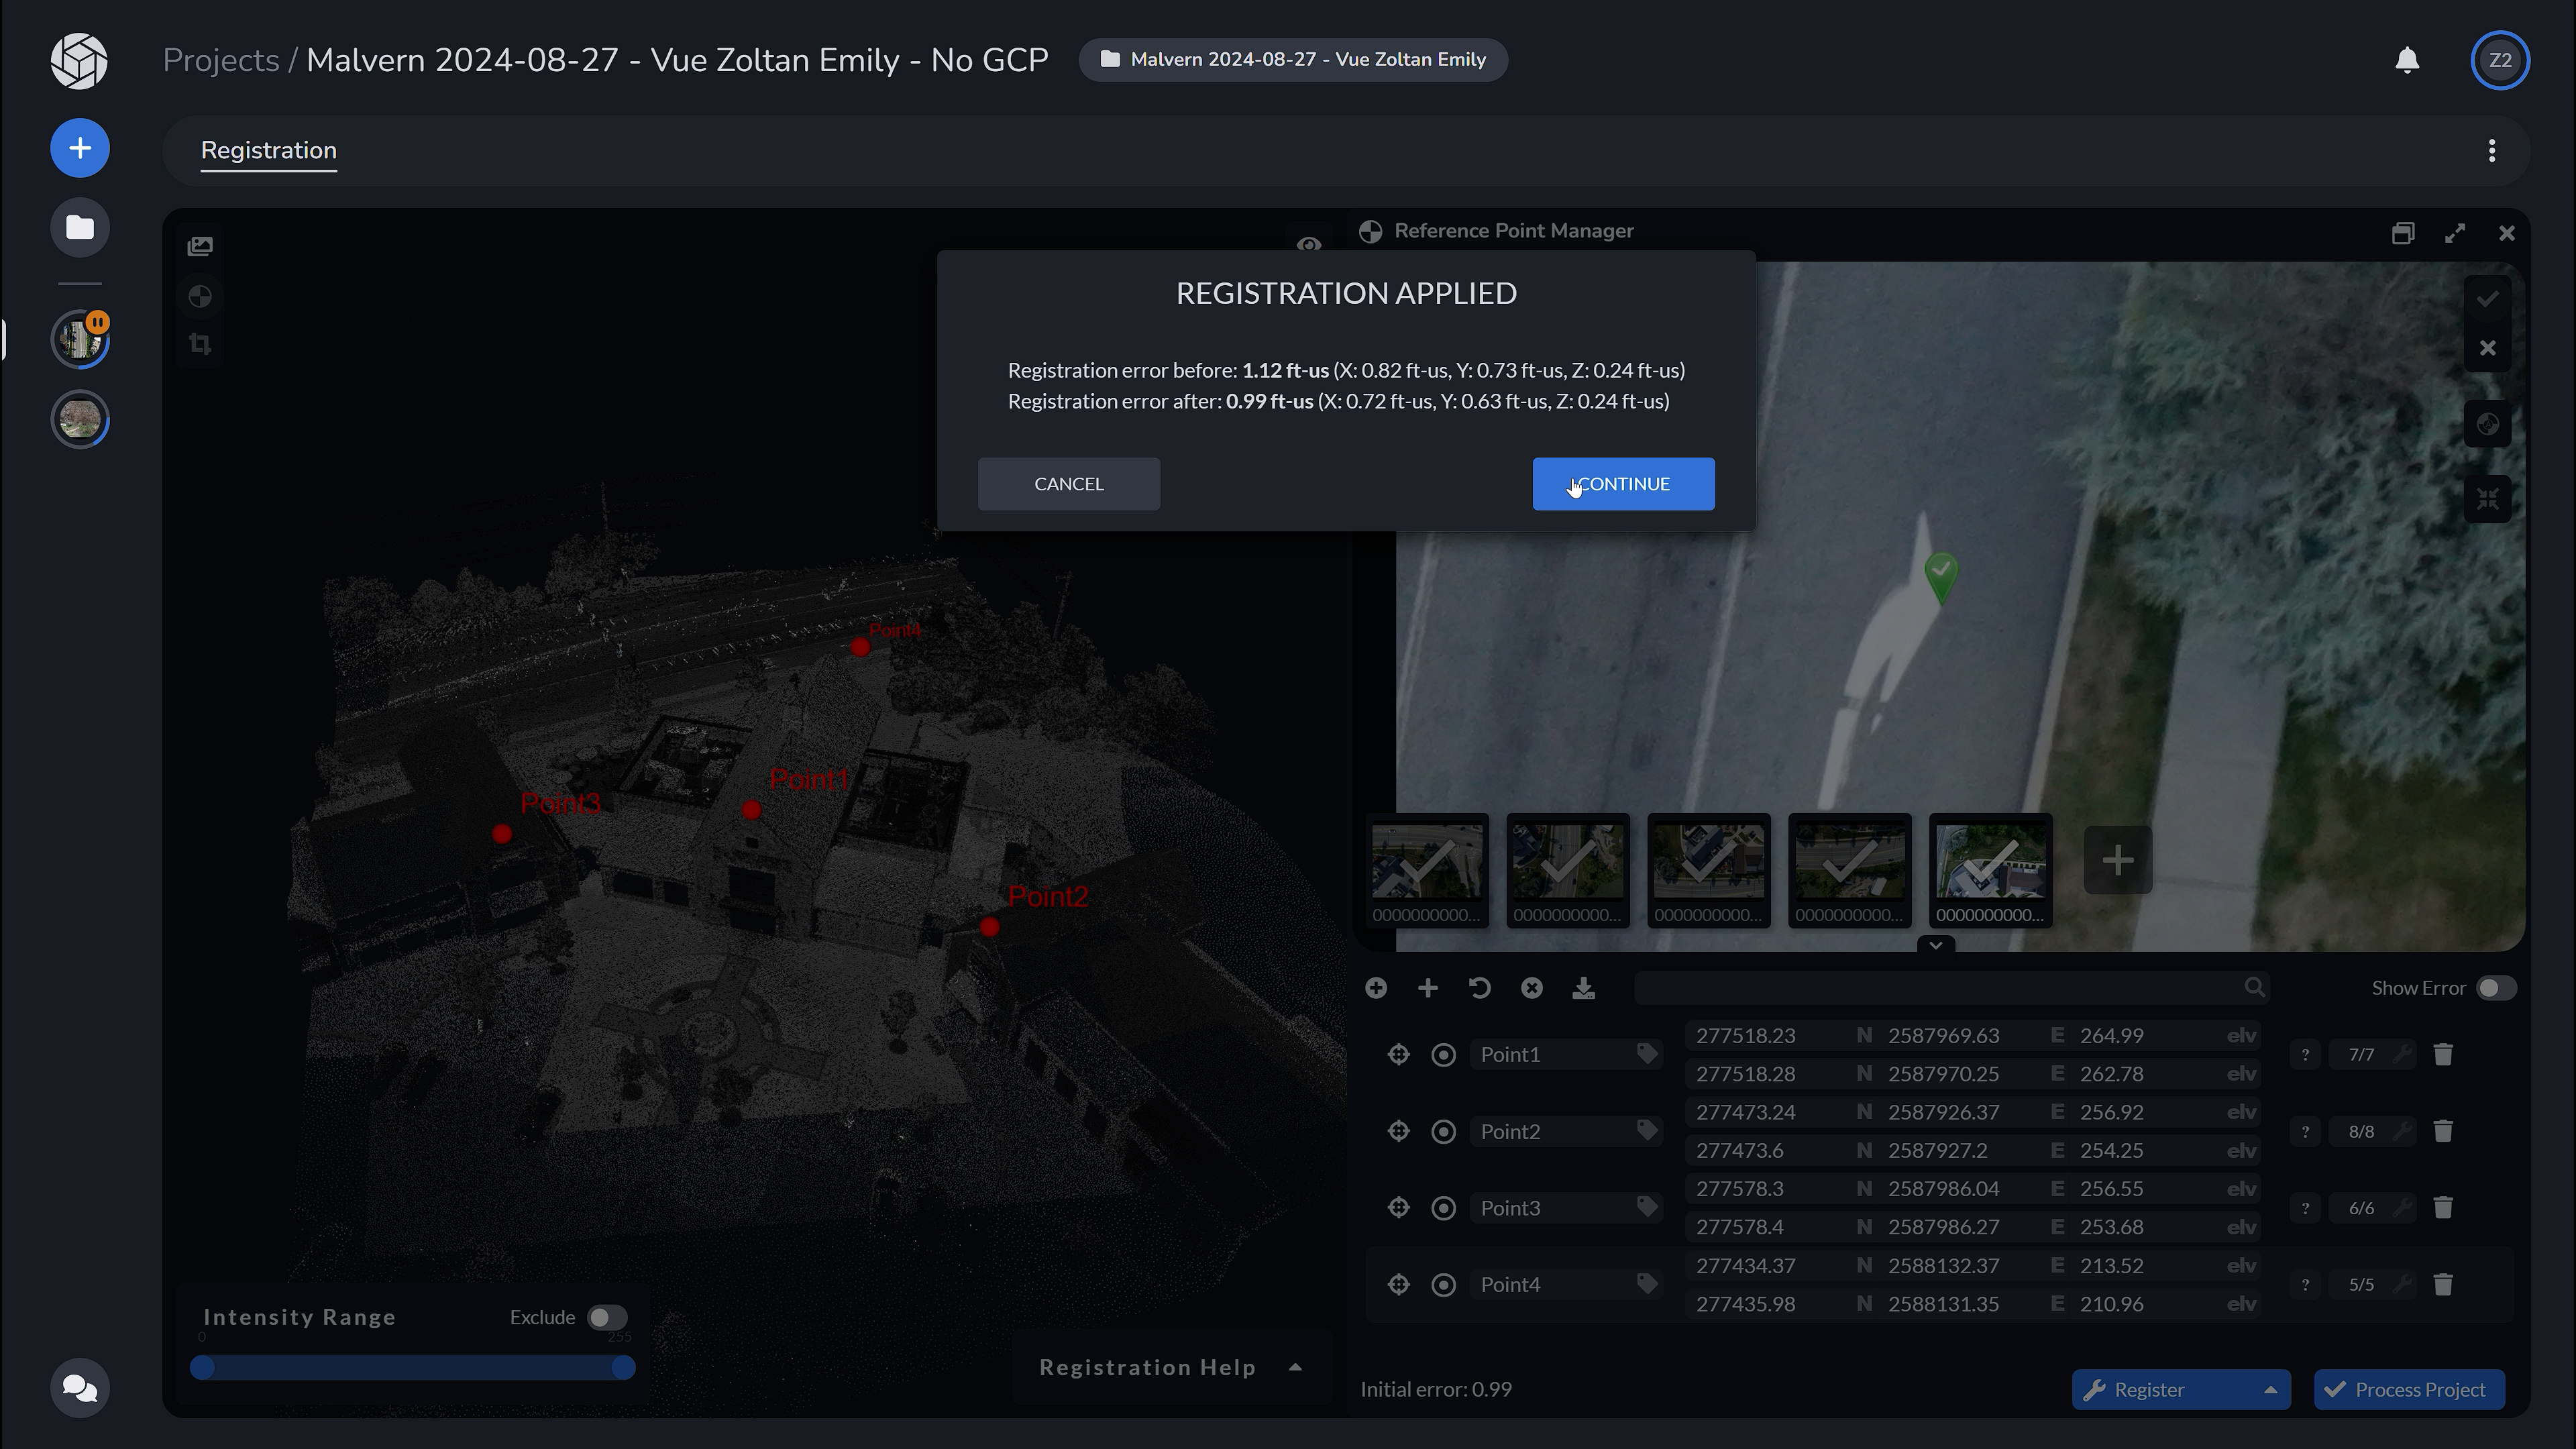
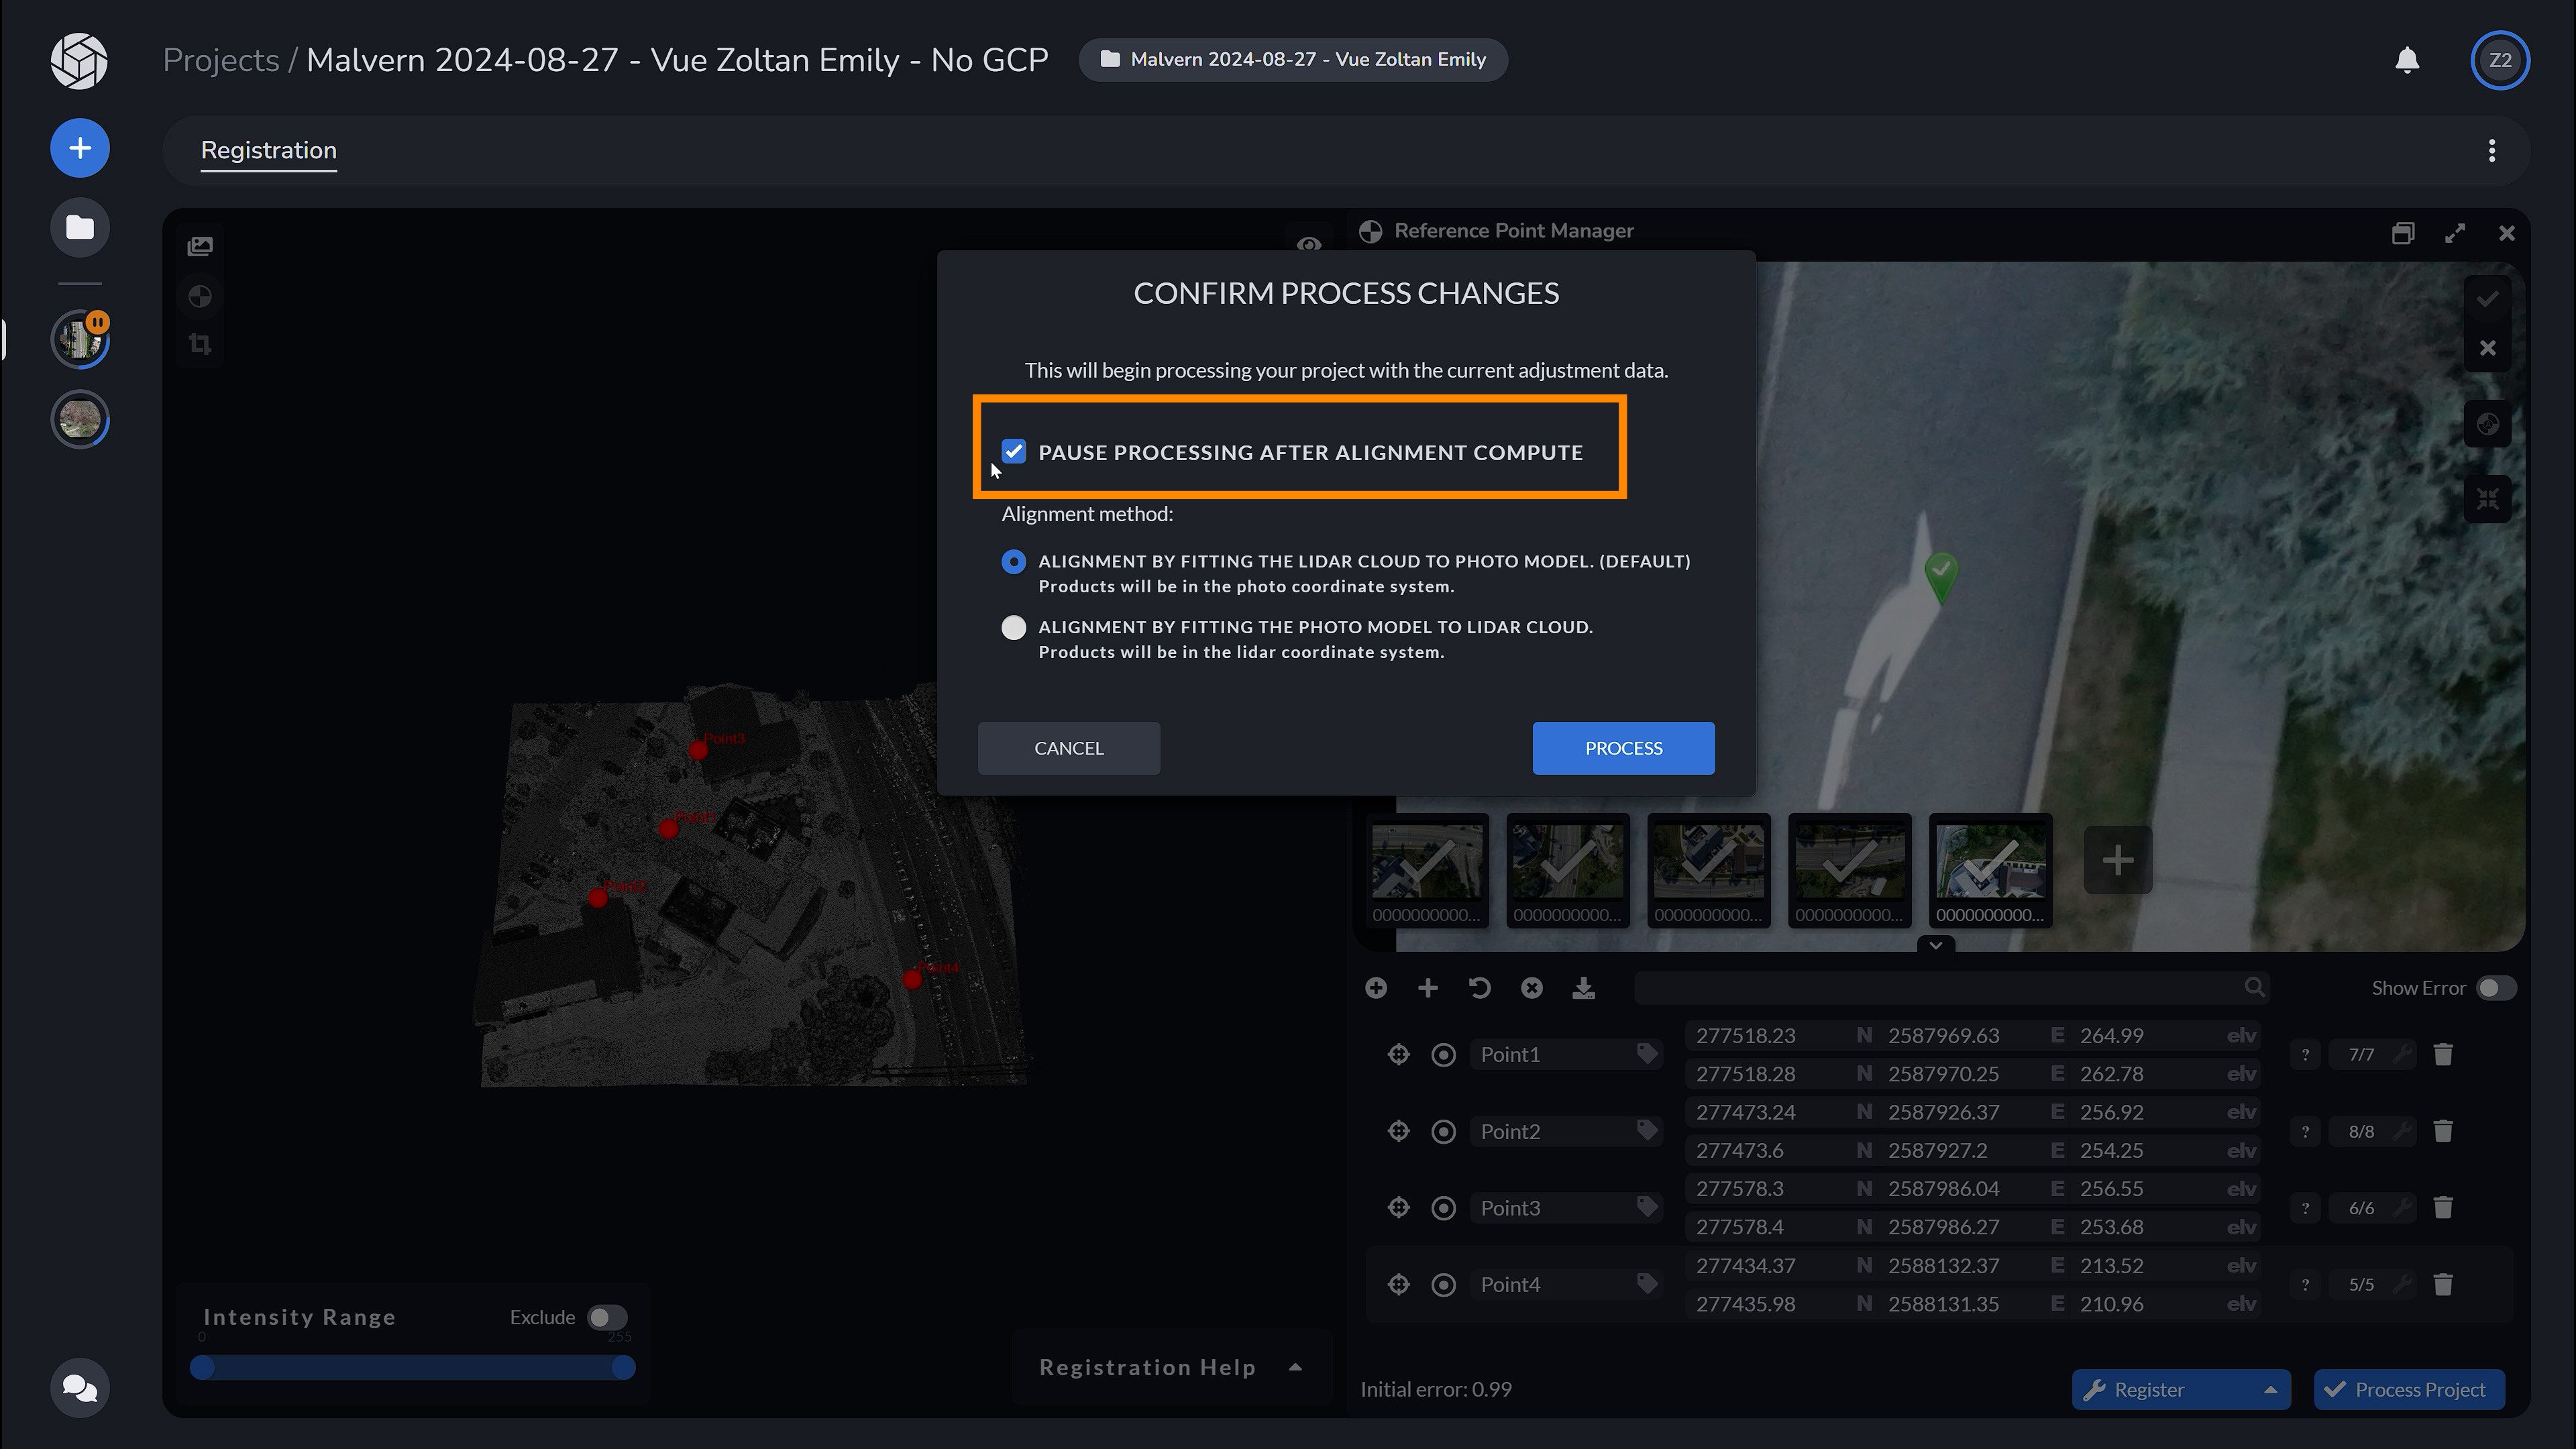
Once at least one point is picked from the cloud and on the images, we can hit the Register button. In the pop-up dialog we can check the registration error. If all is good we can click on the “Process Project” button. Here, we advise you to opt for “Pause Processing”, so you can assess the results after an adjustment. It is good to know that the registration error can improve after the first adjustment.
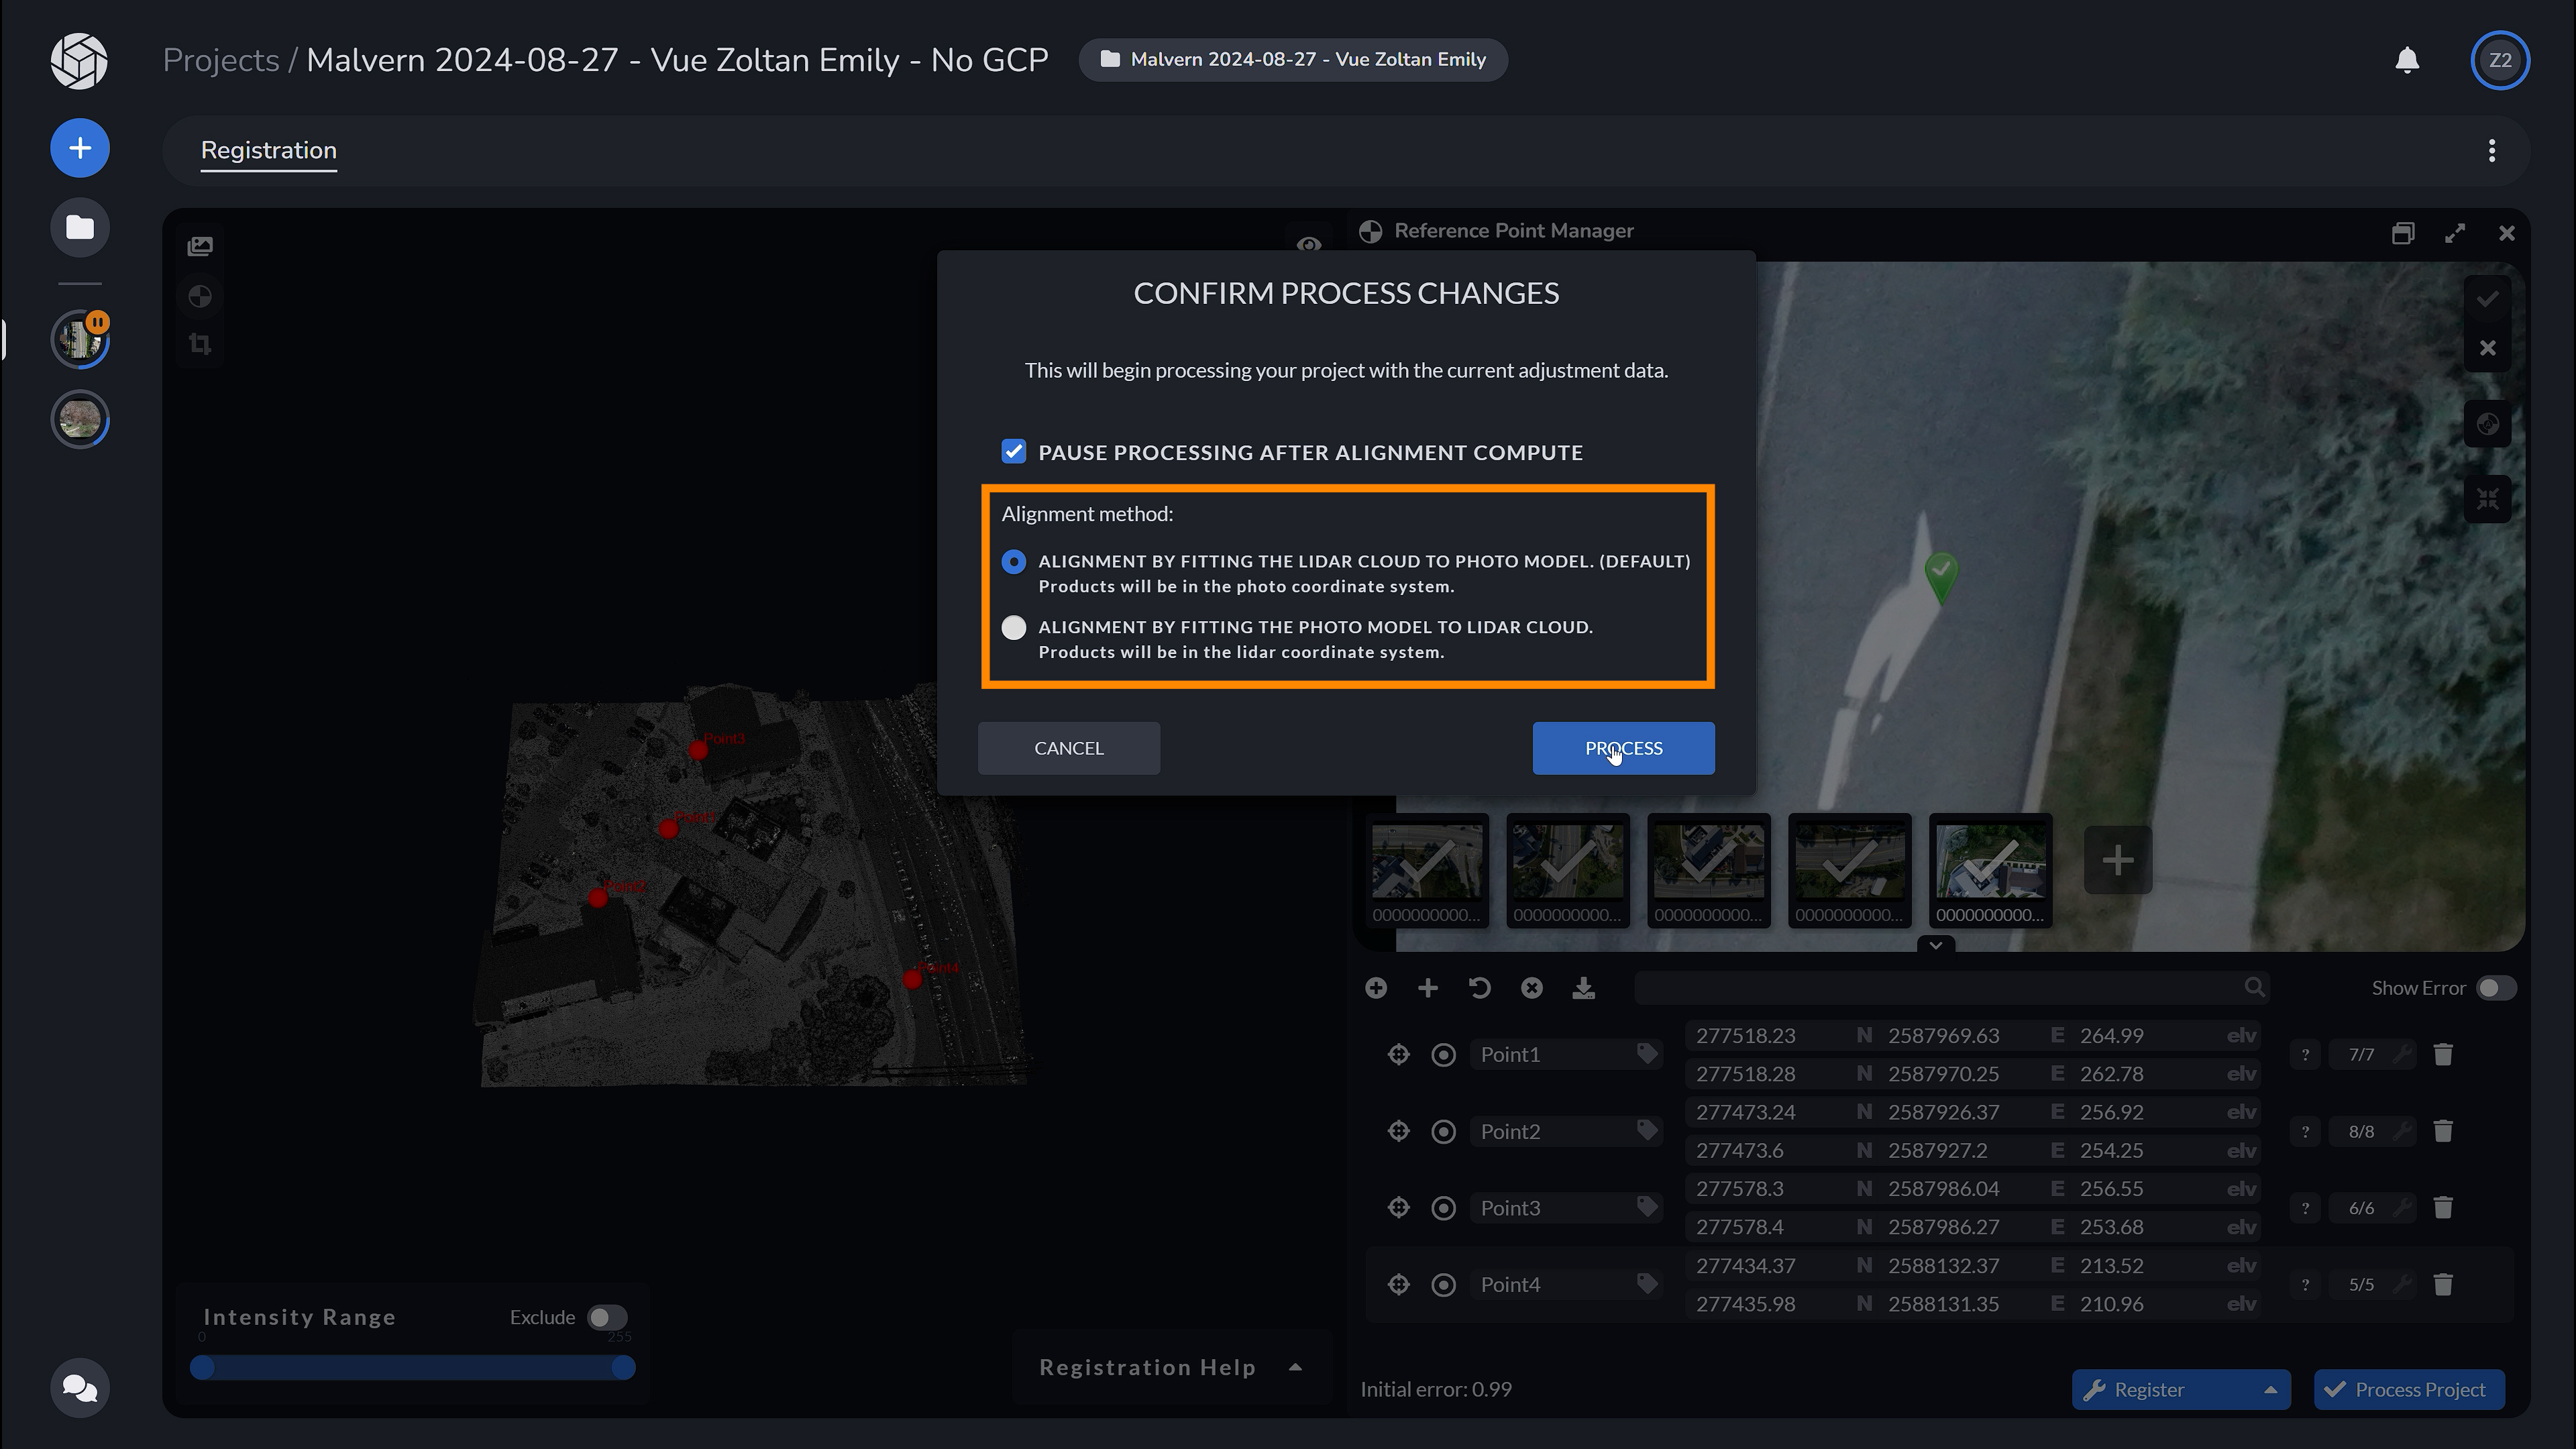
If your project does not have GCPs, you can choose whether your final products should be in the image or in the LiDAR coordinate system. Choosing the alignment method depends on the input data. If the photos are taken with an RTK drone, then you will want to use the photo coordinate system, if not then you can assume that the LiDAR’s global accuracy is better since it must use some sort of RTK or high-accuracy GPS solution for direct georeferencing. But ultimately, having Ground Control Points in your project will always give you the most accurate results.
Using GCPS
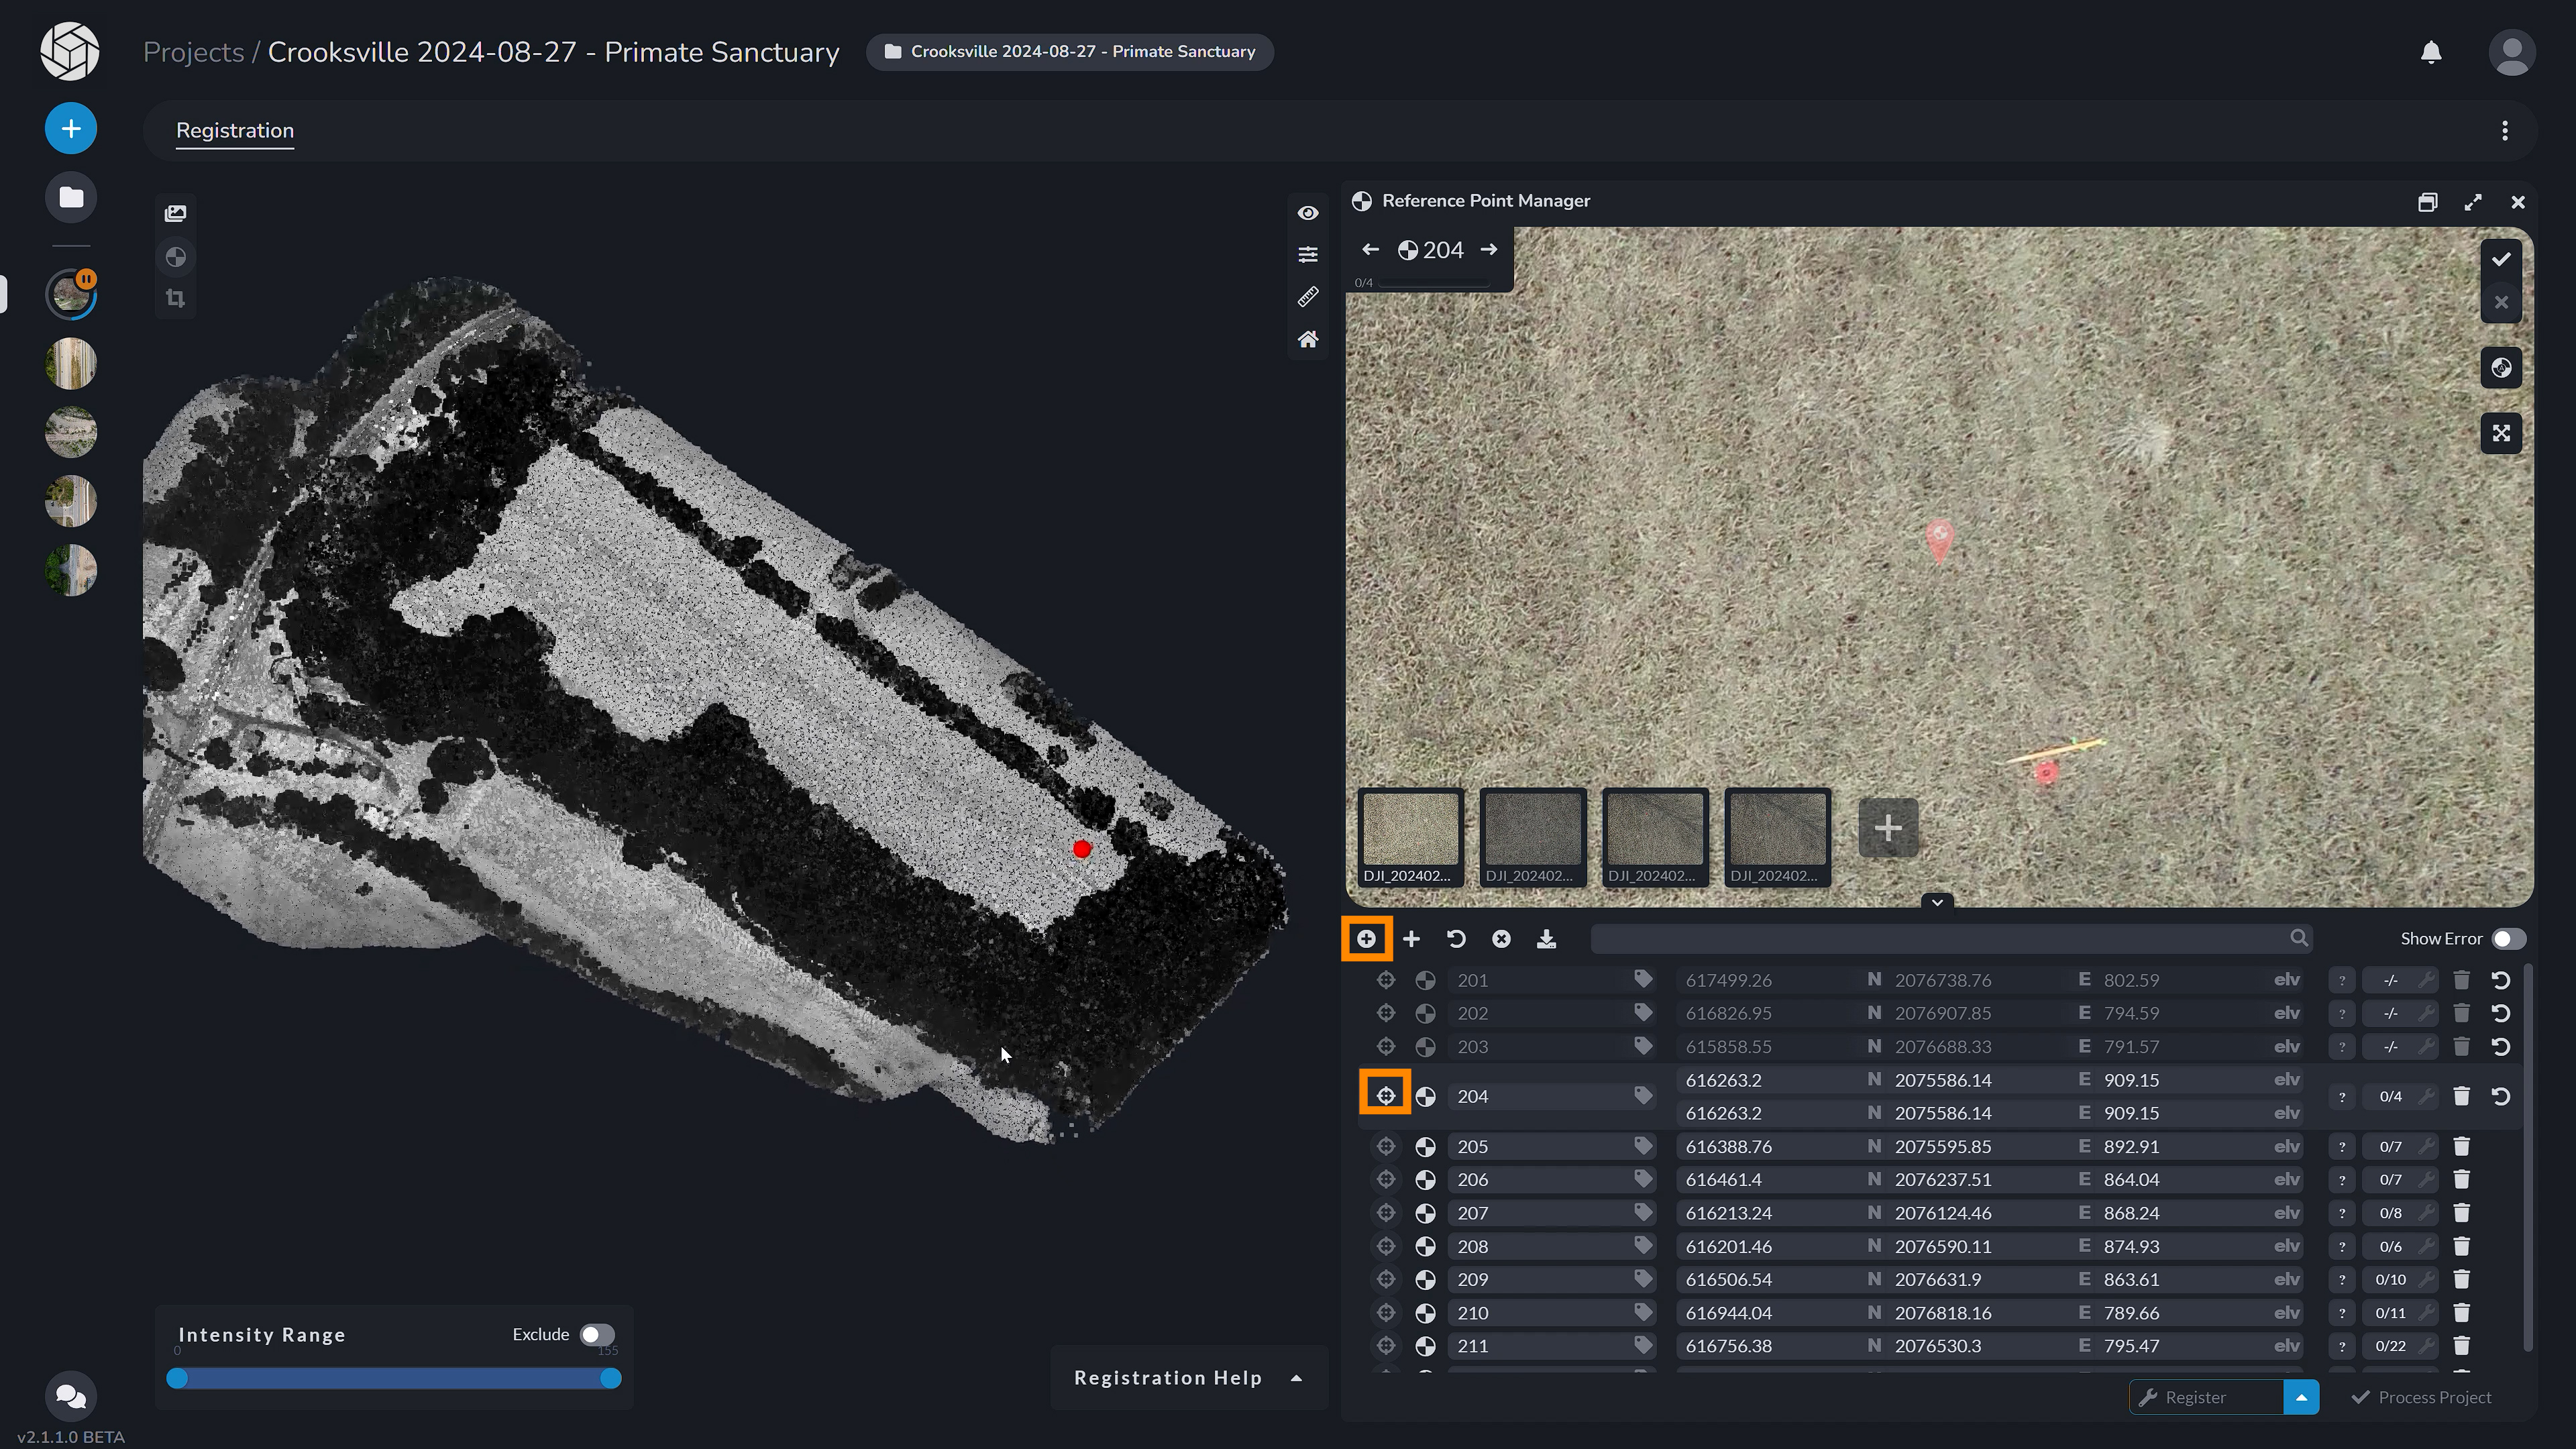
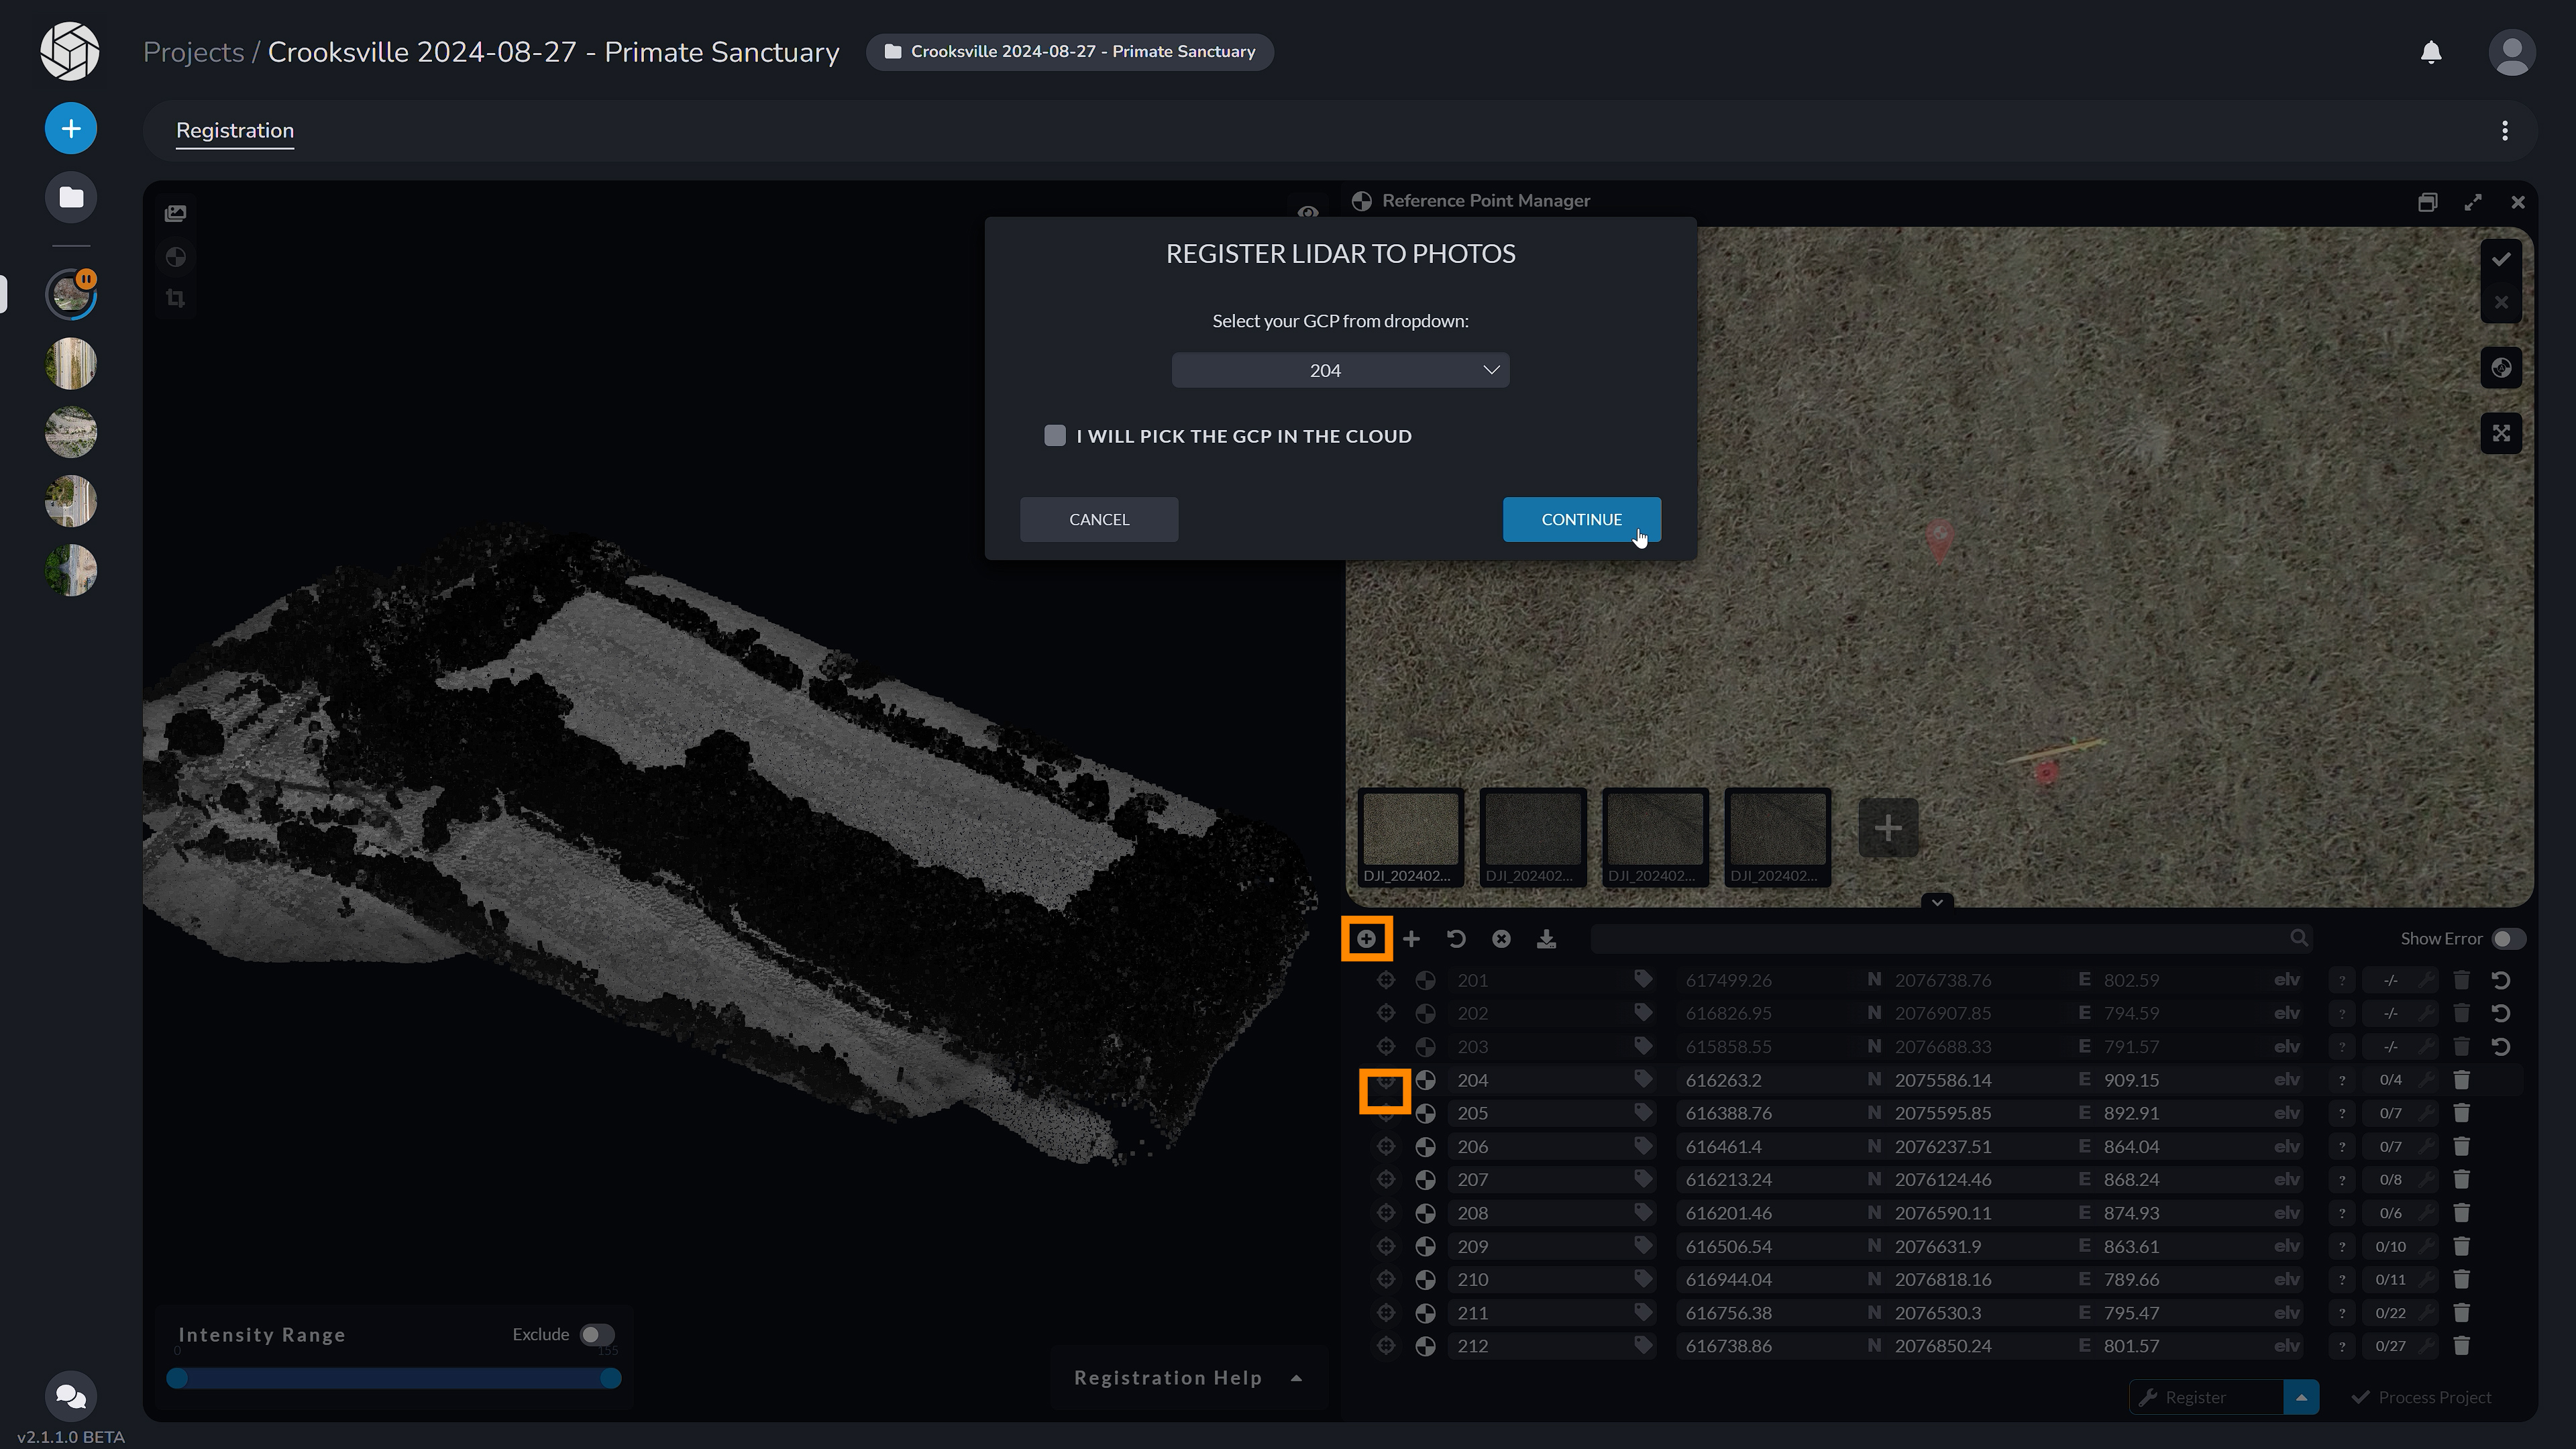
Let’s see an example when we use GCPs to align the LiDAR and photo systems. Note that in this case your final products such as the mesh and ortho will be in the GCP’s coordinate system. To do this, click on the plus sign and select the GCP you want to pick first. Then, we can choose our point in the LiDAR point cloud.

Once we do that, we want to make sure that the point is placed correctly on the surface of the model, not above, up in the air or down below. So make sure that you move around your model to correct for this (as seen with the point in the intensity cloud above).
In some projects, as we can see in this one, you may find that many of the GCP points are very hard to differentiate from the LiDAR cloud and the photos. This happens due to the GCP targets used during the flight not being distinct enough in appearance from their surroundings, especially in complex environments where vegetation, shadows, or similar colors may obscure or blend the GCPs with the point cloud data.
To try to find the correct target location in the LiDAR point cloud, if your input cloud has RGB you can turn the RGB on to find the target and then go back to intensity to “eyeball” the exact location. Not all clouds come with RGB, so this is only applicable when RGB is available. When using the RGB layer, the color is coming from the LiDAR-photo system, therefore it is not as accurate when choosing the GCP point. It is preferred that you choose your final points while in the intensity view. But to get a quick understanding of where your point should be, you can do this.
Therefore, we can keep our identifiable image-only GCPs, but also create LiDAR Tiepoints. In a dataset like this, it is best to create these Tiepoints using the corners of buildings, which are typically well-defined in both LiDAR and imagery data. These Tiepoints help to anchor the model more effectively, ensuring greater accuracy in the final alignment between the LiDAR data and the photogrammetry outputs.
You can also click and drag the point around so it is placed correctly. Once it is correctly placed, you can move on to the reference point manager, where the software has identified the photos from your imagery dataset. Here you can identify the same point in the photos, and then register your data for final processing.
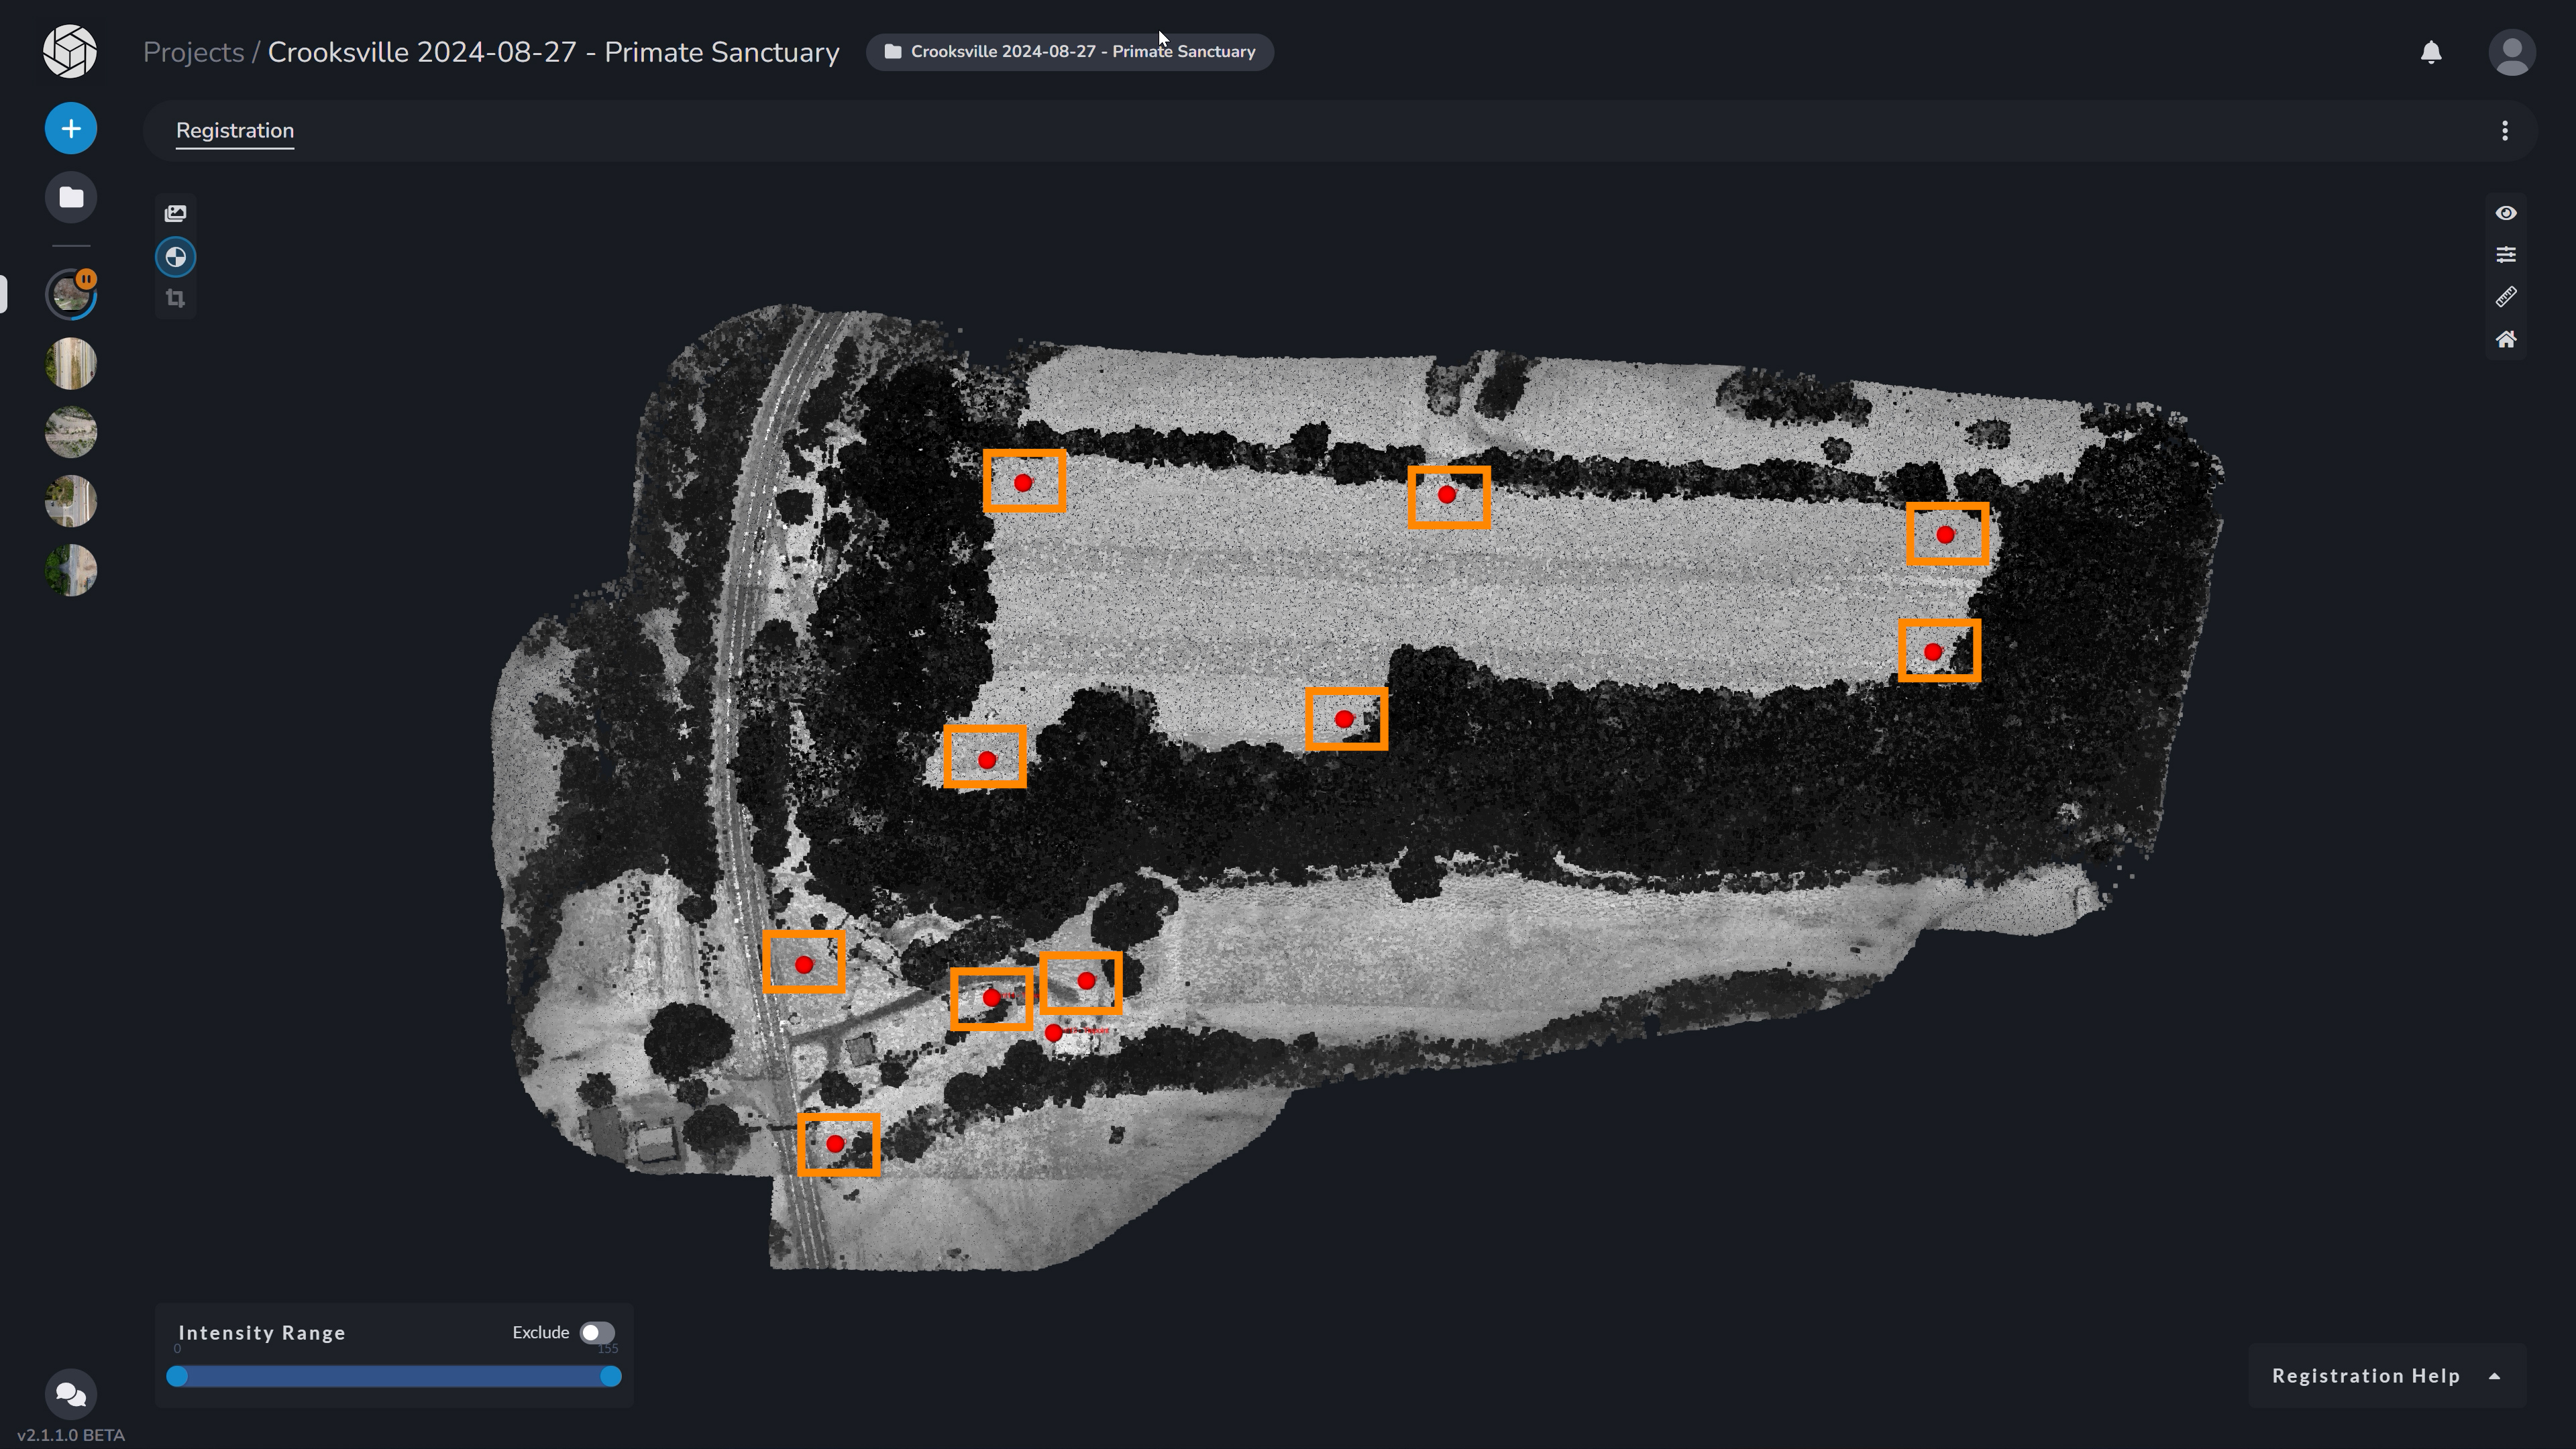
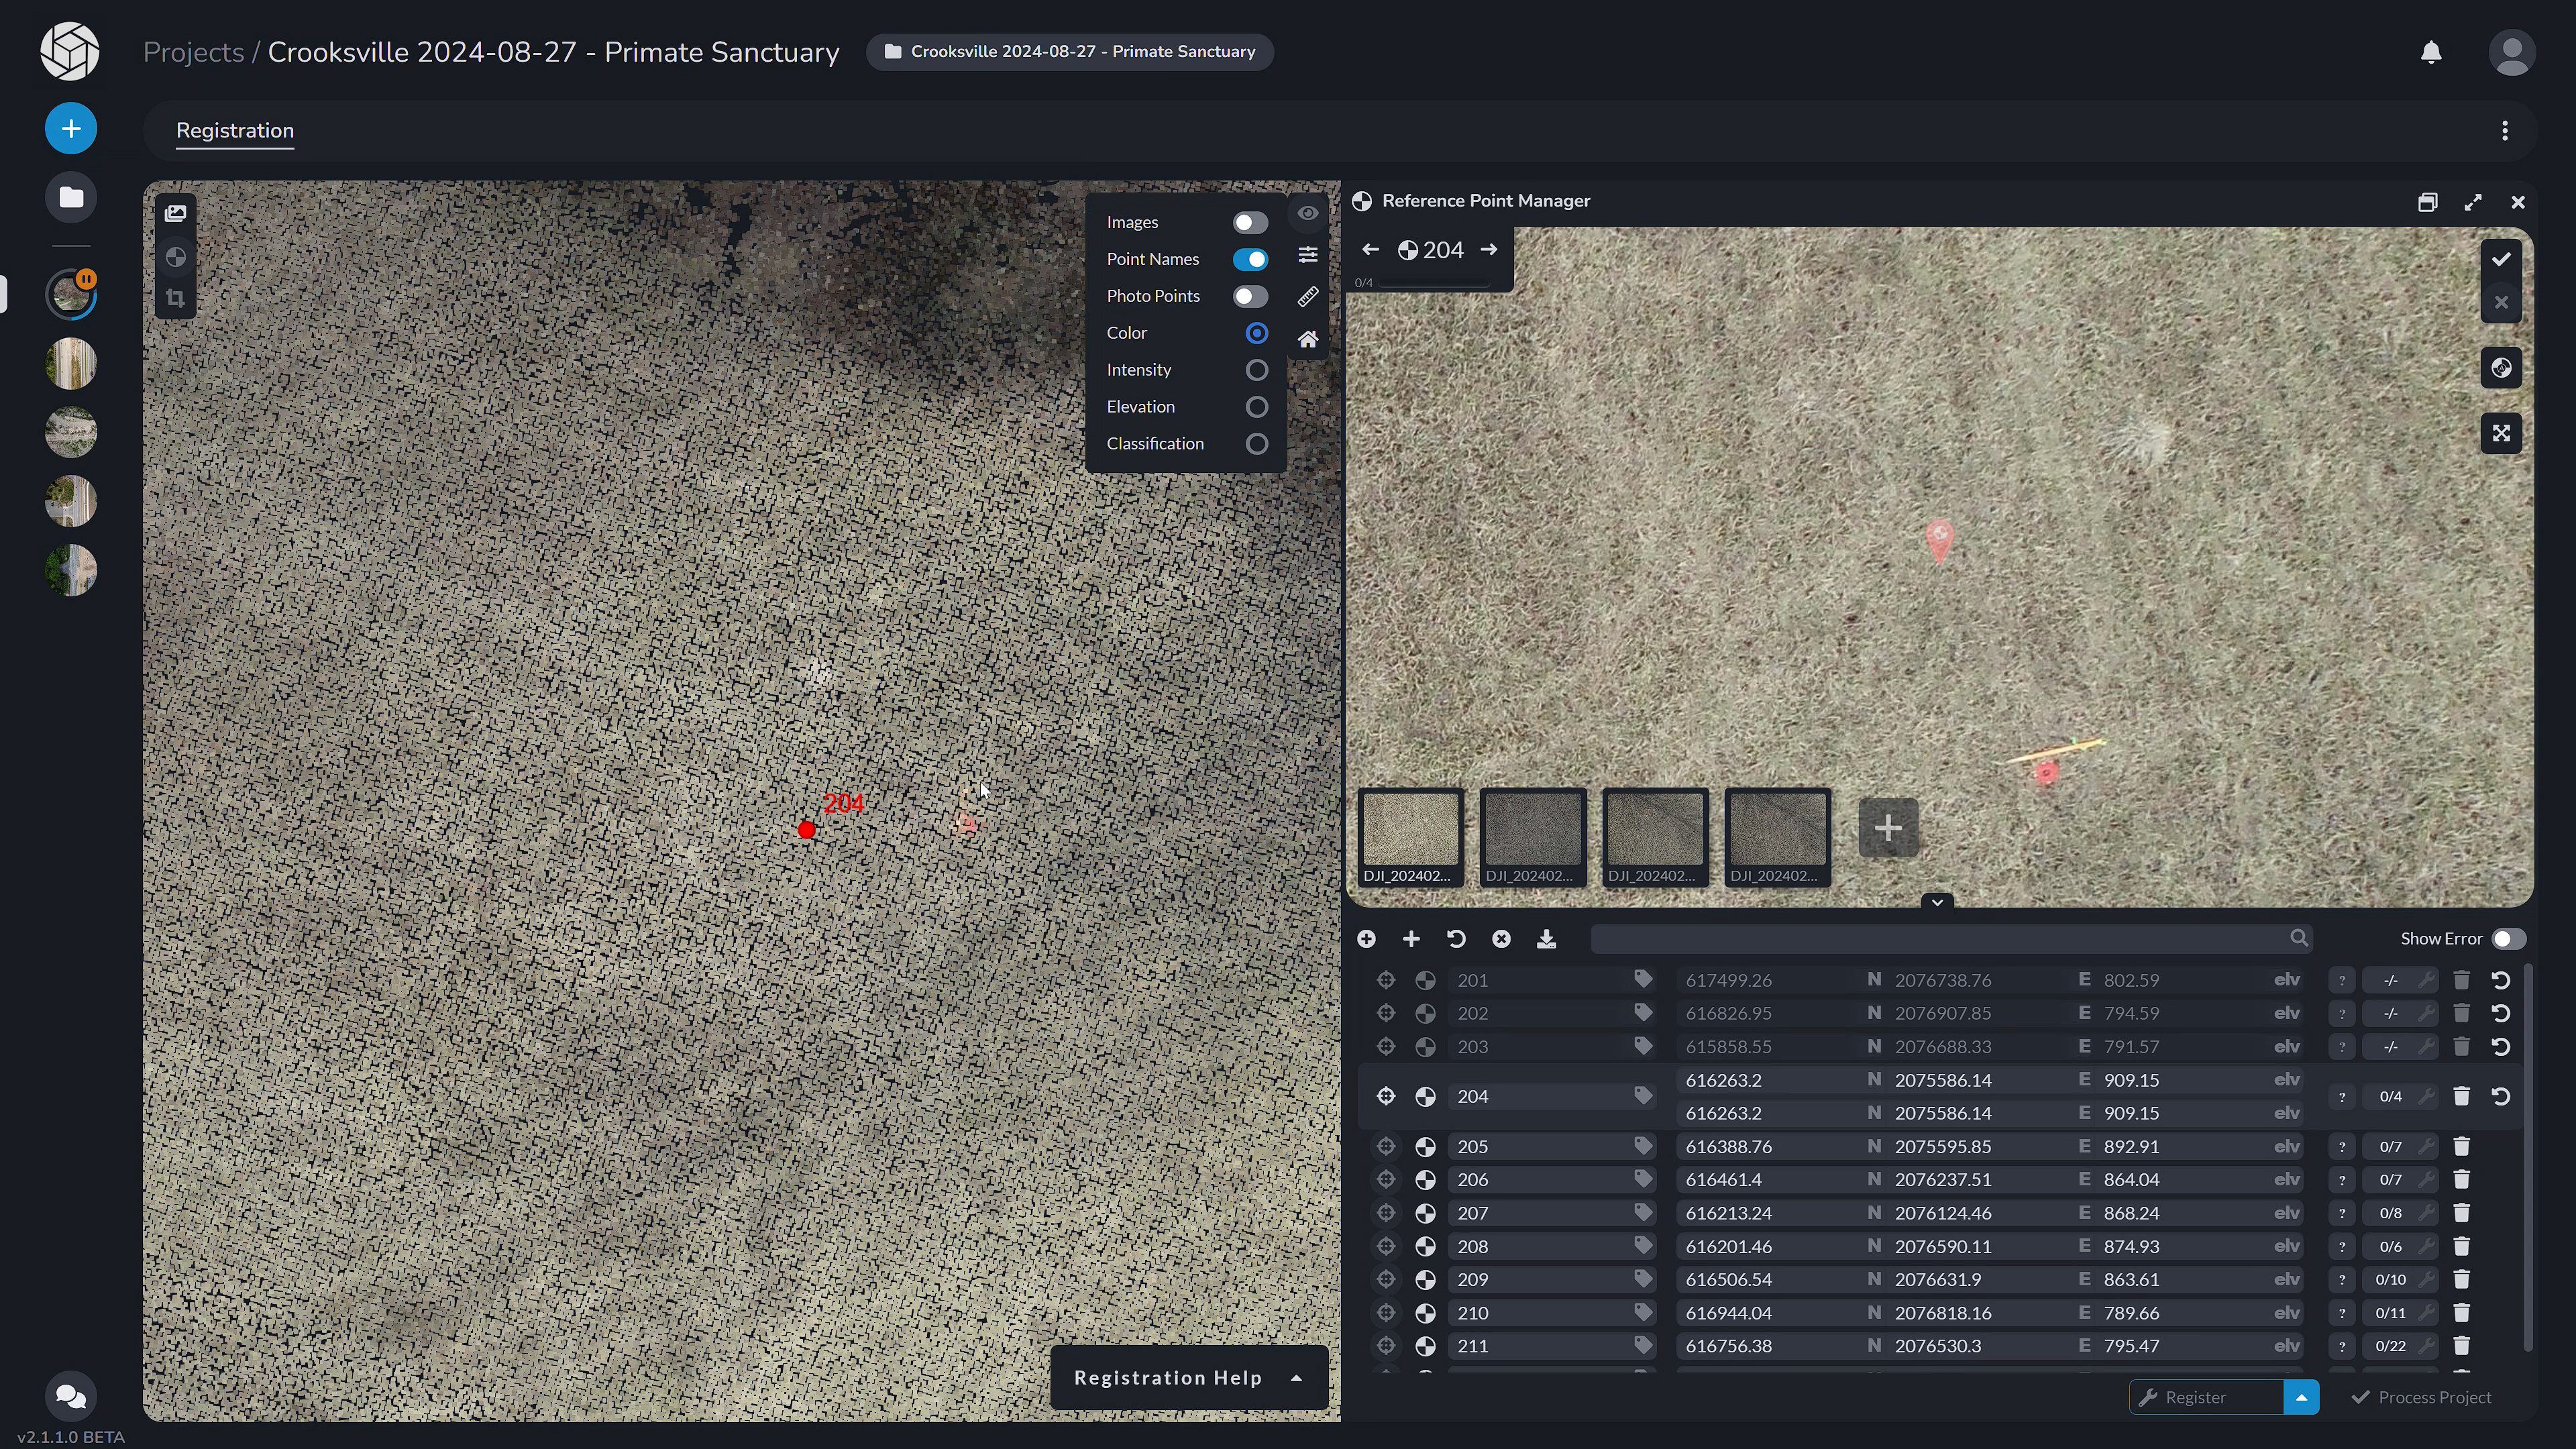
It is important to note that when you register the LiDAR data with the photos, it is much easier to pick your points in the LiDAR cloud while using the intensity or the elevation heatmap, versus using the RGB data. Notice that you are able to switch views to color, intensity and elevation. In the LiDAR menu you can toggle the photos taken, change the LiDAR point size and the point picker snap radius - if you want to be more precise. More matching points allows for redundancy and therefore increases the registration accuracy.
Upon completion, you can view your LiDAR dataset just like the original imagery photogrammetry option along with all of the deliverables. You will receive an email once each deliverable is done processing.