Edit Translations Tool: Workflow Walkthrough
In this article, we will walk you through how to use the new Edit Translations Tool, designed to expedite translation updates directly inside the app, without having to send files back and forth. Please see the corresponding video tutorial below.
Step 1: Toggle on the ability to edit Translations
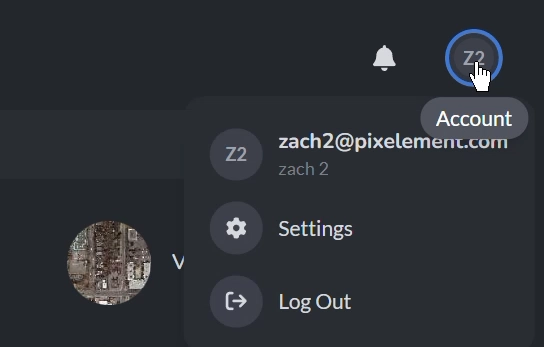
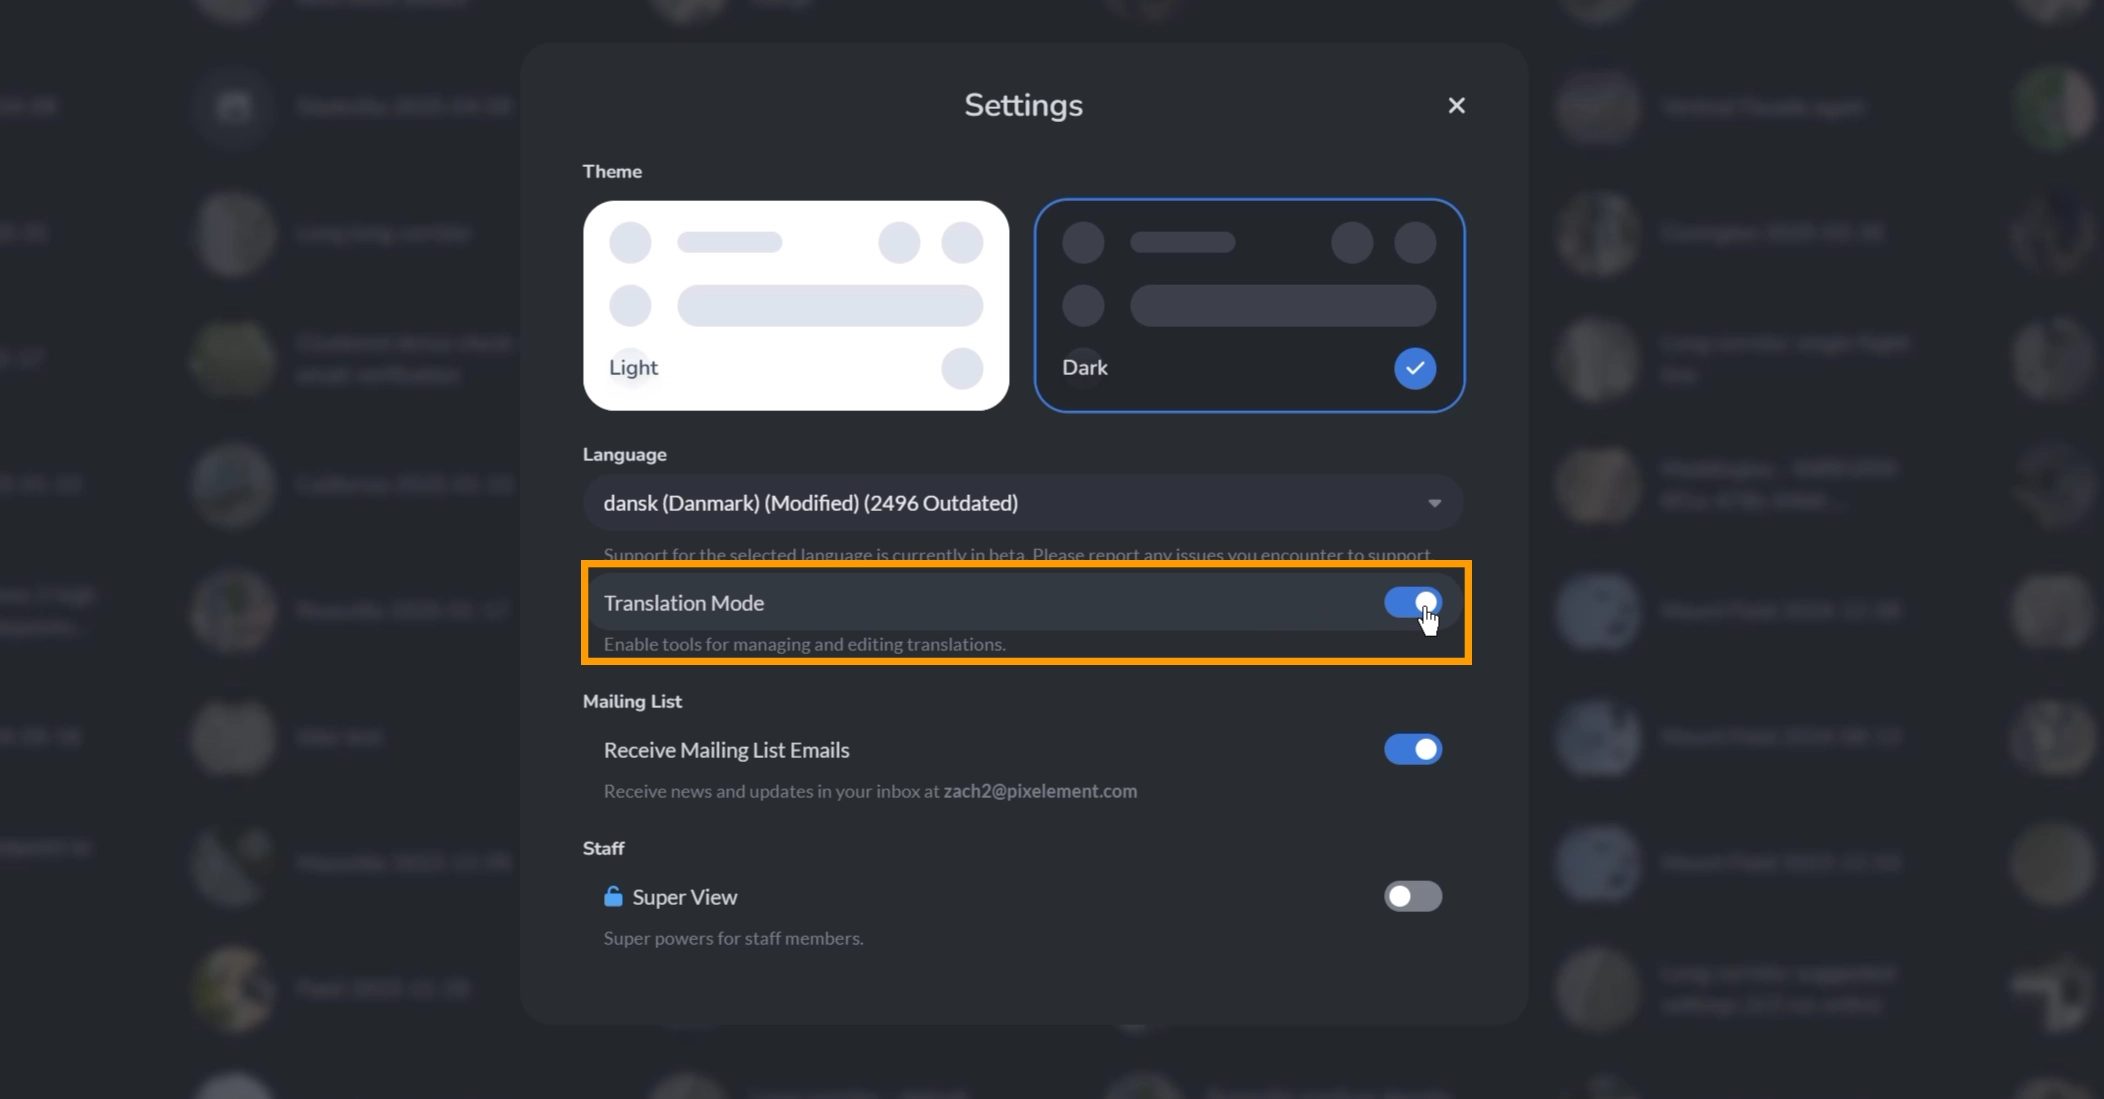
Upon opening up the program, click on your profile button at the top right hand of the screen and select Settings. Then, toggle ON the Translation Mode.
Step 2: Locate the Edit Translations Sidebar
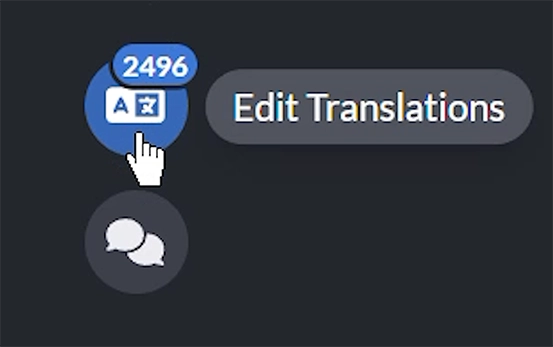
Once enabled, you will see the Edit Translations module button in the lower left hand corner. Click it to open the sidebar. A little notification number will show up if there are any outstanding translations for the specific language you have selected.
Step 3: Choose Your Language
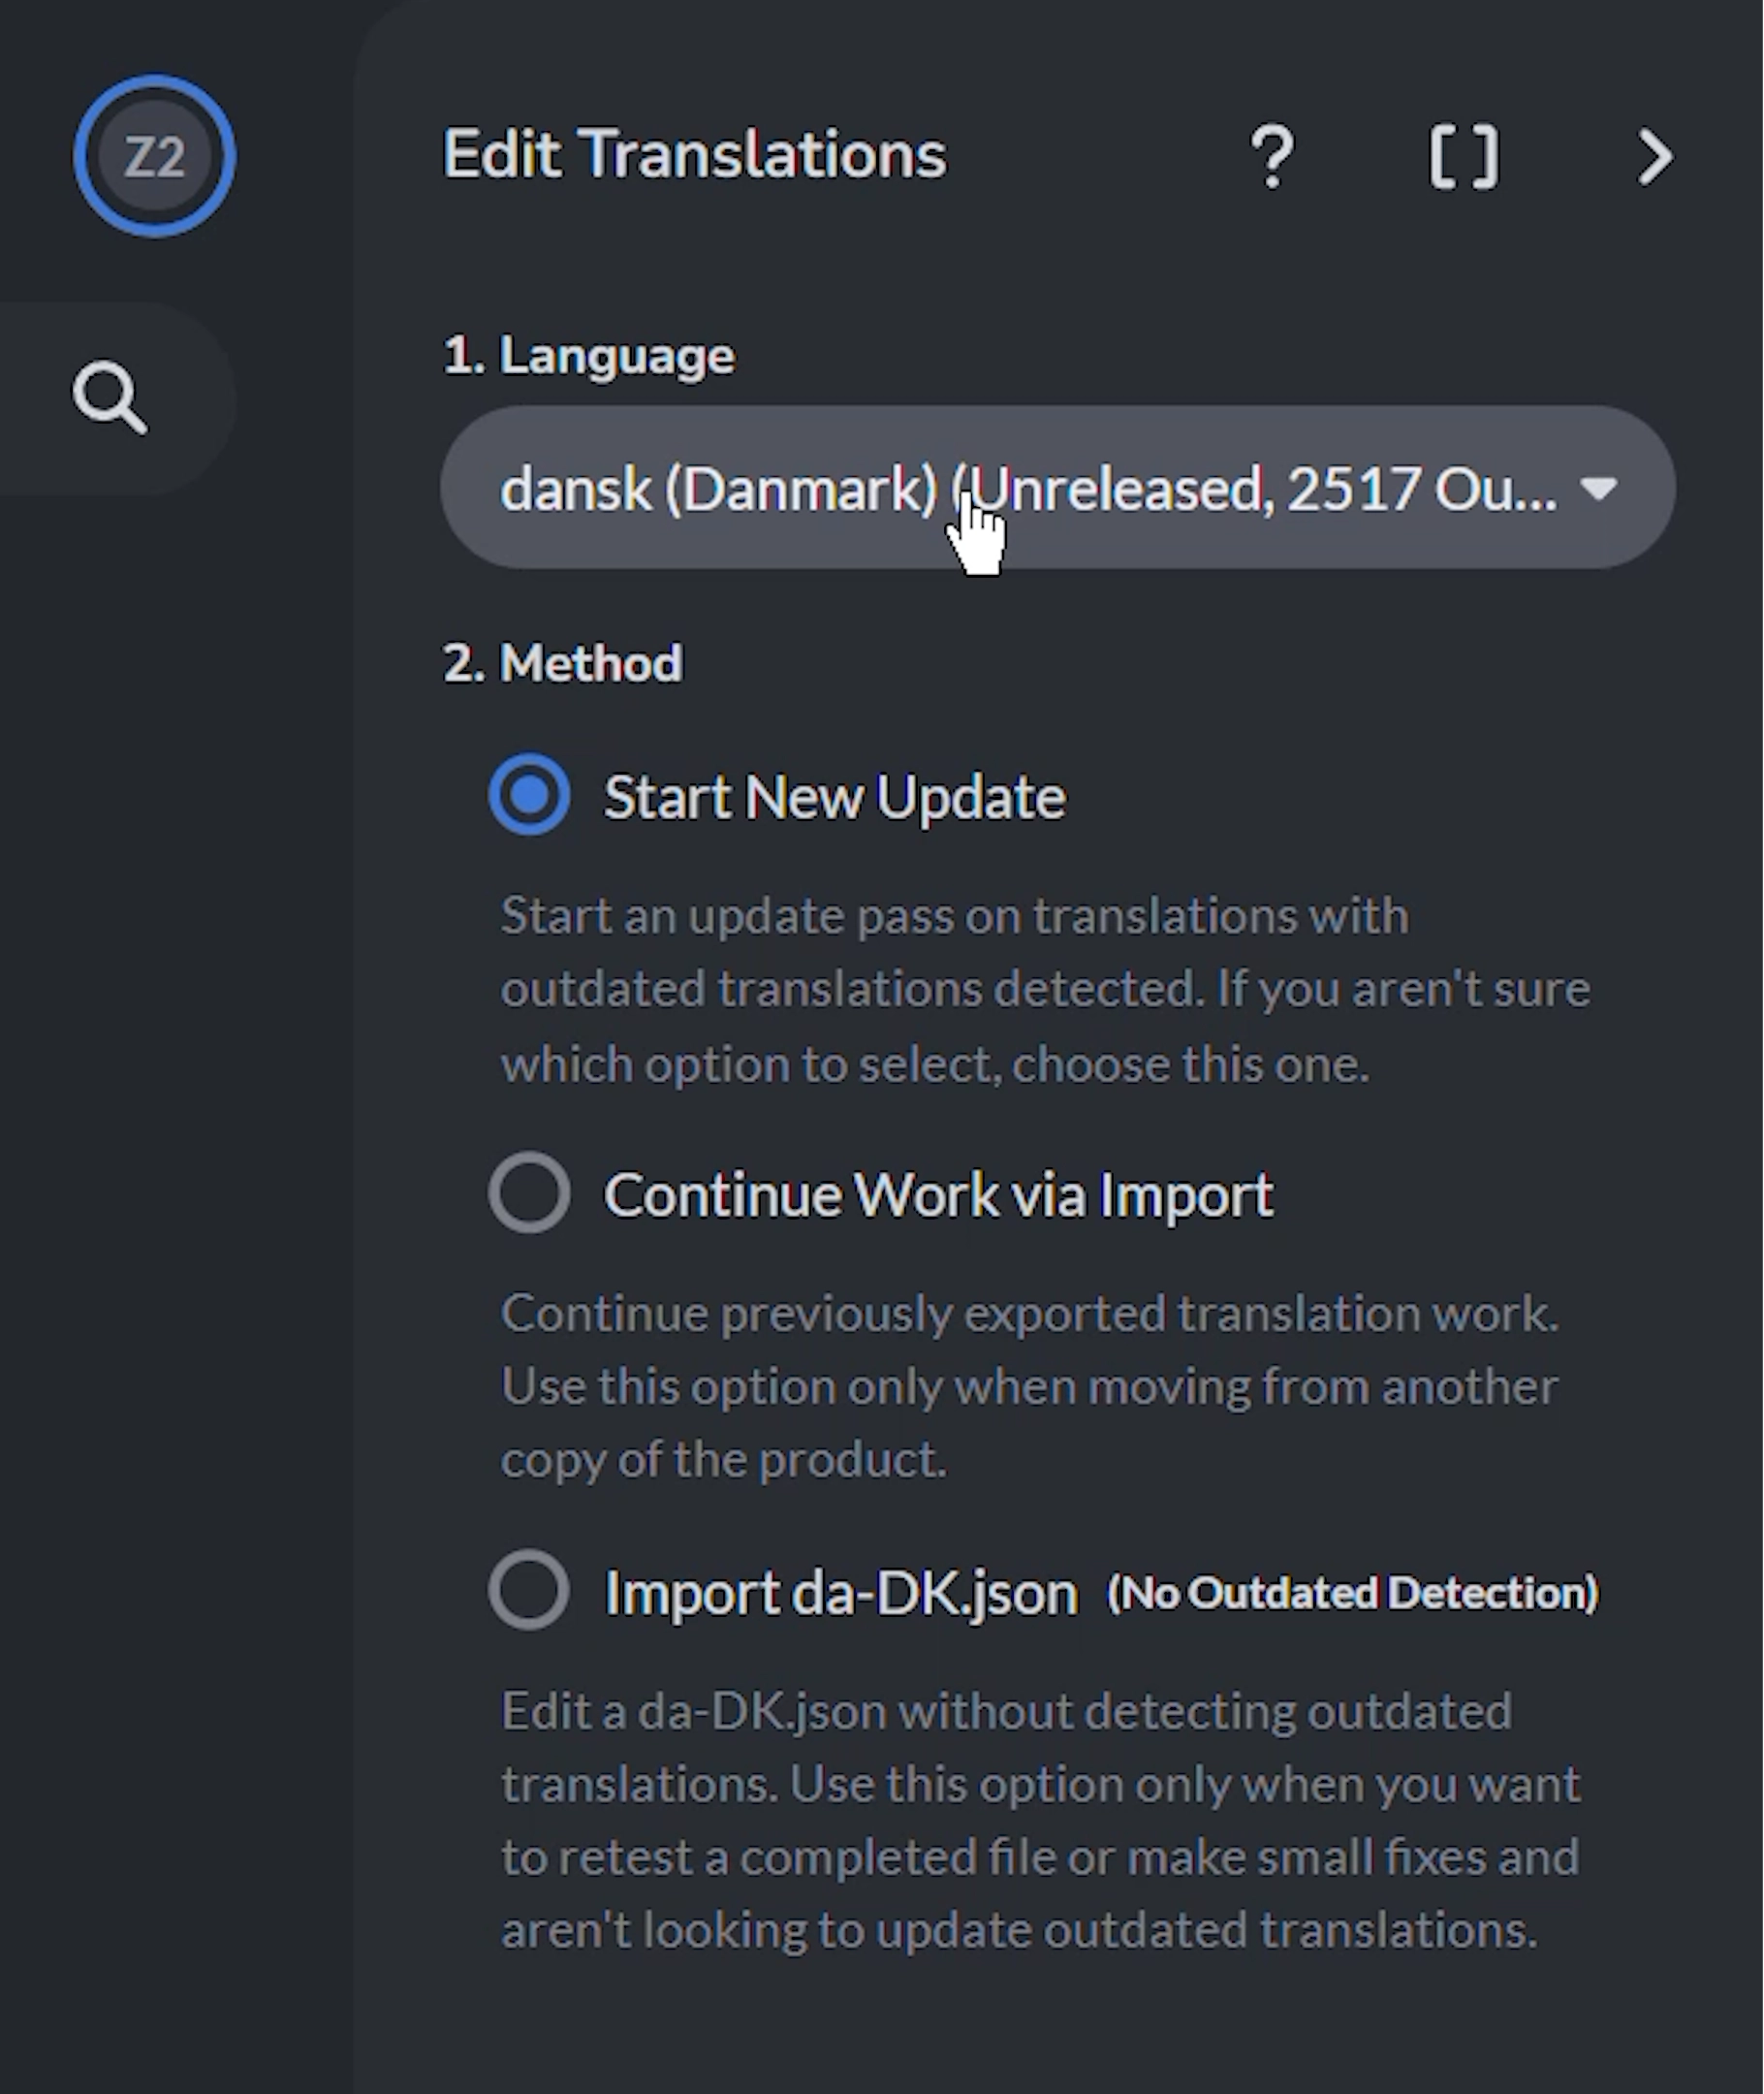
Next, choose the language you would like to update. The badge will let you know how many keys need attention.
The badge number in the bottom left appears even if the sidebar is closed, as long as Translation Mode is enabled and a language other than American English is selected. This allows translators to passively use the app and be notified when updates are available.
Step 4: Choose Your Method
With your method you have three options:
🔁 1. Start New Update
✅ Best for: Most translation work, especially fixing outdated or missing entries.
This is the recommended workflow for updating translations that are integrated into PixElement’s version control and app preview system.

Upon selecting Start New Update and continuing to edit the translation, you will be brought to the edit translations page.
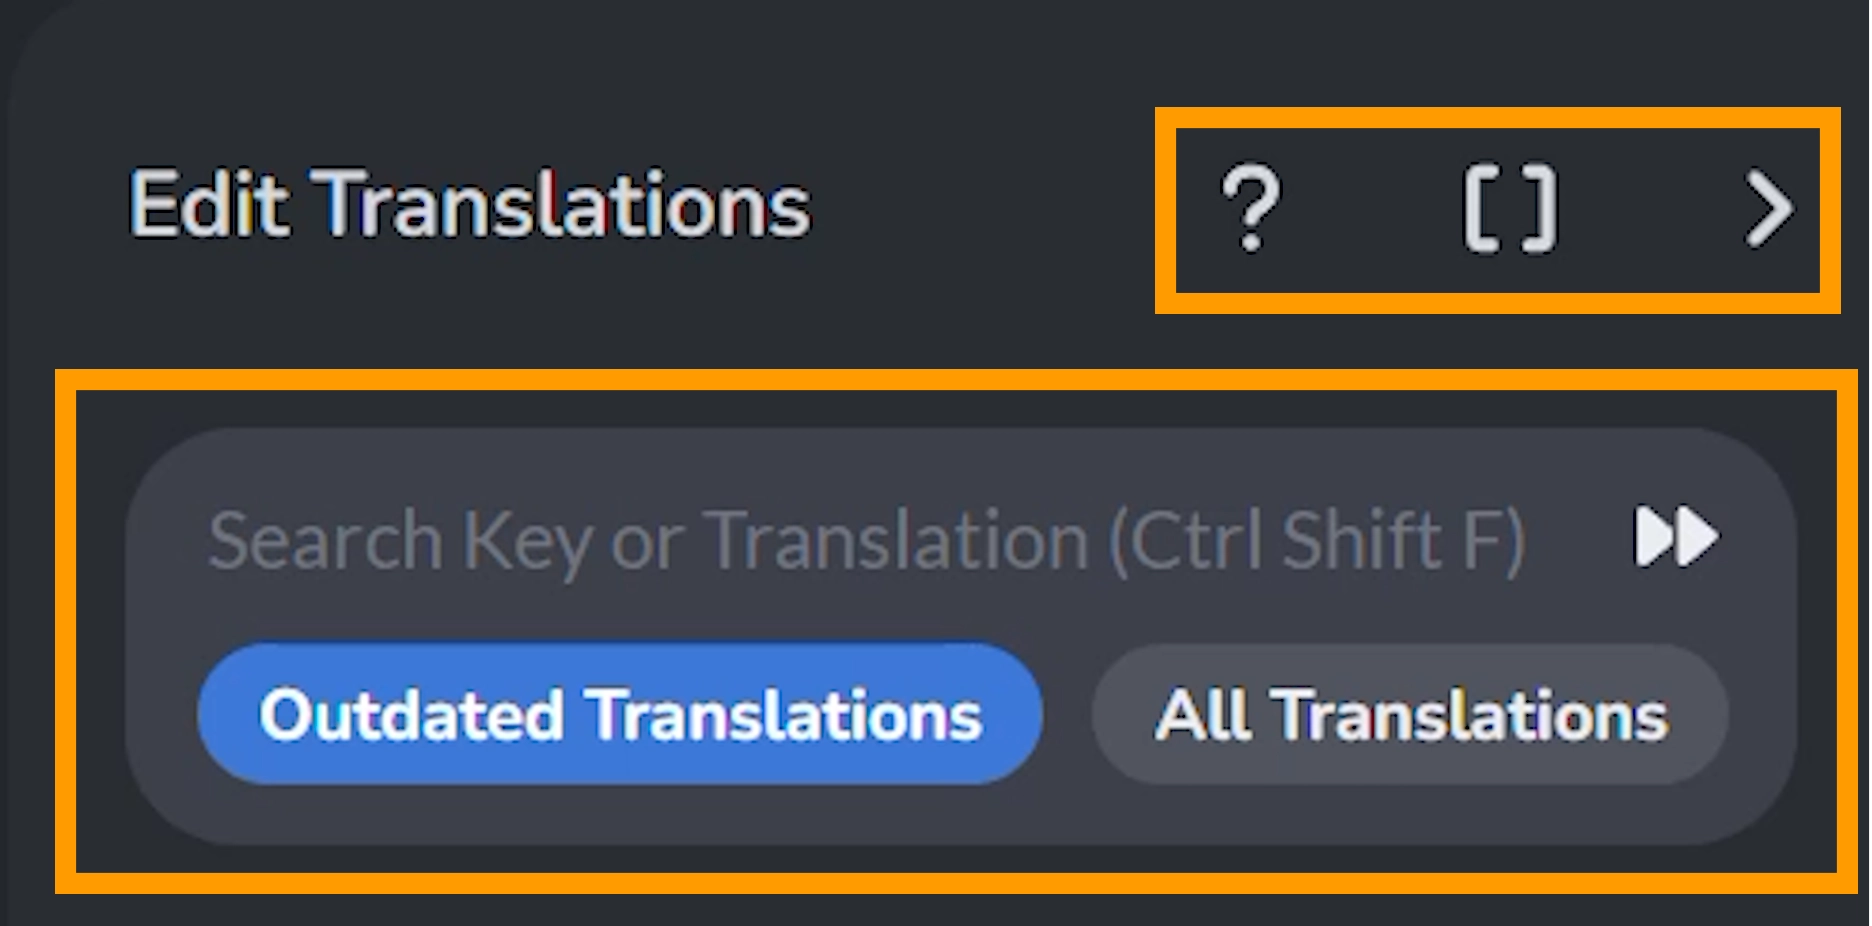
Here you can bring up the Translations tutorial text (question mark logo), Show Translation Keys (square brackets), and close the tool menu (arrow).
Next you can search for a Key or Translation, and filter whether you would like to search only for outdated translations or all translations. You can also click the arrows button to automatically jump to the first missing translation.
Starting to Translate
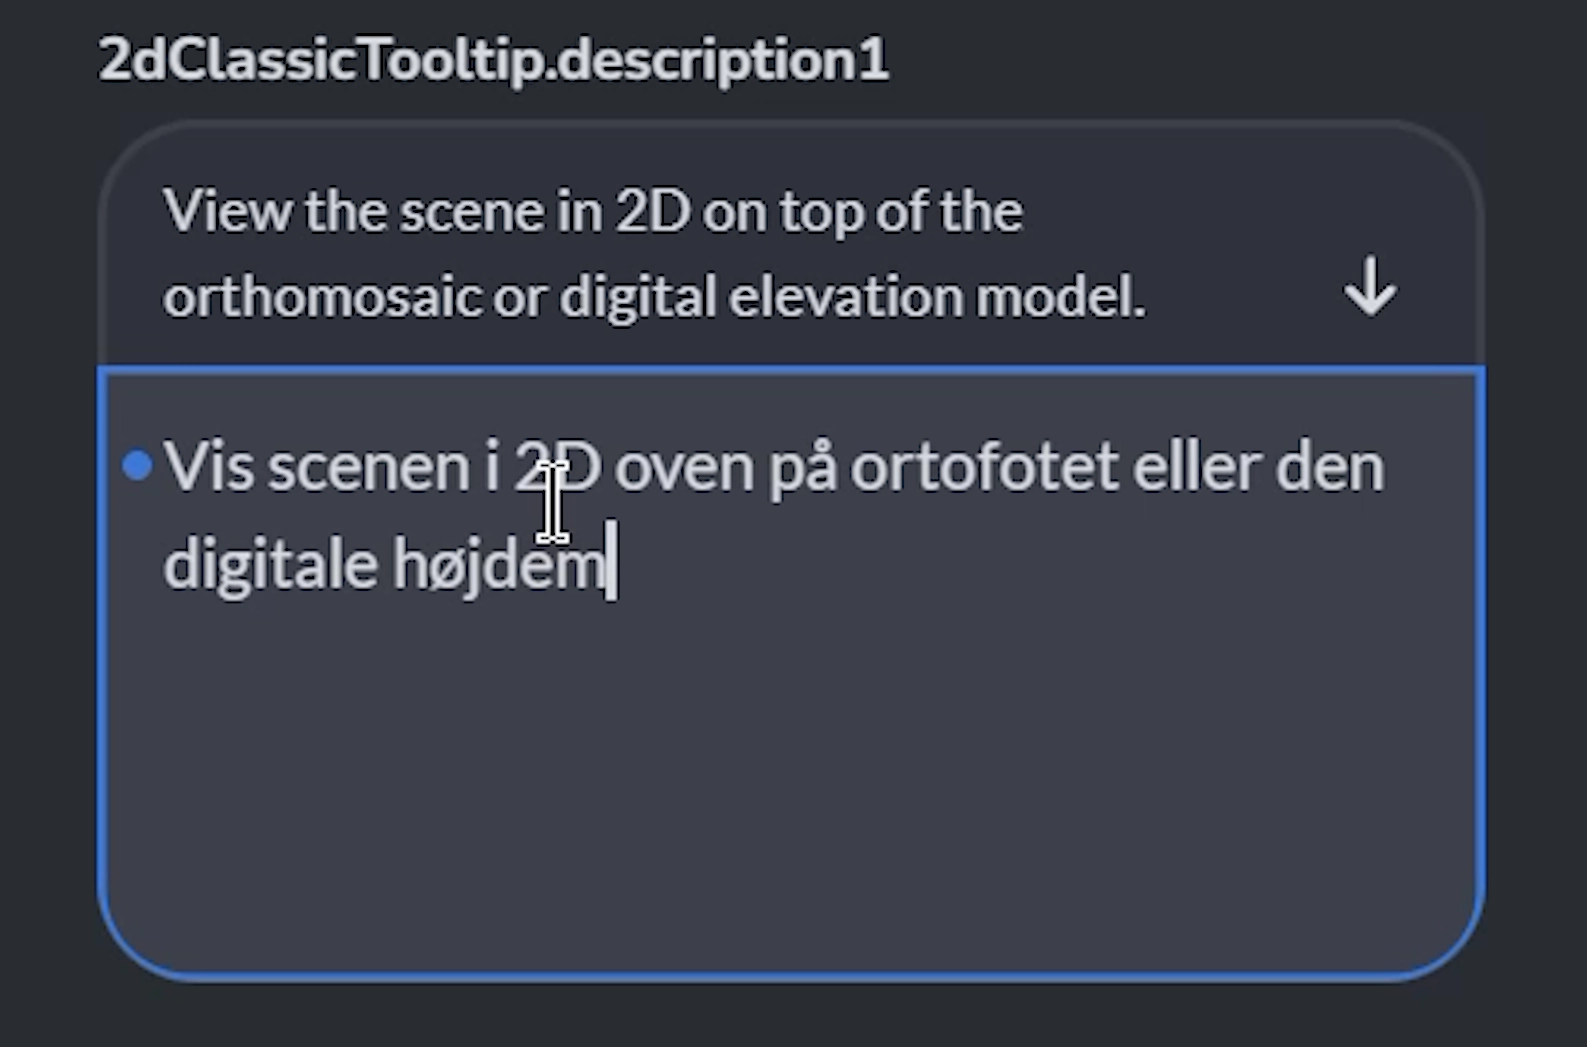
Now you’re ready to start translating. First you are given the title of the key, and then the text (in English) that you are being asked to translate. In the box below, enter your translation text in the respective language. If you want to keep the same English translation, you can click the down arrow to automatically enter it into the text box. Continue to enter as many translations as you would like.
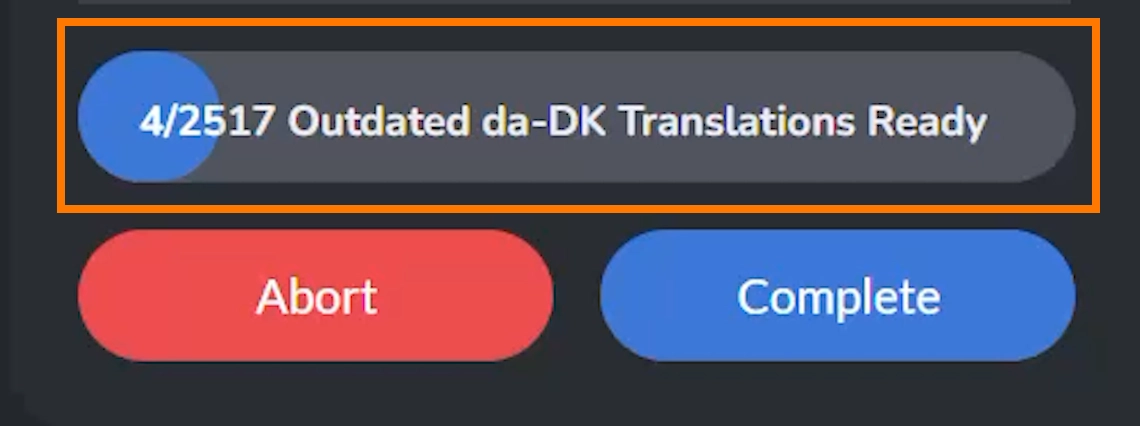
At the bottom of the toolbar, there is a progress bar displaying how many translation words/phrases there are. Please note that if you abort your translation project, no translations will be saved.
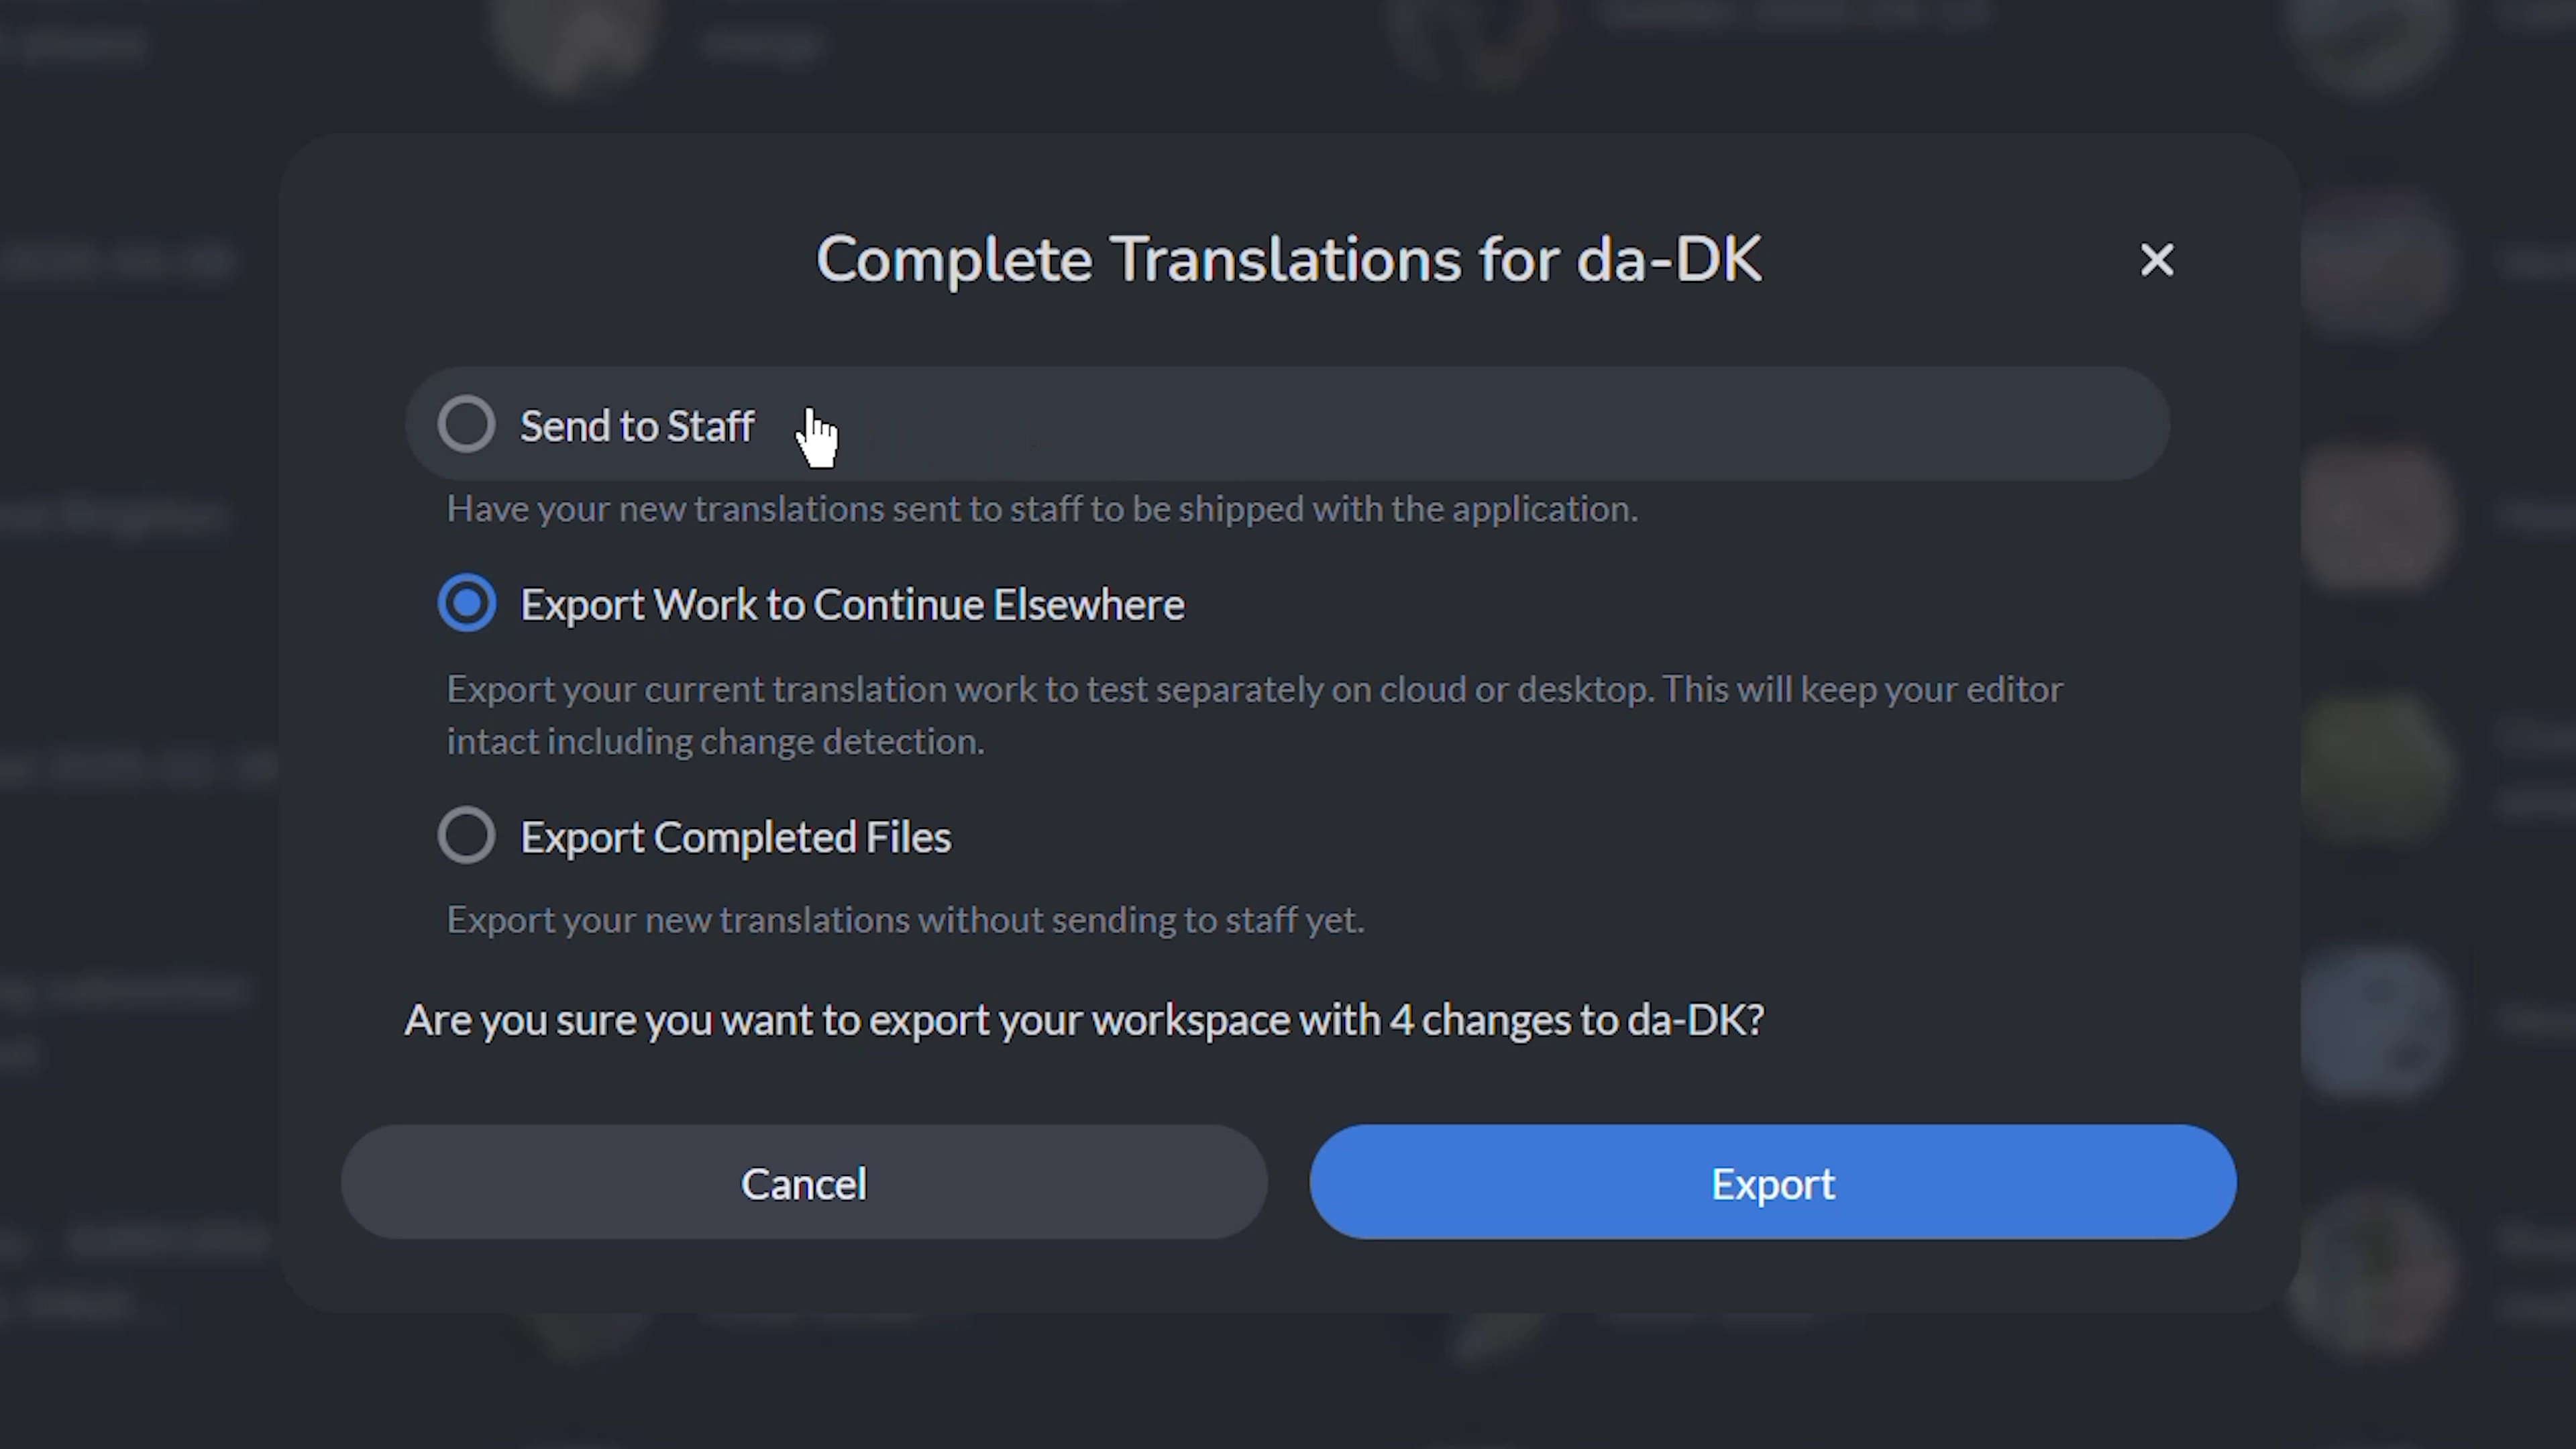
Upon completion of your translations, press the Complete button. You will then be prompted to:
-
Send To Staff for your translations to be shipped with the application – please note, it is preferred that all translation fields are filled in before being submitted for review.
-
Export Work to Continue Elsewhere where you can export your current translation work to test separately on cloud or desktop.
-
Export Completed Files to export your new translations without sending to staff yet.
Exporting the files will give you a workspace-json when selecting Export Work to Continue Elsewhere, and a json as well as an English reference json file when selecting Export Completed Files. You can continue to edit this file if needed, or re-import it using the Translator Tool at any time.
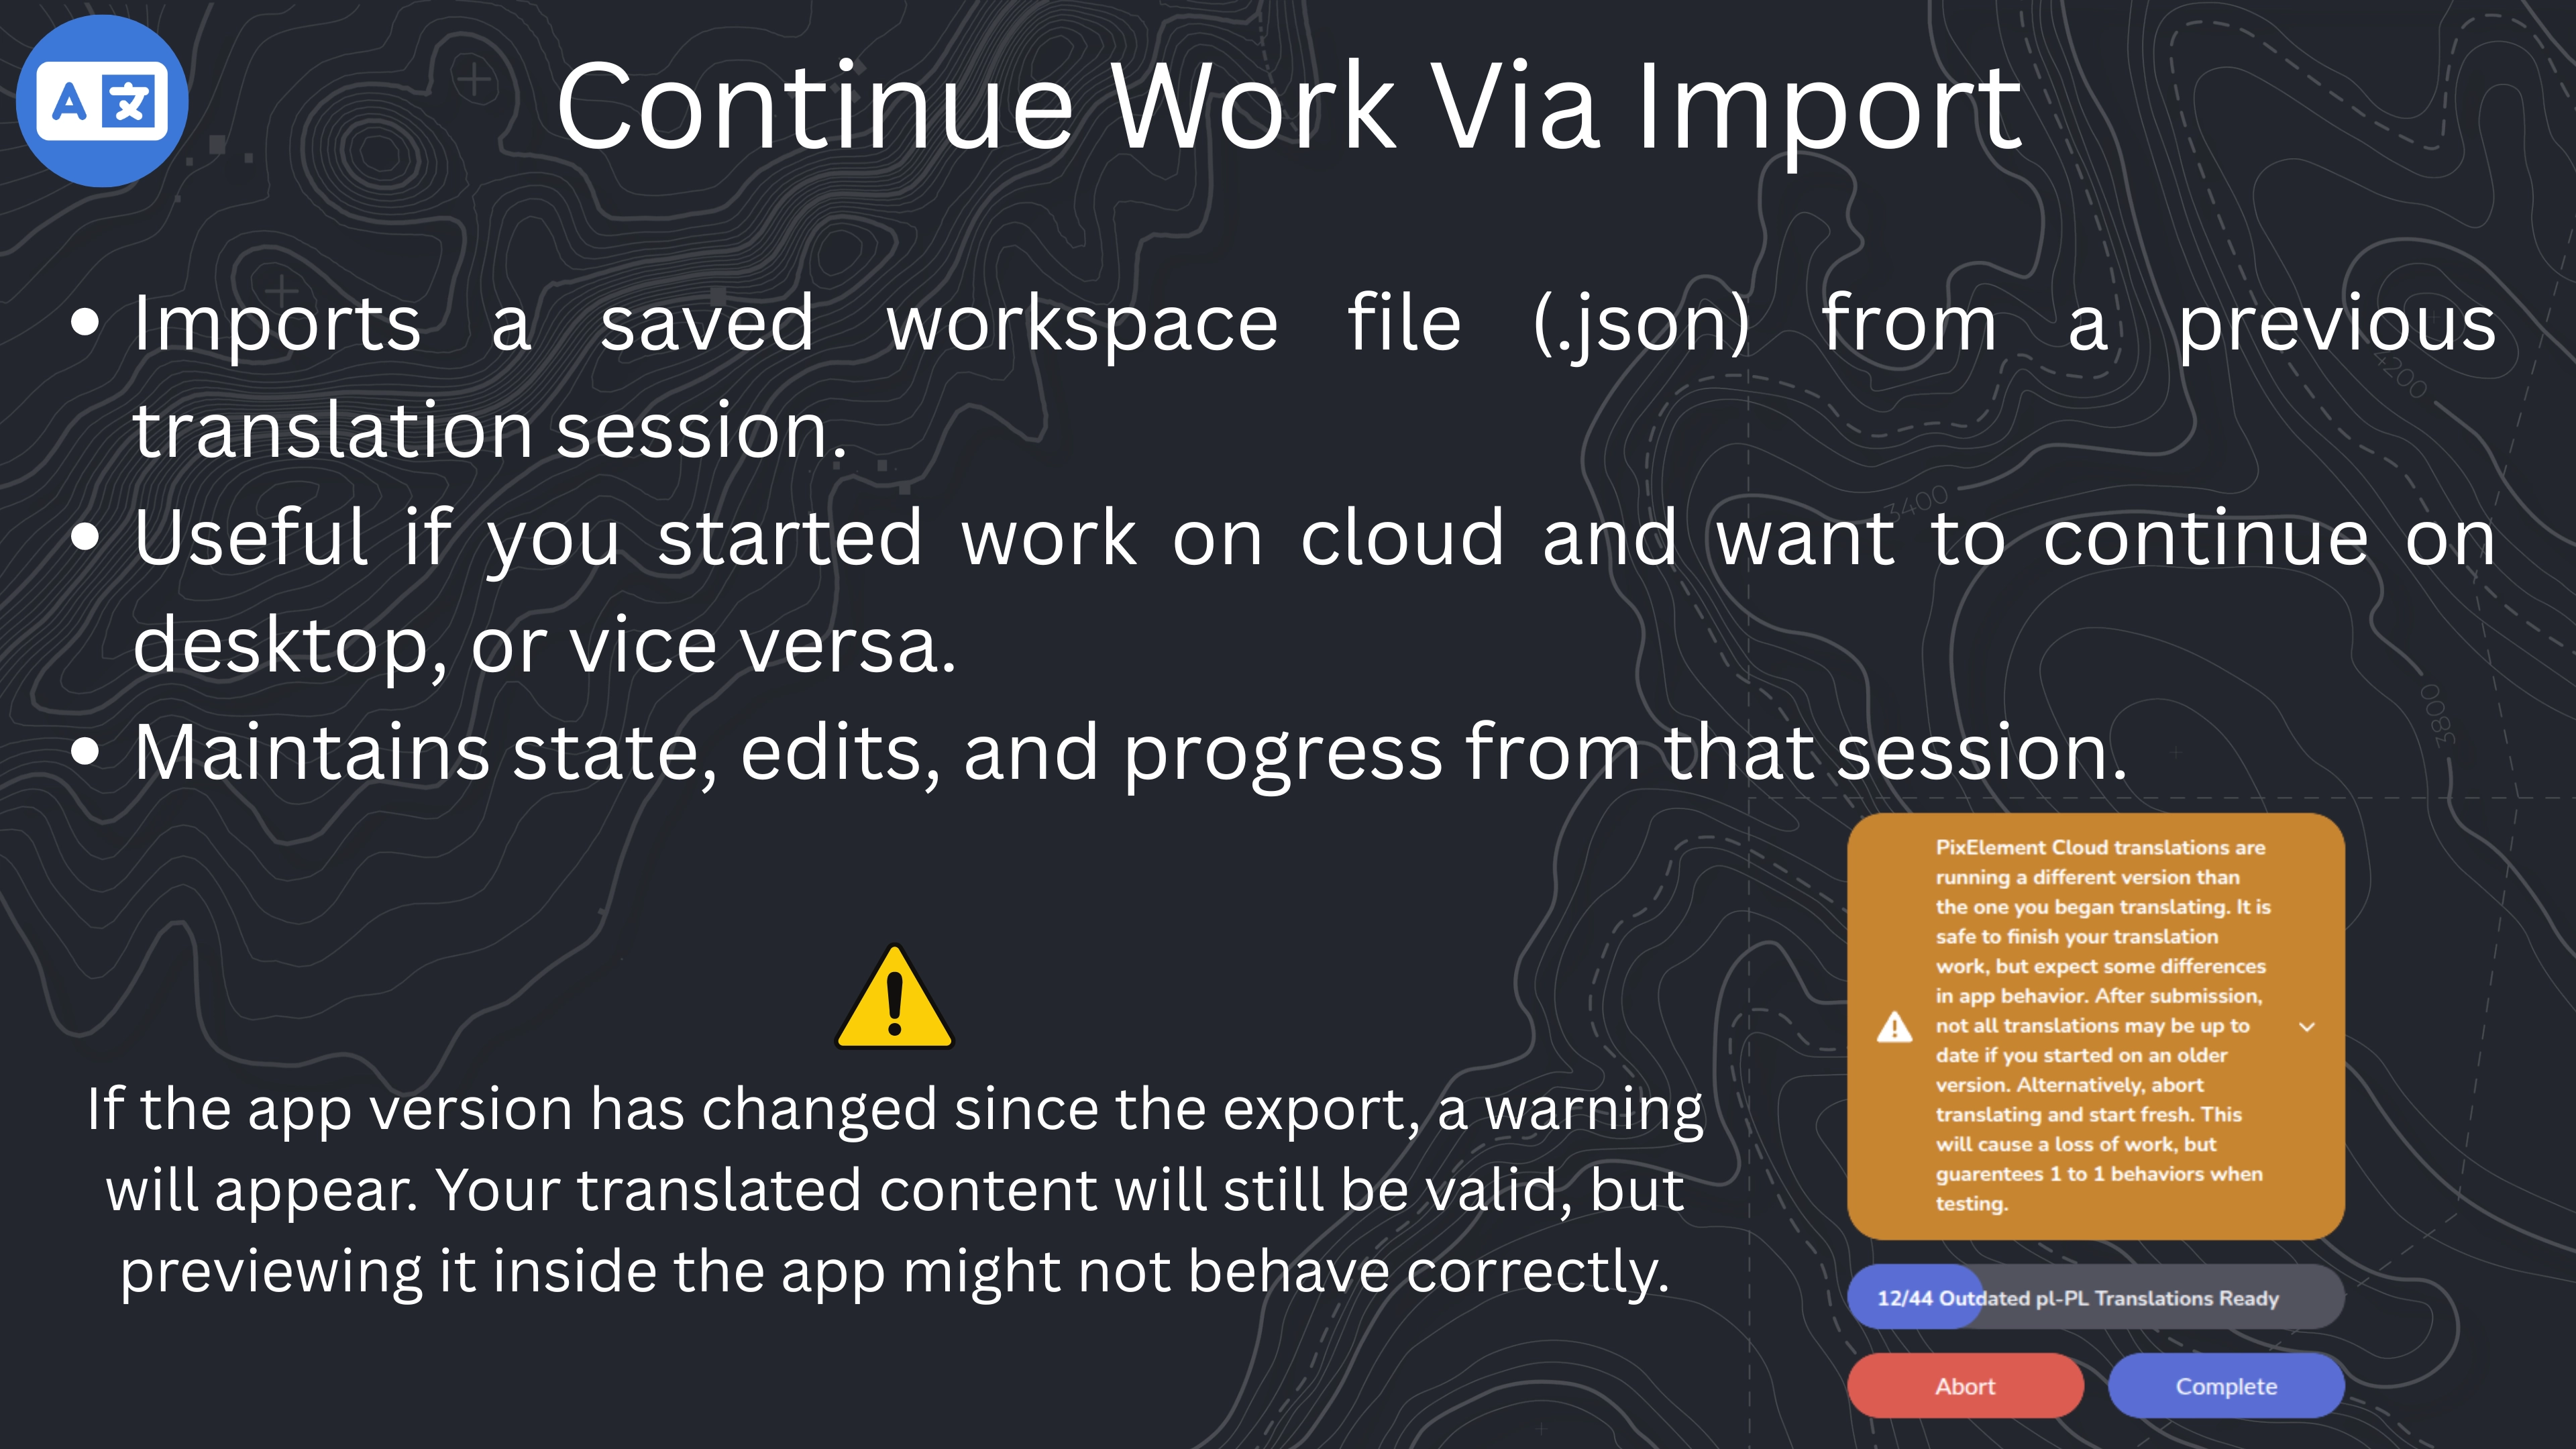
📥 2. Continue Work via Import
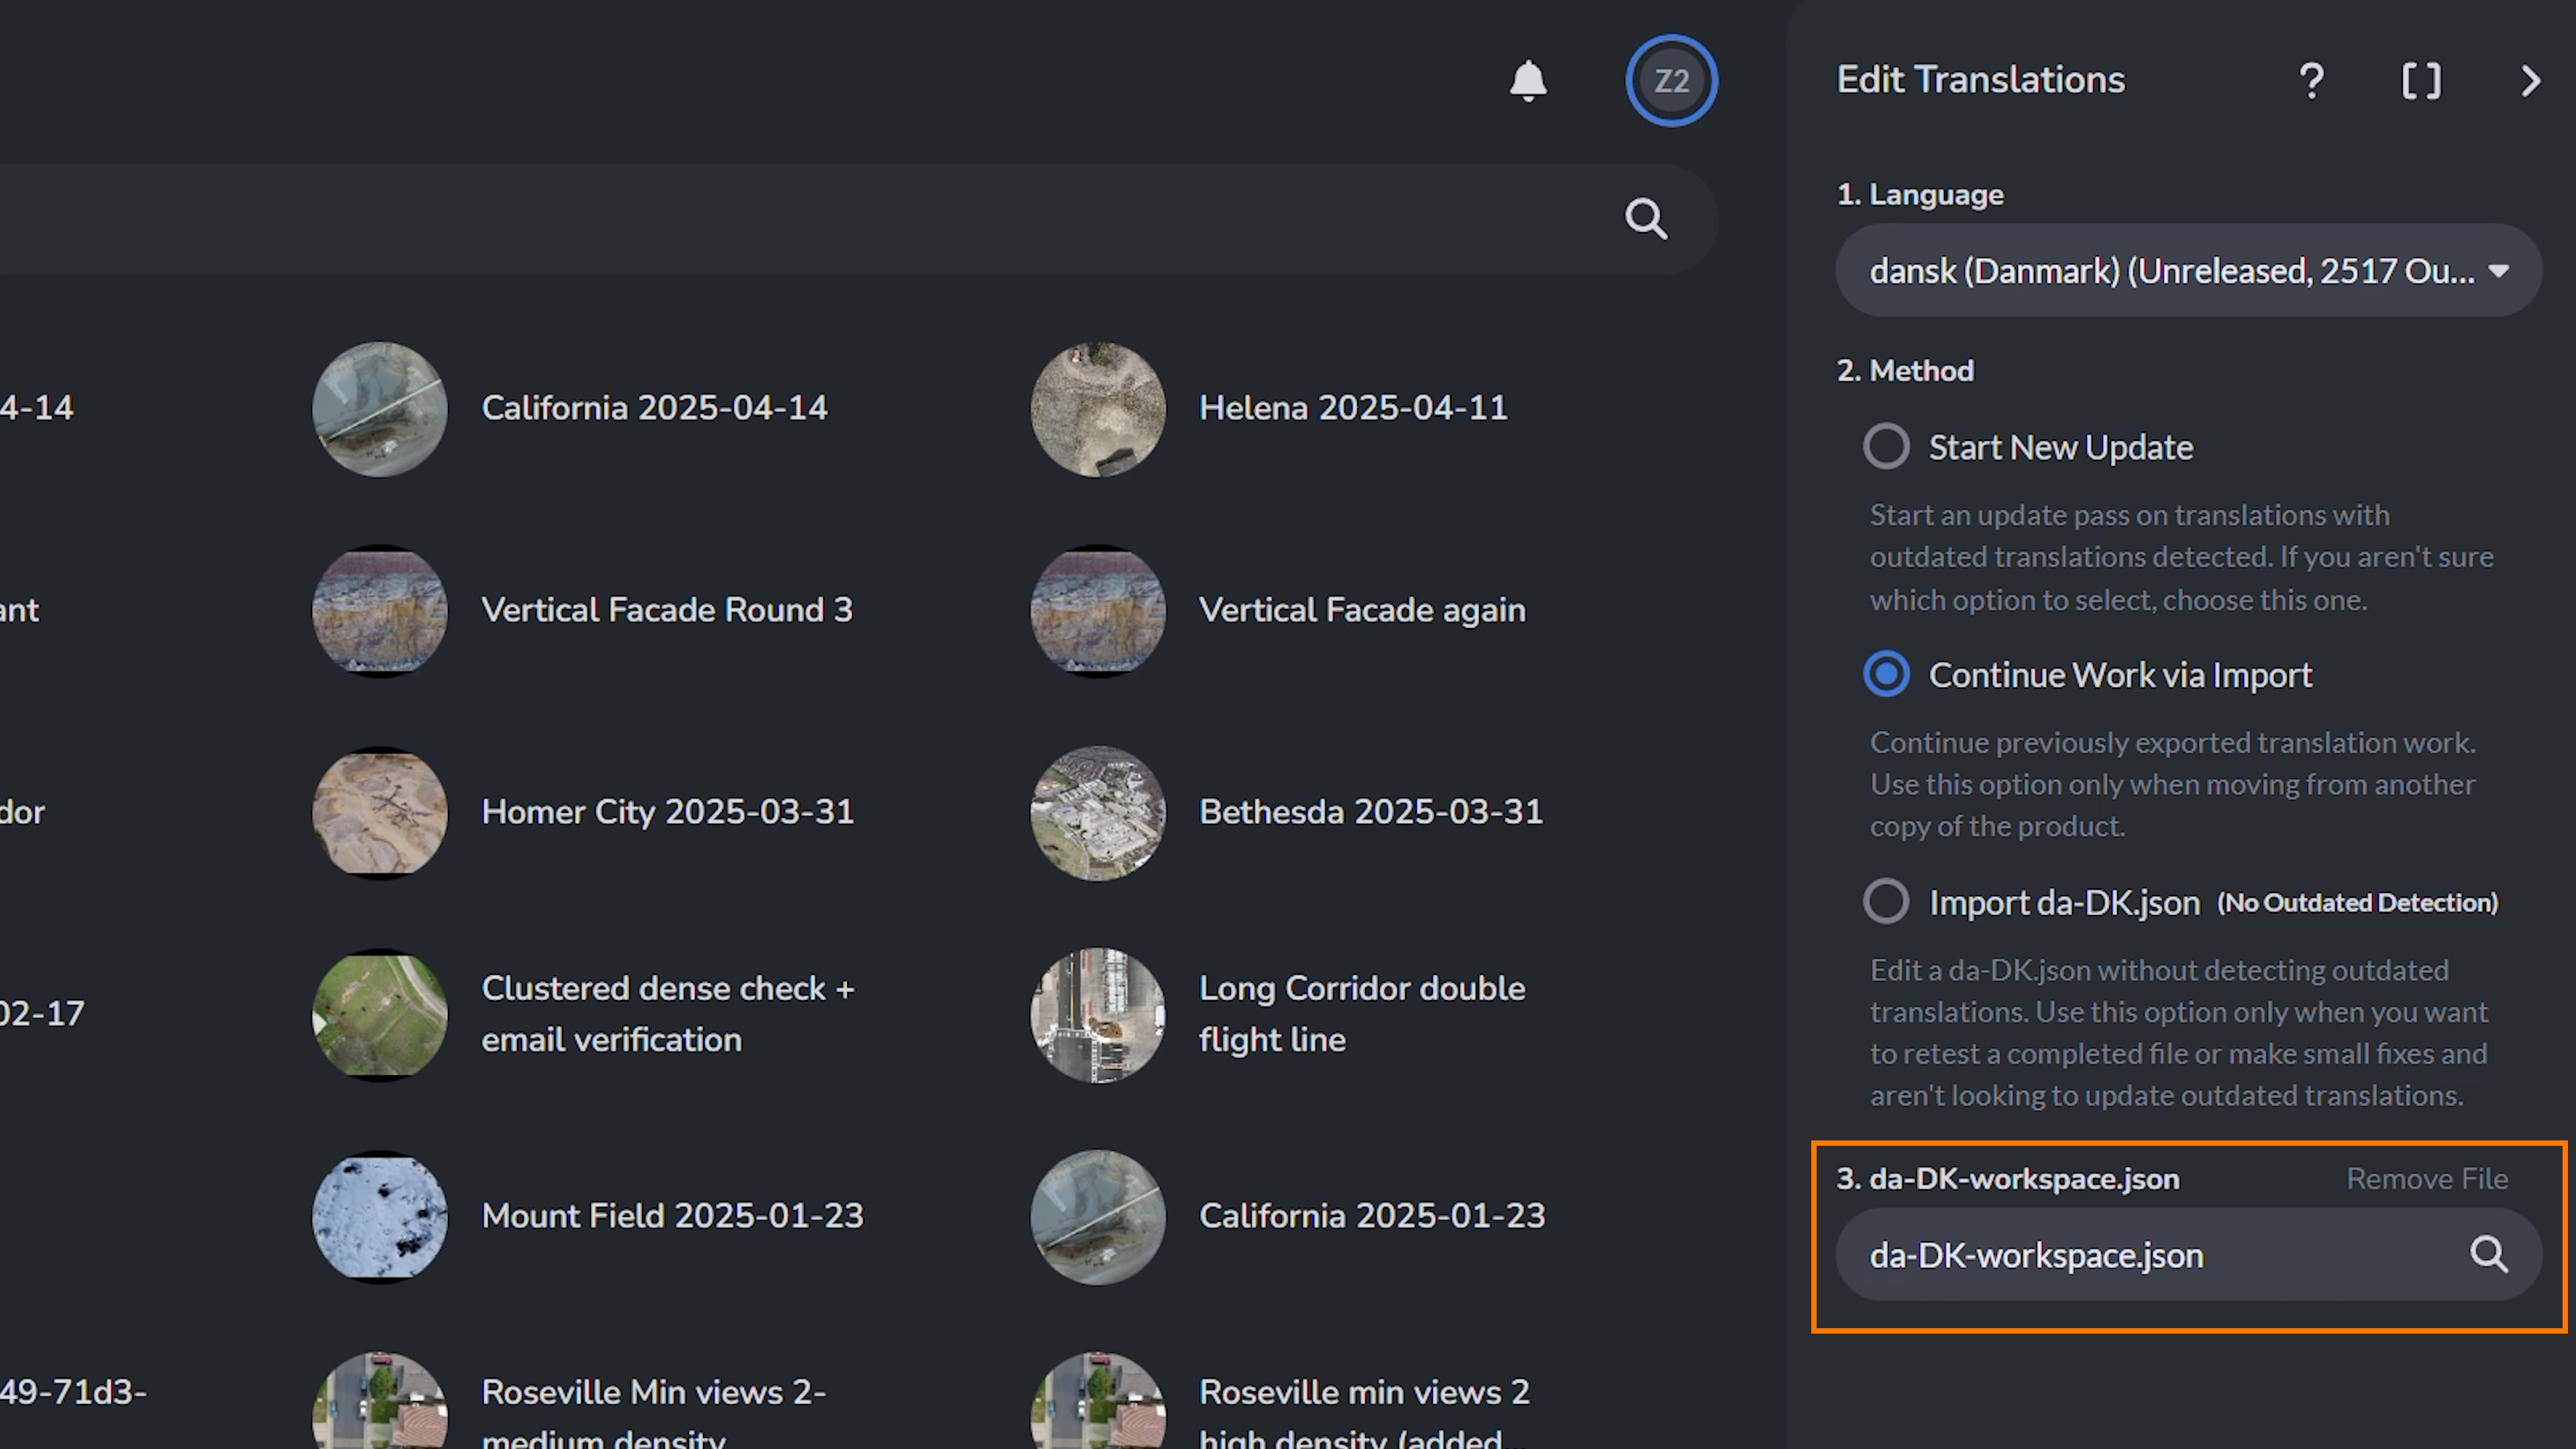
Upon selecting Continue Work via Import, you are prompted to upload your workspace JSON file that you previously had exported from your previous work session. In our case, it is the da-DK-workspace.json (Danish Translation File). So we will click to browse under number 3 to give it our JSON file. Once it’s loaded, we can see all of our previous inputs and continue editing.
✅ Best for: Picking up where you left off from a previous session, especially across devices or platforms (cloud vs desktop).
📂 3. Import (locale).json (No Outdated Detection)
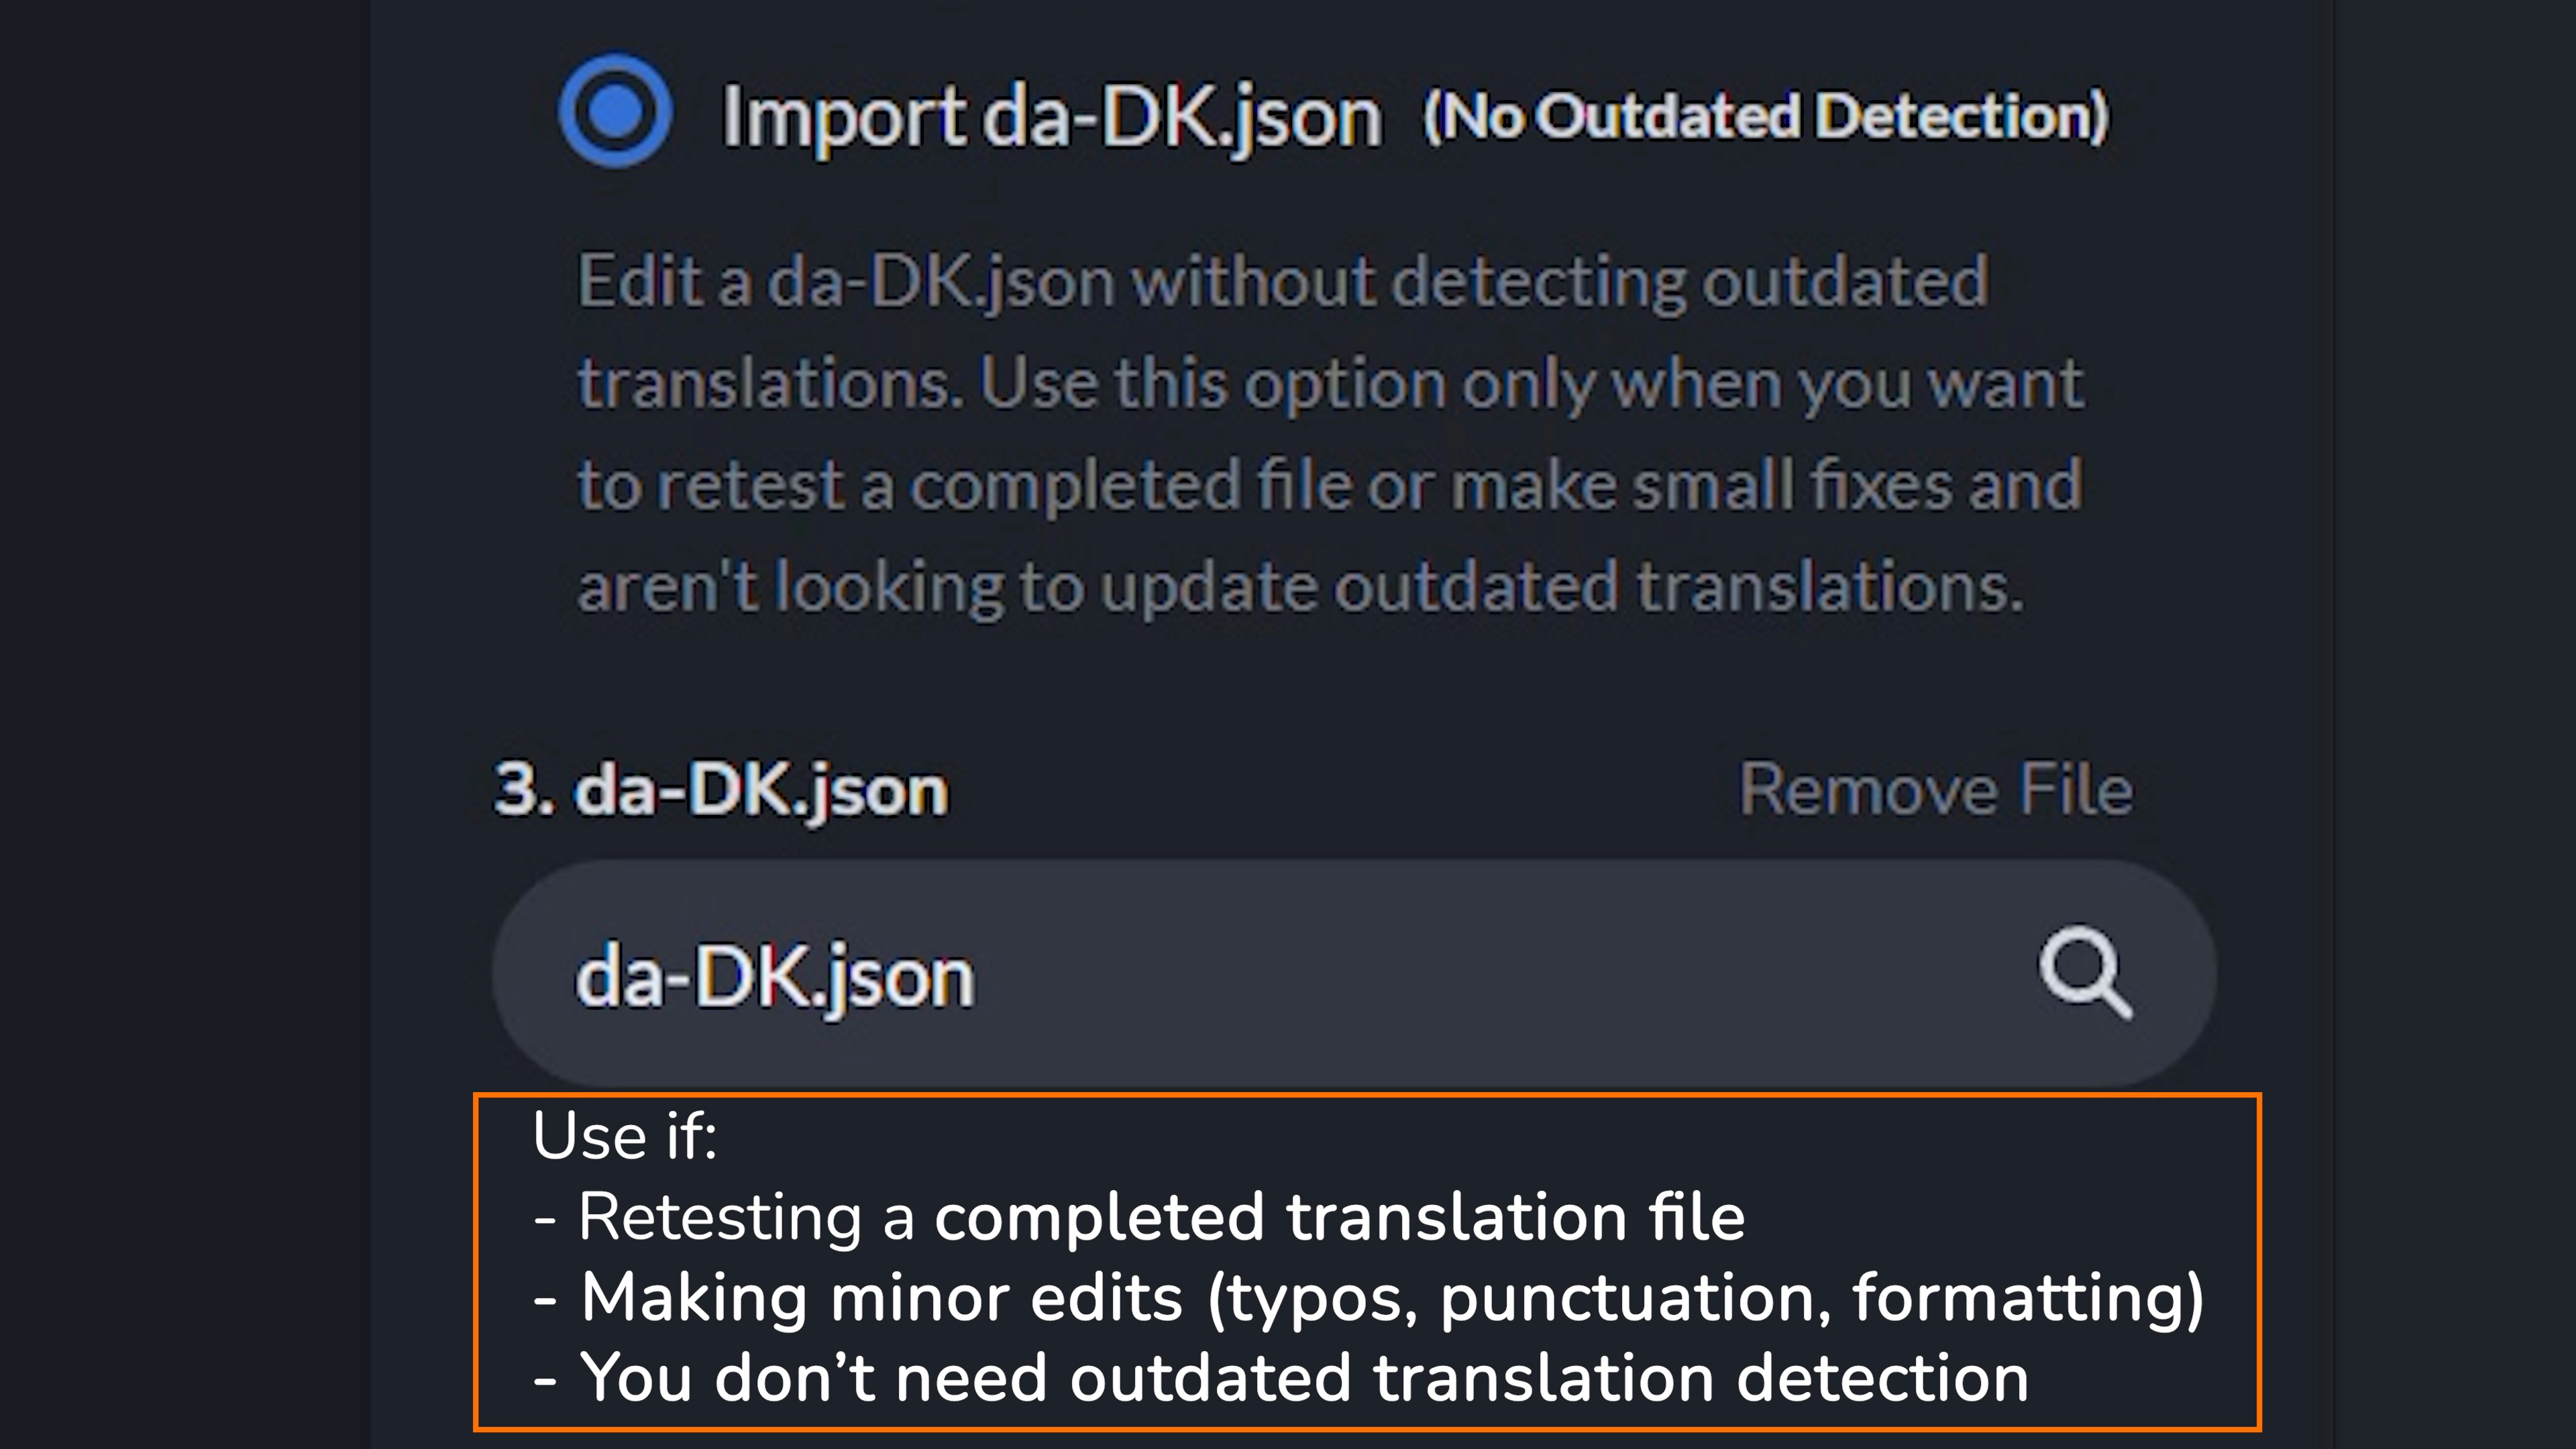
This option allows you to load a raw .json file, like da-DK.json, directly into the app without triggering outdated translation detection. This is NOT the same as importing a workspace file. The easiest way to generate a locale .json file is by exporting it using the Export Completed Files option in the Complete menu.
While translators could use this to spot-check or retest, its main purpose is internal – like when support staff review submitted changes to verify everything looks correct before integration.
You might use this if you want to edit a .json file without checking for outdated keys, for example, to retest a completed file or make small fixes like typos, formatting, or minor adjustments. To edit your final .json file, you would browse for it in step 3.
✅ Best for: Retesting a finalized .json file or making small manual edits outside the tracking system.
If you need to update outdated keys or work through incomplete translations, use Start New Update instead.
What Happens After Submission?
Once you select Send to Staff, your updated translations are submitted for internal review. You cannot submit if there are syntax or formatting errors. However, you can submit partially completed translations – not every field must be filled for submission to go through.
Our team will still review everything submitted including any partially or problematic files, and follow up if needed.

Here’s what happens next:
- The translation files are queued for approval by PixElement staff or localization maintainers.
- Any flagged issues or syntax errors will be reviewed.
- Once approved, your translations are merged into the latest application build and will be included in the next update shipped to users.
- If any problems arise during review (e.g., invalid formatting or missing placeholders), you may be contacted to make corrections.
Once integrated, your translations will become active in the live app, visible to users who select that language.
The Edit Translations Tool makes it easier than ever to manage and update localization files directly within PixElement. Whether you’re fixing a few outdated keys, translating an entire interface, or just retesting a finalized file, the built-in workflow supports a flexible, intuitive experience. With tools for version tracking, progress monitoring, and error detection, you’re empowered to contribute high-quality translations faster—and without the back-and-forth of external file management.
If you’re ready to enhance your localization workflow, the Edit Translations Tool is already available in the latest version of PixElement. Try it out and help bring PixElement to users around the world, one language at a time.