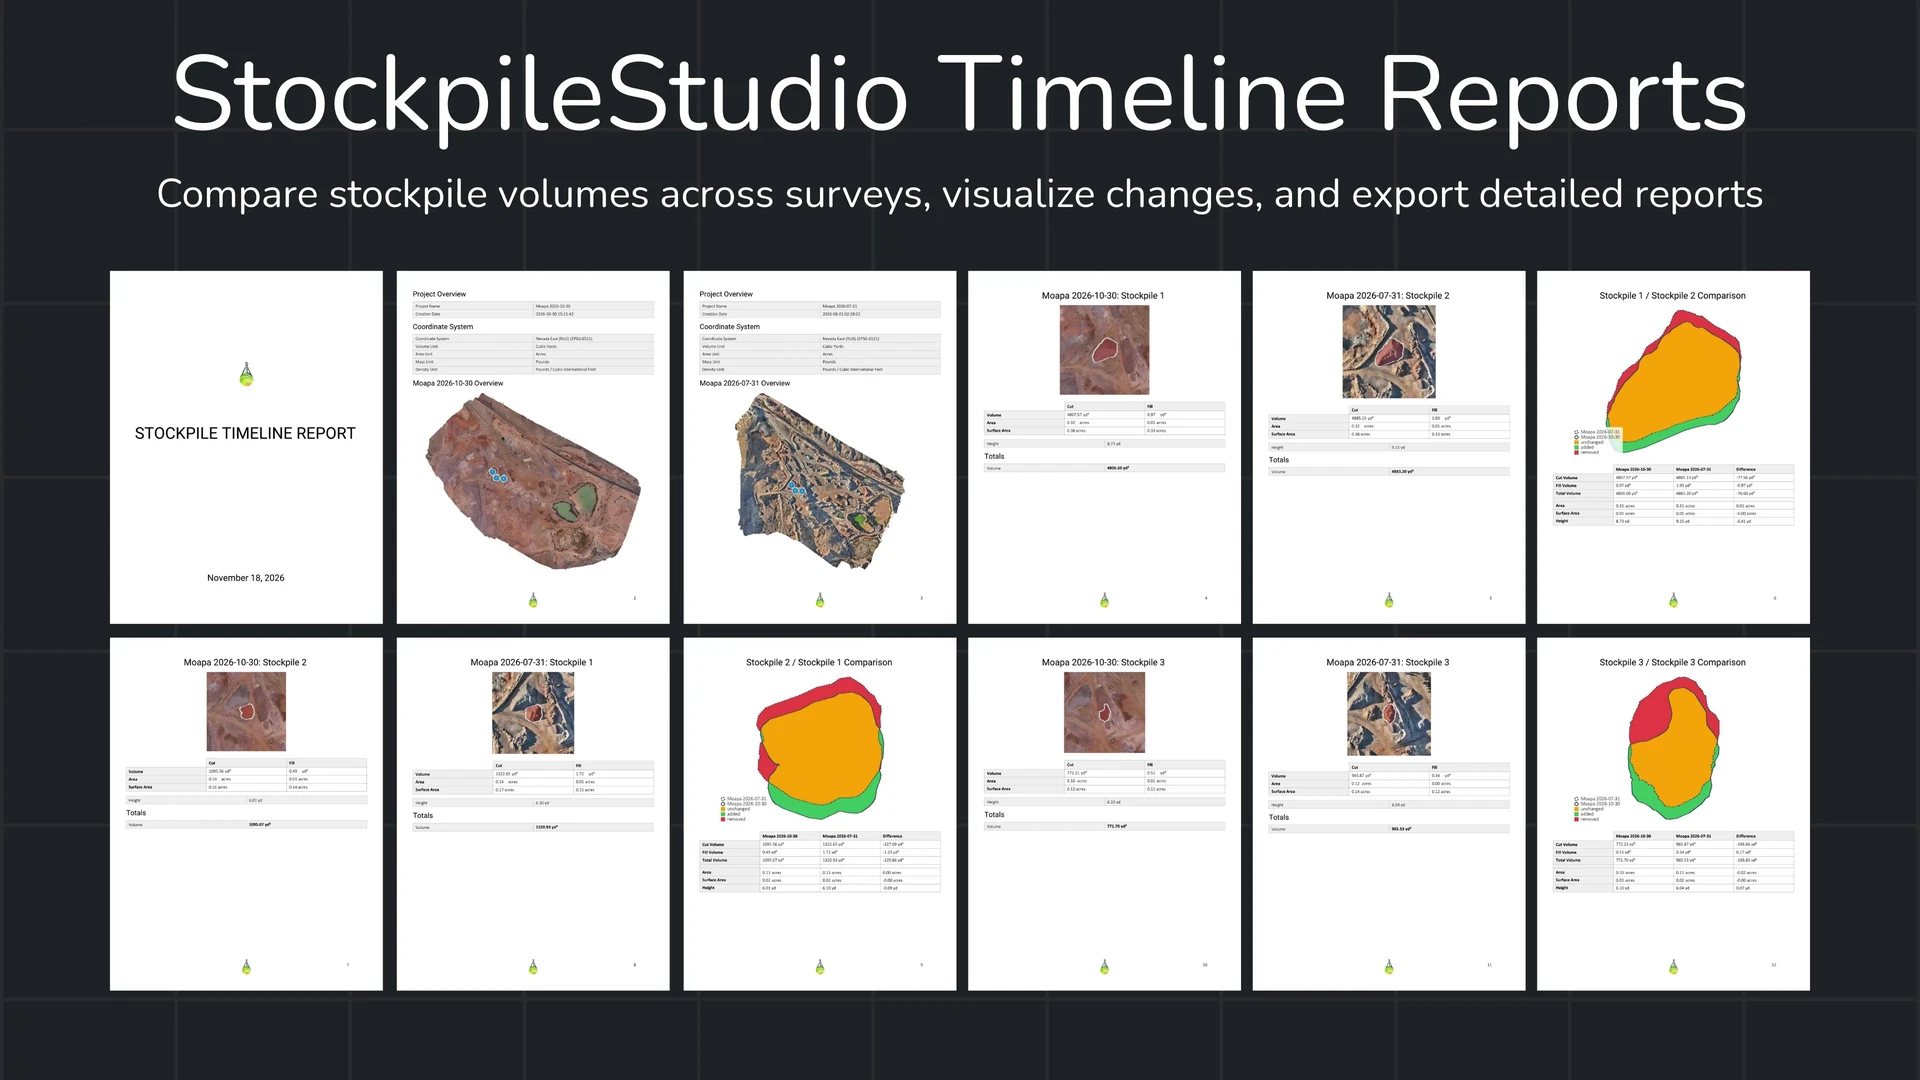
Comparing Stockpile Volumes Across Surveys with Timeline Reports in StockpileStudio
With Timeline Reports in StockpileStudio, you can compare stockpile volumes from two surveys of the same site and export the results. In this tutorial, we’ll compare three stockpiles using two of the surveys in the project.
Watch the Timeline Reports Tutorial
Walkthrough of comparing stockpile volumes across survey dates and exporting reports
Step 1: Open StockpileStudio and Expand the Timeline
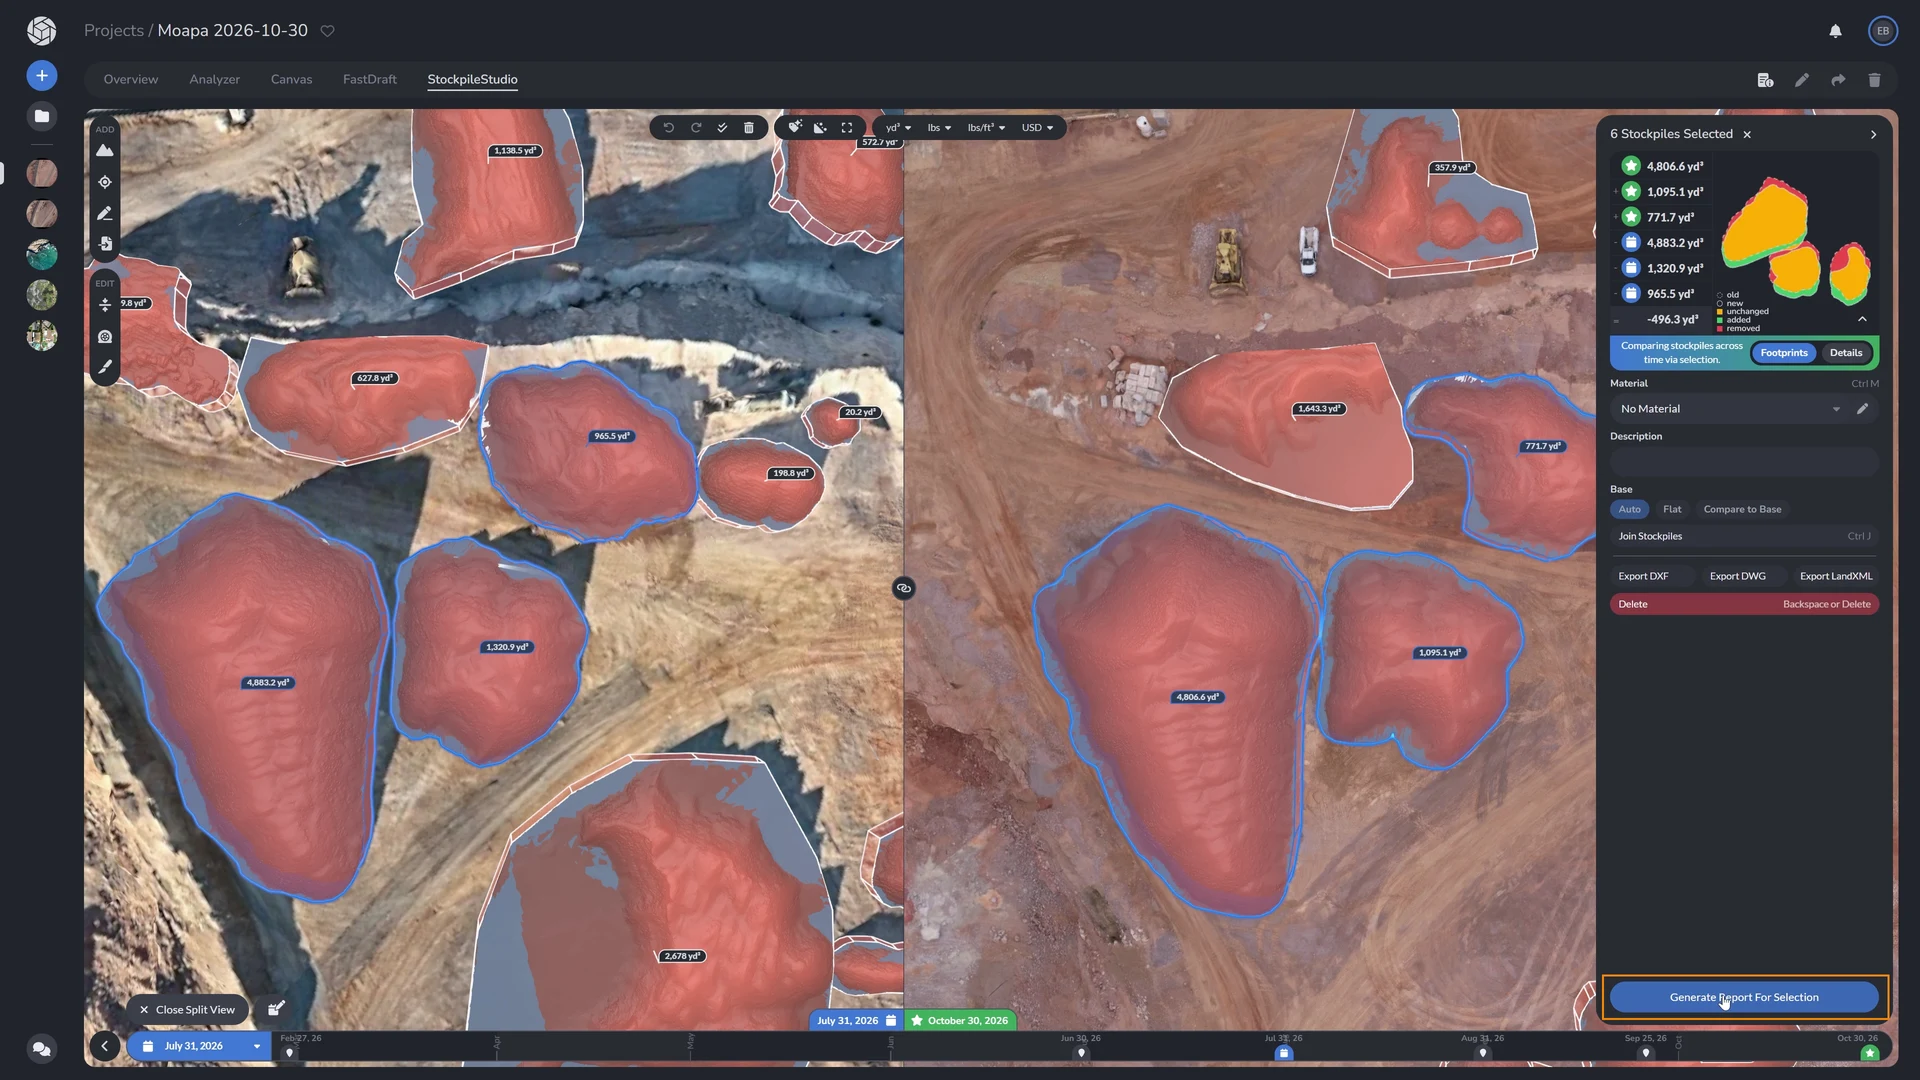
Start with two processed projects that cover the same site. Make sure StockpileStudio is enabled and that the piles you want to compare have been added to both projects. Open StockpileStudio and expand the Timeline in the lower left corner. Choose a comparison project from the dropdown, or click its marker on the Timeline. Hover over a marker to see the project name, the survey date, and how far apart the surveys are.
Step 2: Navigate the Split View with Synced Cameras
In split view, the earlier survey is on the left and the later survey is on the right. With the cameras synced, you can pan or zoom in either view to find the same part of the site in both surveys.
Step 3: Select Counterpart Stockpiles Across Both Surveys
Click your first stockpile, then hold Shift while you click to add the remaining piles from both views. Here, we’re selecting three piles in July and their three counterparts in October, for a total of six selections.
Step 4: Configure Volume Report Options
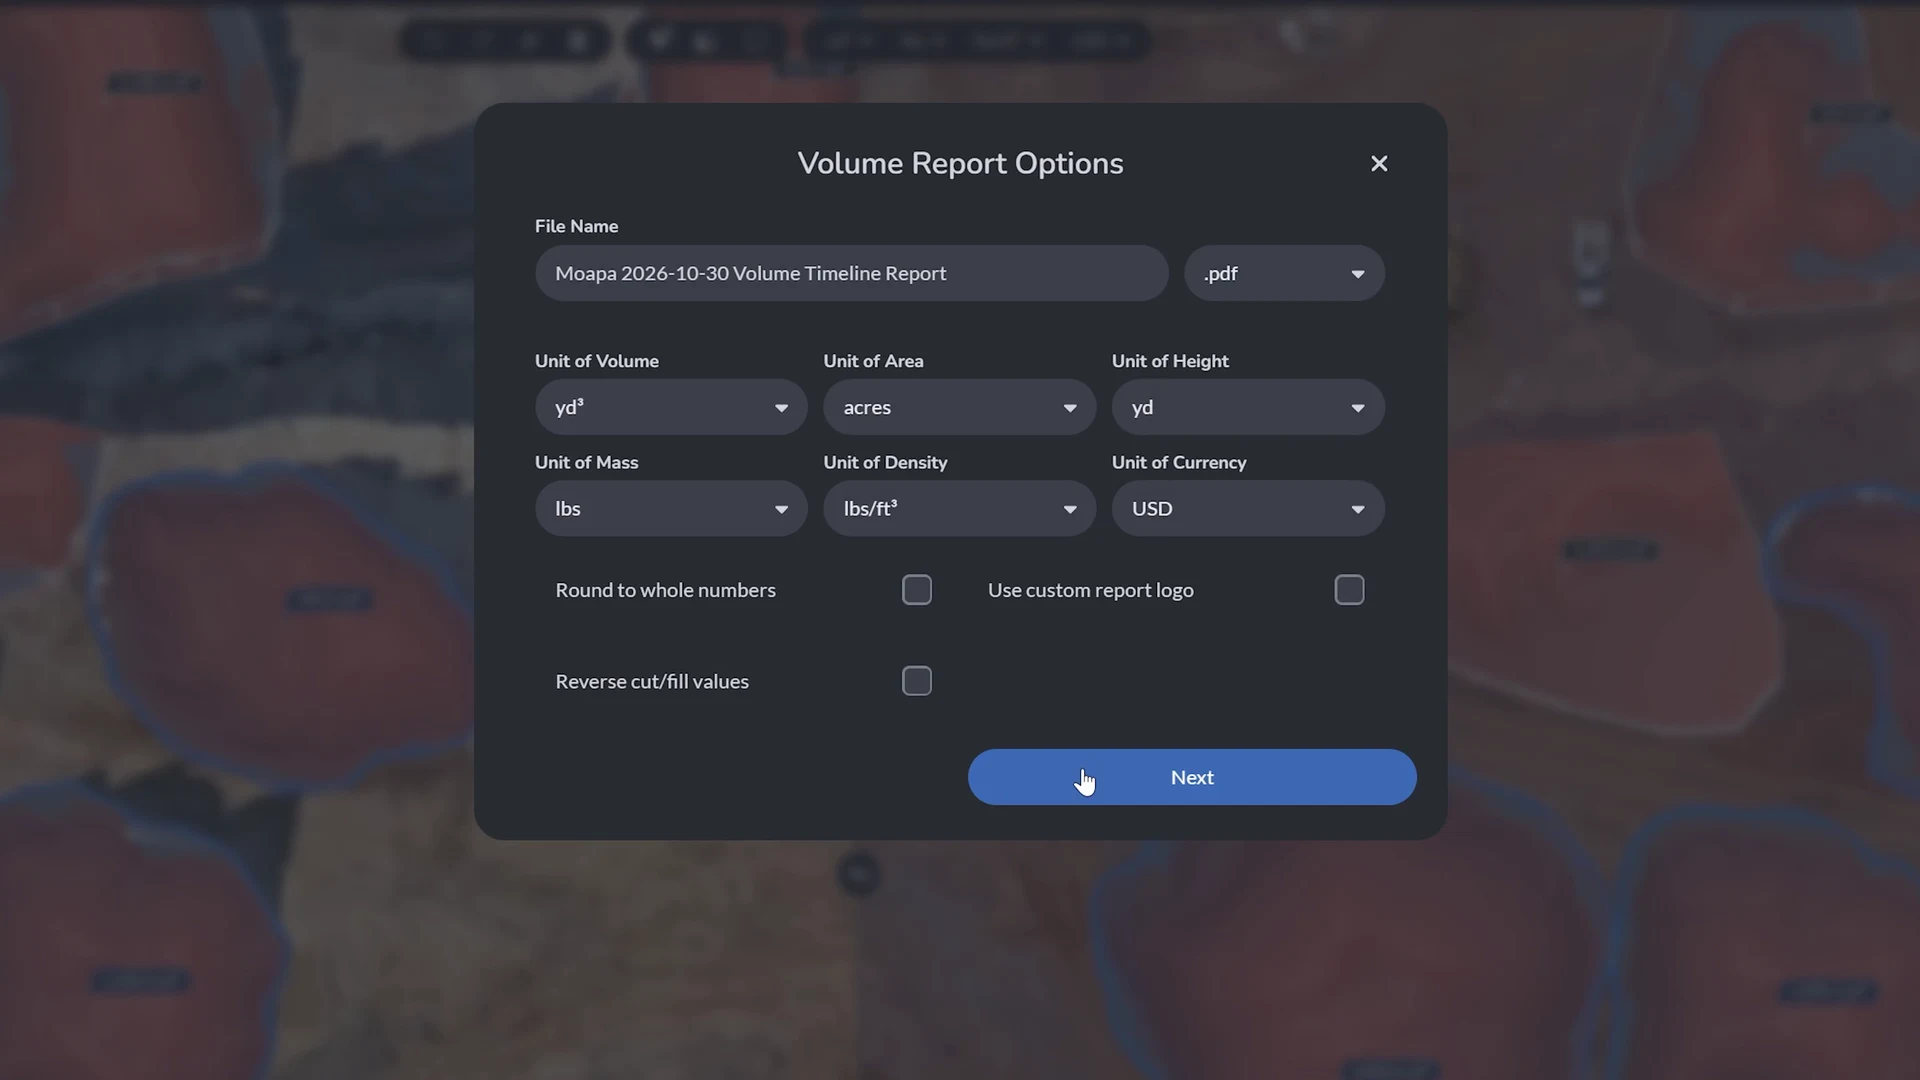
When you’re ready to export, expand the inspection panel, and click Generate Report For Selection. In Volume Report Options, enter a file name and set the units you want to use. You can round values to whole numbers, reverse cut and fill values, or add a custom report logo. For this example, we’ll keep the default settings and generate a PDF.
Step 5: Arrange Stockpiles and Verify Footprint Matches
Click Next to open Arrange Stockpiles. Each row pairs a stockpile from one survey with a stockpile from the other. Use the footprint overlay in the center to verify each match. If a pair is out of order, drag the stockpiles into the correct rows before continuing.
Step 6: Confirm Details and Generate the Volume Report
Click Next again and review the survey dates, file name, units, and stockpiles included. Then click Generate Volume Report. Once the PDF is ready, open it to review the comparison and share the report with your team or client.