Animate Your Project View with Camera Controls in PixElement
If you are looking to create a smooth fly-through of a project you just mapped, present a site to a client, or guide someone through specific areas of a 3D model, the Camera Controls tool gives you a more controlled way to navigate, animate, and record project views directly in app.
With options for movement speed, FPS-style looking, auto-orbit paths, and keyframe playback, Camera Controls make it easier to create smooth project walkthroughs directly inside the application.
Flight Modes: Fly, Orbit, and Path
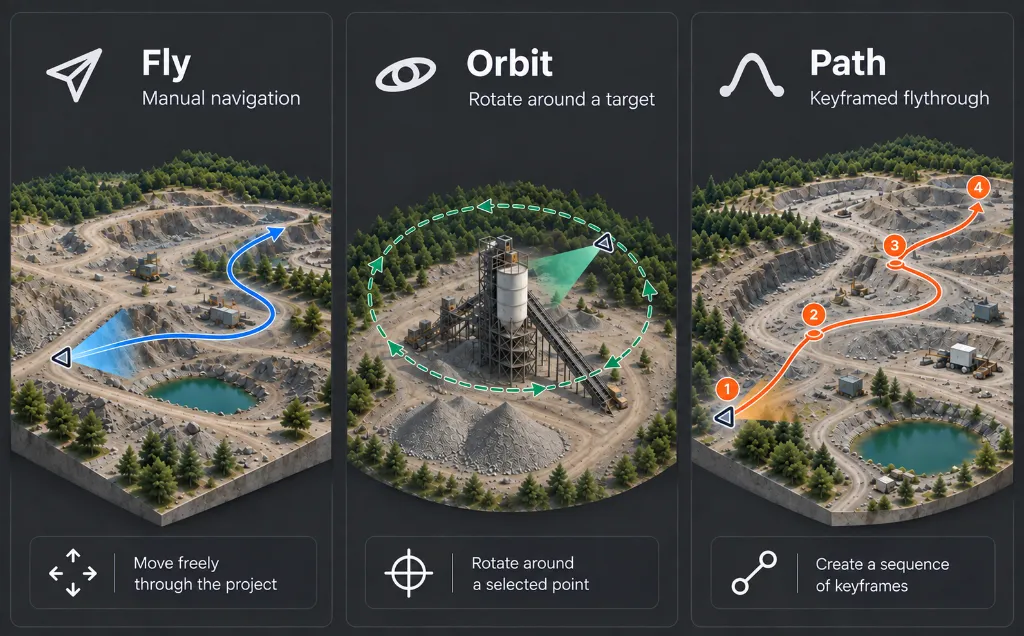
Camera Controls includes three primary motion modes: Fly for manual navigation, Orbit for automated movement around a selected point, and Path for creating repeatable keyframe-based flythroughs. Together, these modes support project inspection, site presentation, and more controlled navigation through 3D data.
Window Controls
The Camera Controls window includes a Cancel motion option at the top of the tool.
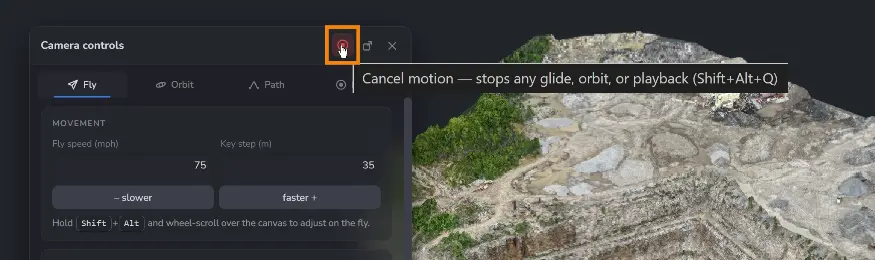
This stops any active glide, orbit, or keyframe playback. It gives users a quick way to interrupt an animation if the view needs to be adjusted, restarted, or changed.
This is especially helpful when testing camera paths or preparing a screen recording.
Users are also able to detach the window into its own window.
Fly Tab
The first tab is the “Fly” tab, which is where users can adjust camera travel speed and movement step distance while using WASD controls to move forward and side to side.
Users can adjust:
- Fly speed, measured in miles per hour
- Key Step, measured in meters
This gives users better control over how the camera travels across the Canvas. A slower speed can be useful for close inspection, while a faster speed may be better for moving across larger project areas.
The tool also includes a shortcut: users can hold Shift + Alt and scroll over the Canvas to adjust movement settings more quickly.
Adjust Look and Rotation Sensitivity
The Look & Rotate section controls how responsive the camera is when changing direction.
The sensitivity slider affects both mouse-look speed and pivot rotation rate. This is important when navigating 3D project data because camera movement that is too sensitive can make navigating difficult, while movement that is too slow can make navigation inefficient.
Lower sensitivity is useful for detailed review of a specific area. Higher sensitivity is useful when quickly orienting around a large model.
Use FPS Look for First-Person Navigation
In the Look & Rotate section, FPS Look allows users to navigate the Canvas in a first-person viewing style. This is similar to moving through a 3D scene with direct camera control, making it easier to inspect a model from the perspective of someone moving through or around the site.
To use FPS Look, users can enable the mode, then move the mouse to look around the Canvas. The tool notes that FPS Look uses pointer lock, and users can press the backslash (\) button or Esc to release the camera.
Create Orbit Animations
The Orbit tab allows users to create a smooth orbit around a selected point on the Canvas.
Users can define:
| Setting | Description |
|---|---|
| Radius | Distance from the selected target point |
| Duration per orbit | Length of time for each orbit (seconds) |
| Start height | Camera height at the beginning of the orbit |
| End height | Camera height at the end of the orbit |
| Total orbits | Number of full rotations around the target |
To begin, select Pick target, then click on the Canvas to set the orbit center. Once the target is selected, the exact target information will fill in, and your orbit path will be previewed – both what the camera will see in the submenu, and the actual path with camera frustum over the canvas. Then hit Start to begin the orbit animation.
This is especially useful for presenting a project area from all sides. For example, users can orbit around a stockpile, construction site, quarry, building, or terrain feature to show its full shape and surrounding context.
Because the start and end heights can be different, the camera can also ramp upward or downward during the orbit. This creates a more dynamic animation than a simple flat rotation.
You can edit the numbers in the module as the rotation is occurring to refine your animation.
Path - Create and Play Keyframes
For more customized camera motion, the Path tab allows users to capture multiple camera positions and play them back as a sequence, as well as save the flights to play back at another time.
The first setting you must decide is which mode to be in (Constant Speed or Fixed Time Per Leg). For Constant Speed, choose which Cruise speed you would like the camera to move at, as well as the Turn Rate in degrees per second. For Fixed time per leg, choose the travel time per leg.
A waypoint stores the current camera view. Users can move the camera to a desired position, click Add current, then move to another view and add another keyframe. When played back, the software interpolates between the captured camera positions.
For each waypoint, you are able to edit each position and what kind of transition you would like, as well as edit how many seconds the camera is held for once it reaches that position. You are also able to rearrange the waypoints to your liking.
You can also play back each waypoint to verify it matches your desired view.
A graph is generated to display the keyframes’ positioning and orientation.
At the bottom of the Path tab, users can name and save flights for future access. Upon wanting to access it again, users can load the saved keyframe flight.
Record
The Record tab allows users to record any of the previously discussed motions (Fly, Orbit, and Path).
Select your frame rate, video quality, and whether you would like a pre-recording “countdown”.
Mask Recording to an Area
With the Mask Recording to an Area feature, hit the button to draw either a box or polygon on the canvas that you would like to highlight, then click or drag the polygon or box over the region you would like focused on for the recording. When you record, only the region you selected will be shown in the final video. Hit the Clear button to remove your drawn region.
To begin the recording select Start, then navigate to your preferred motion tab, and hit start/play/or control your movement.
Saving your Recording
You are able to pause and resume your recording. Upon completion, hit Stop & Save.
All mouse cursor movements and menu items/tools will not be visible in the recording. The recording will export as a .webm and will ask for you to browse to save to your device.
A More Controlled Way to Navigate Project Data
The Camera Controls tool gives users more precision over how they move through their projects. With adjustable movement speed, FPS Look, Auto-Orbit, and Keyframe playback, users can create smoother and more intentional views of their project data.
Instead of manually navigating the Canvas every time, users can define how the camera moves, where it looks, and how long each motion takes.
For inspection, review, and presentation, Camera Controls provide a cleaner way to explore and communicate 3D project information directly in the app.