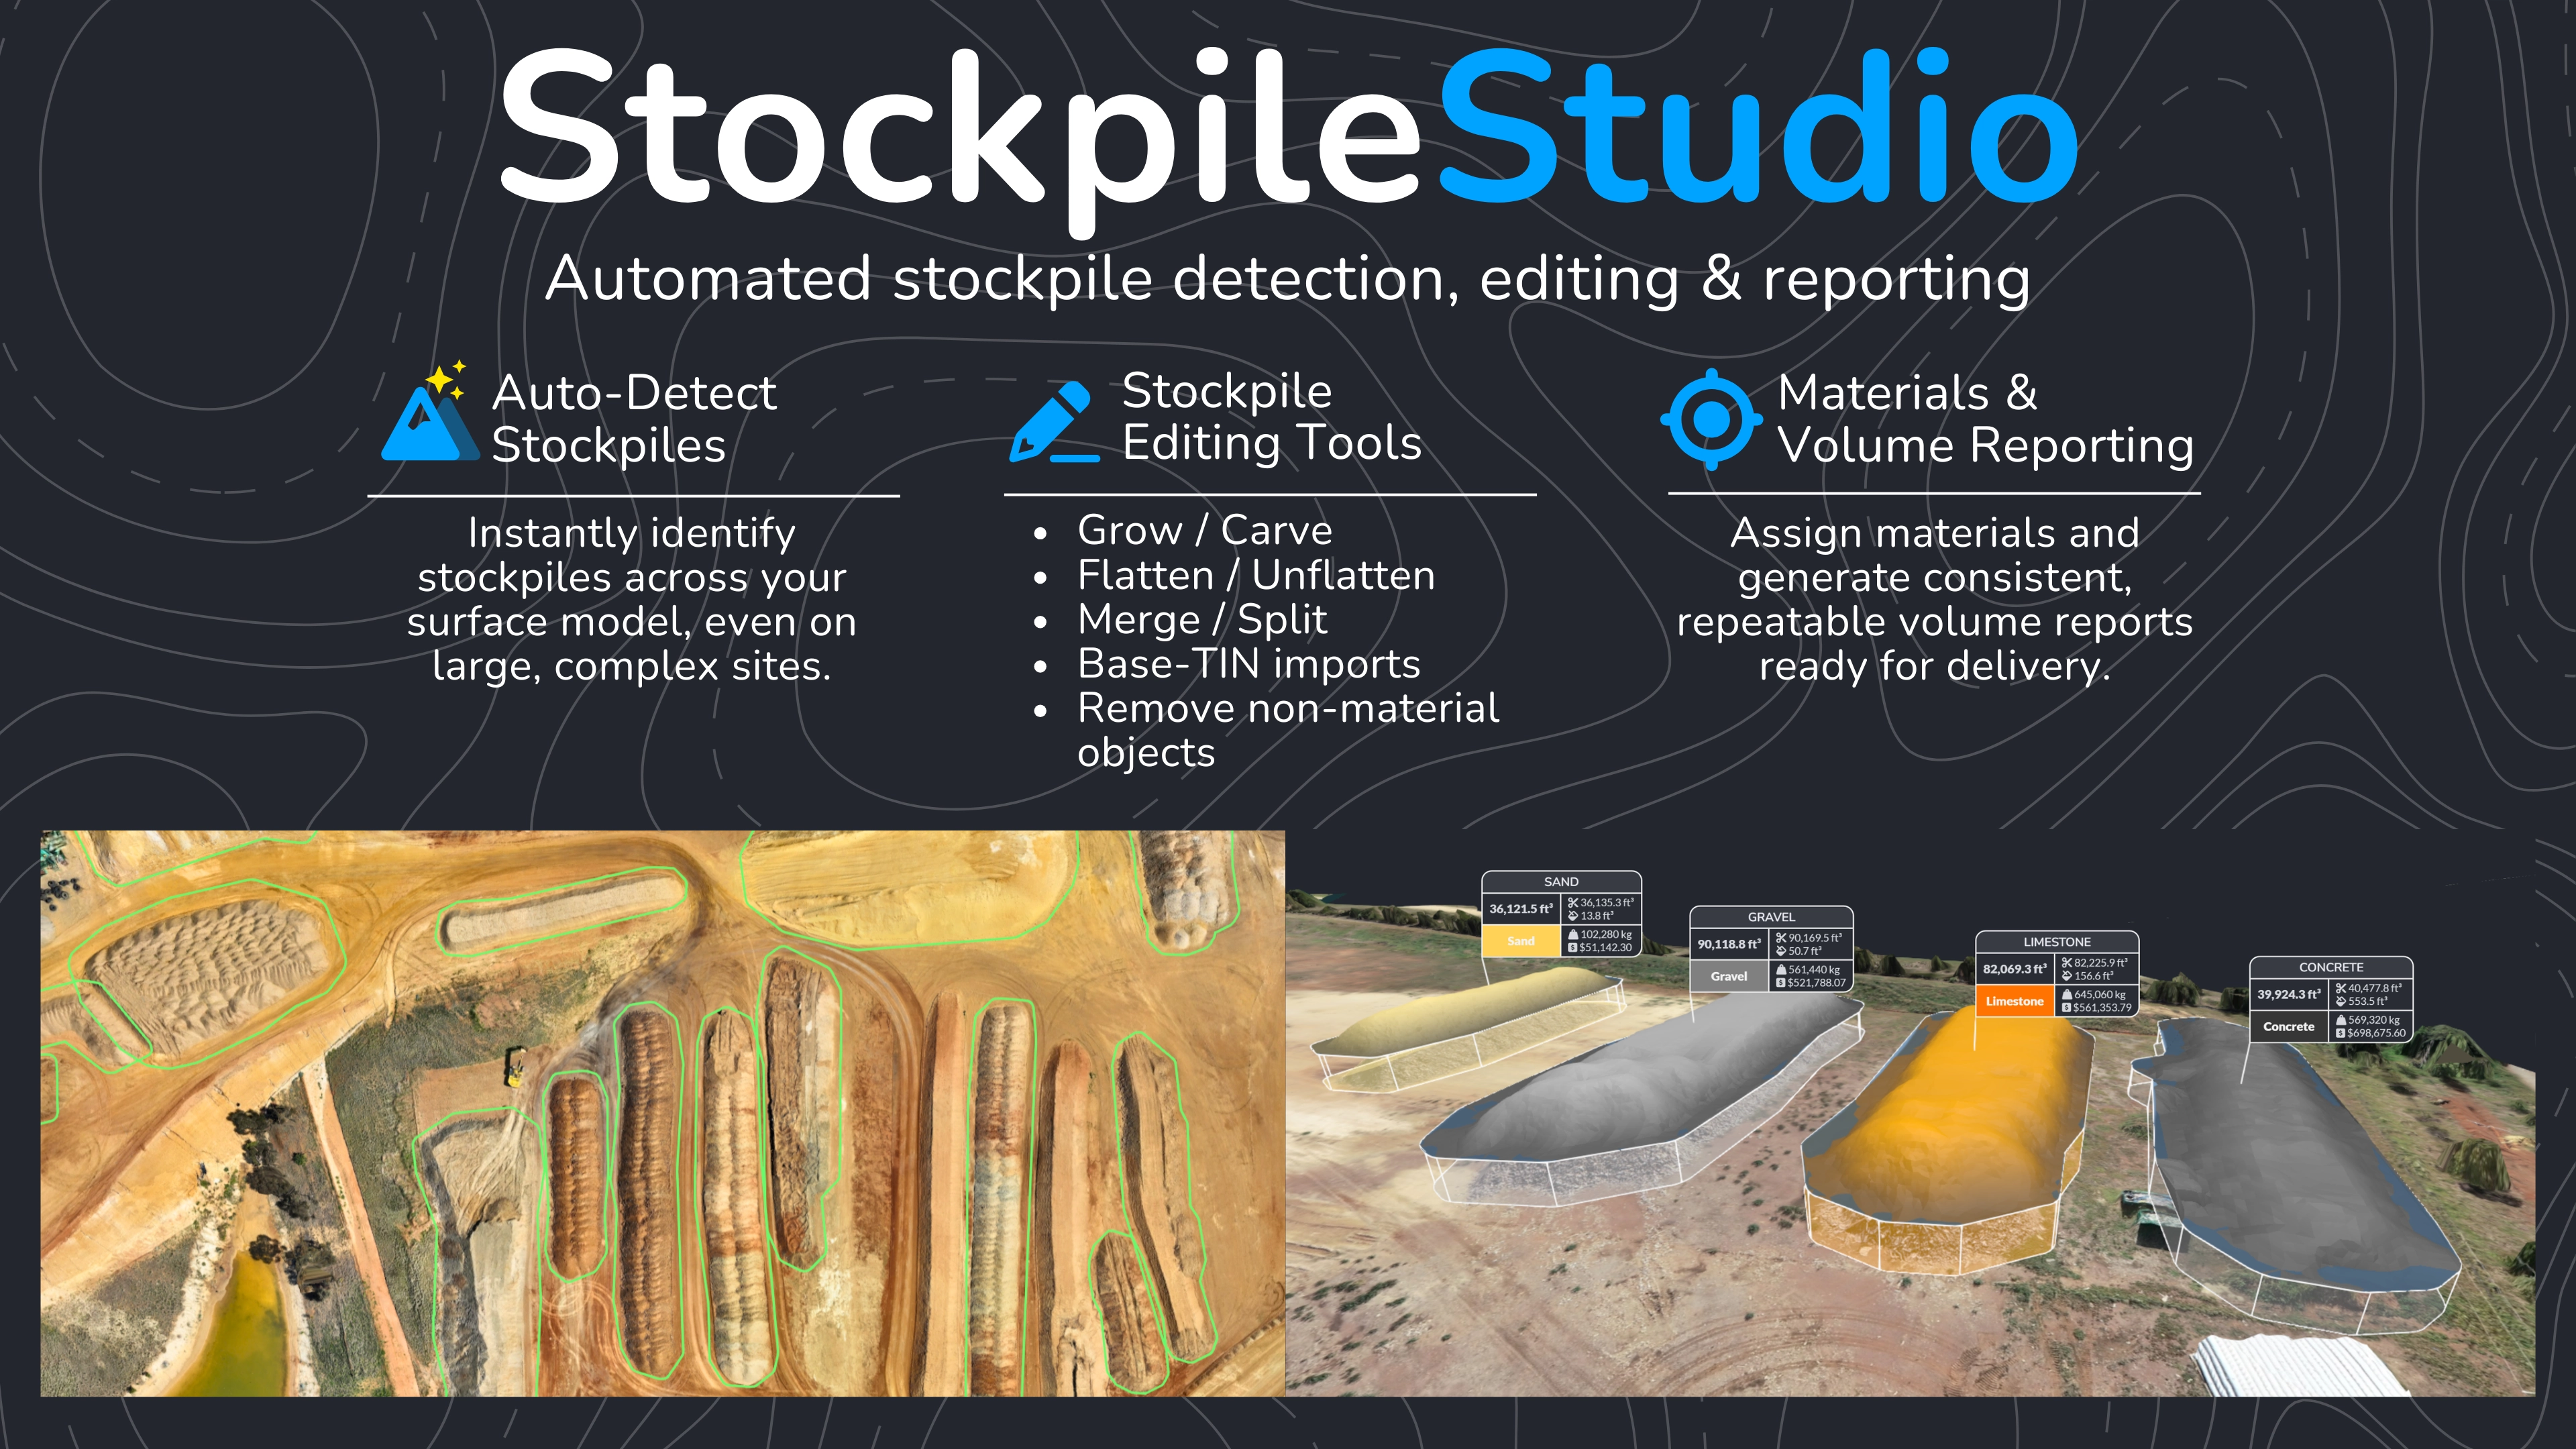
Introducing StockpileStudio
StockpileStudio is a dedicated add-on module for detecting and measuring stockpiles directly inside PixElement. It is built for workflows where fast, repeatable, and accurate volume calculations matter—without relying on manual digitizing or external tools.
The module provides automated stockpile detection, manual refinement tools, material assignment, and reporting capabilities, all accessible from a dedicated tab within the interface for efficient volumetric analysis and decision-making.
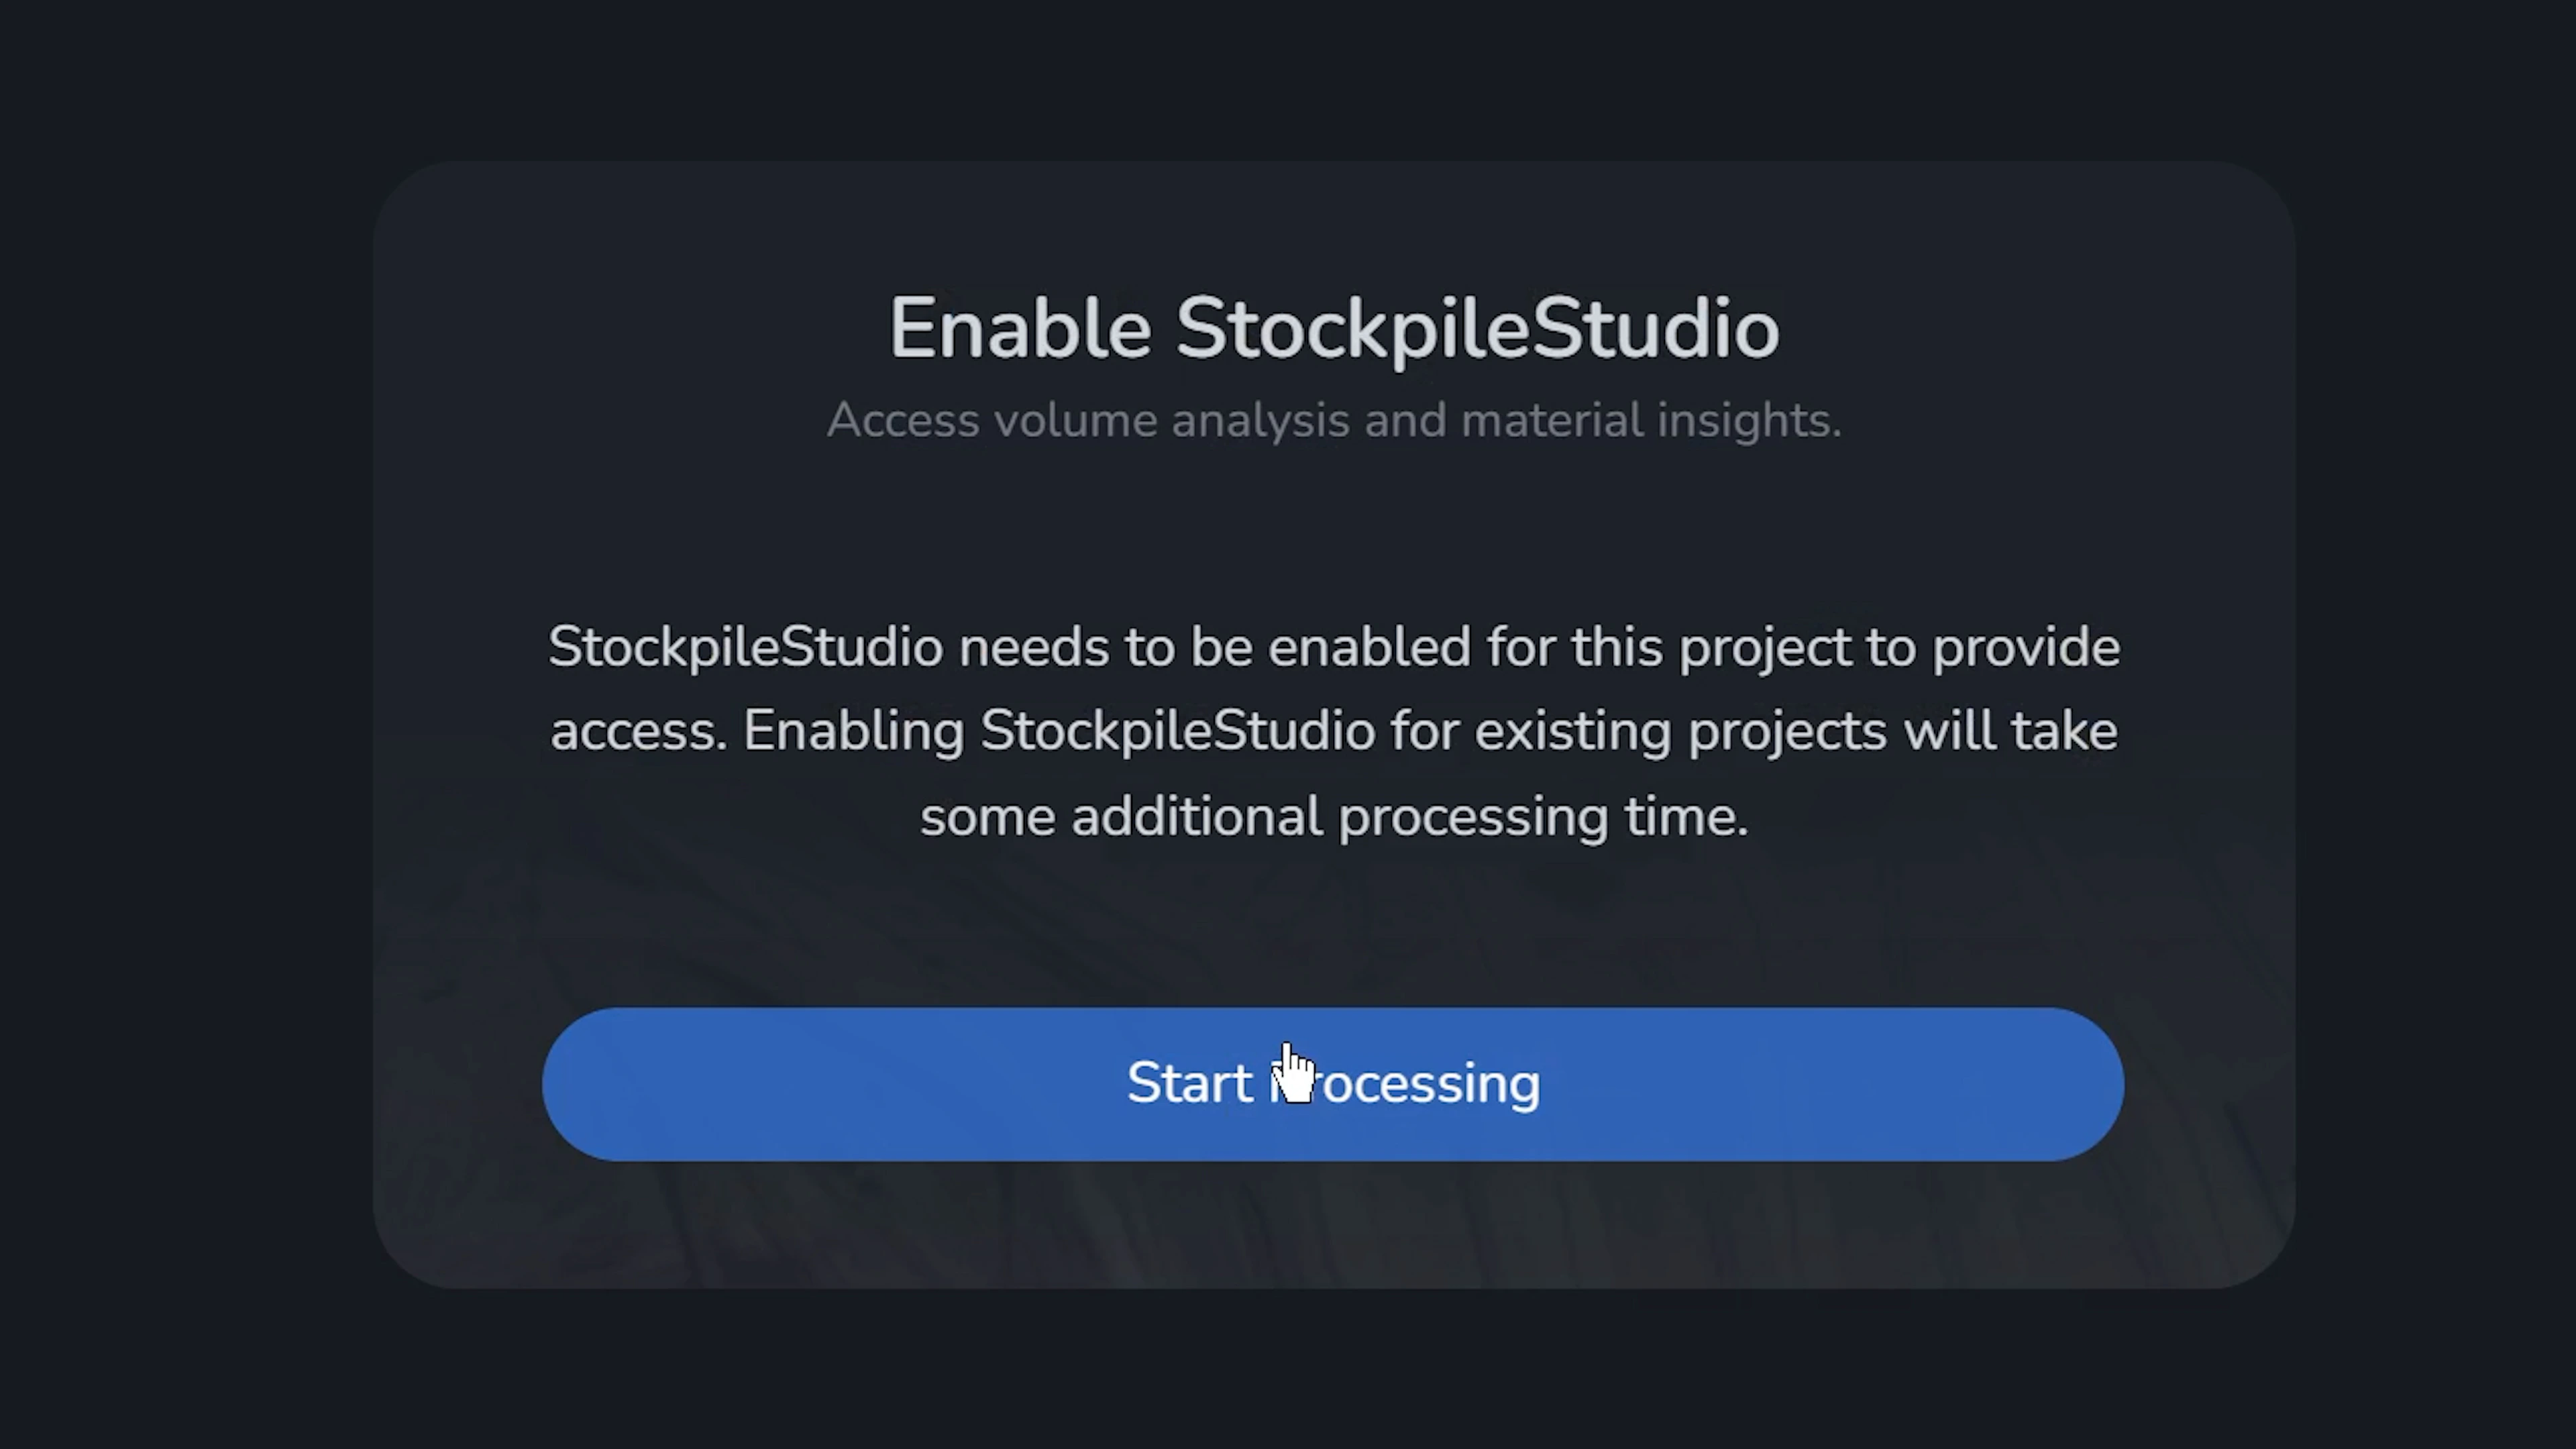
StockpileStudio can be used on both new projects and previously processed projects. To access the module, StockpileStudio must be enabled for the project by checking the StockpileStudio add-on during project creation. When enabled on an existing project, additional processing is required, and you will be prompted to start processing. Simply select the StockpileStudio tab within your desired project and select “Start Processing”.
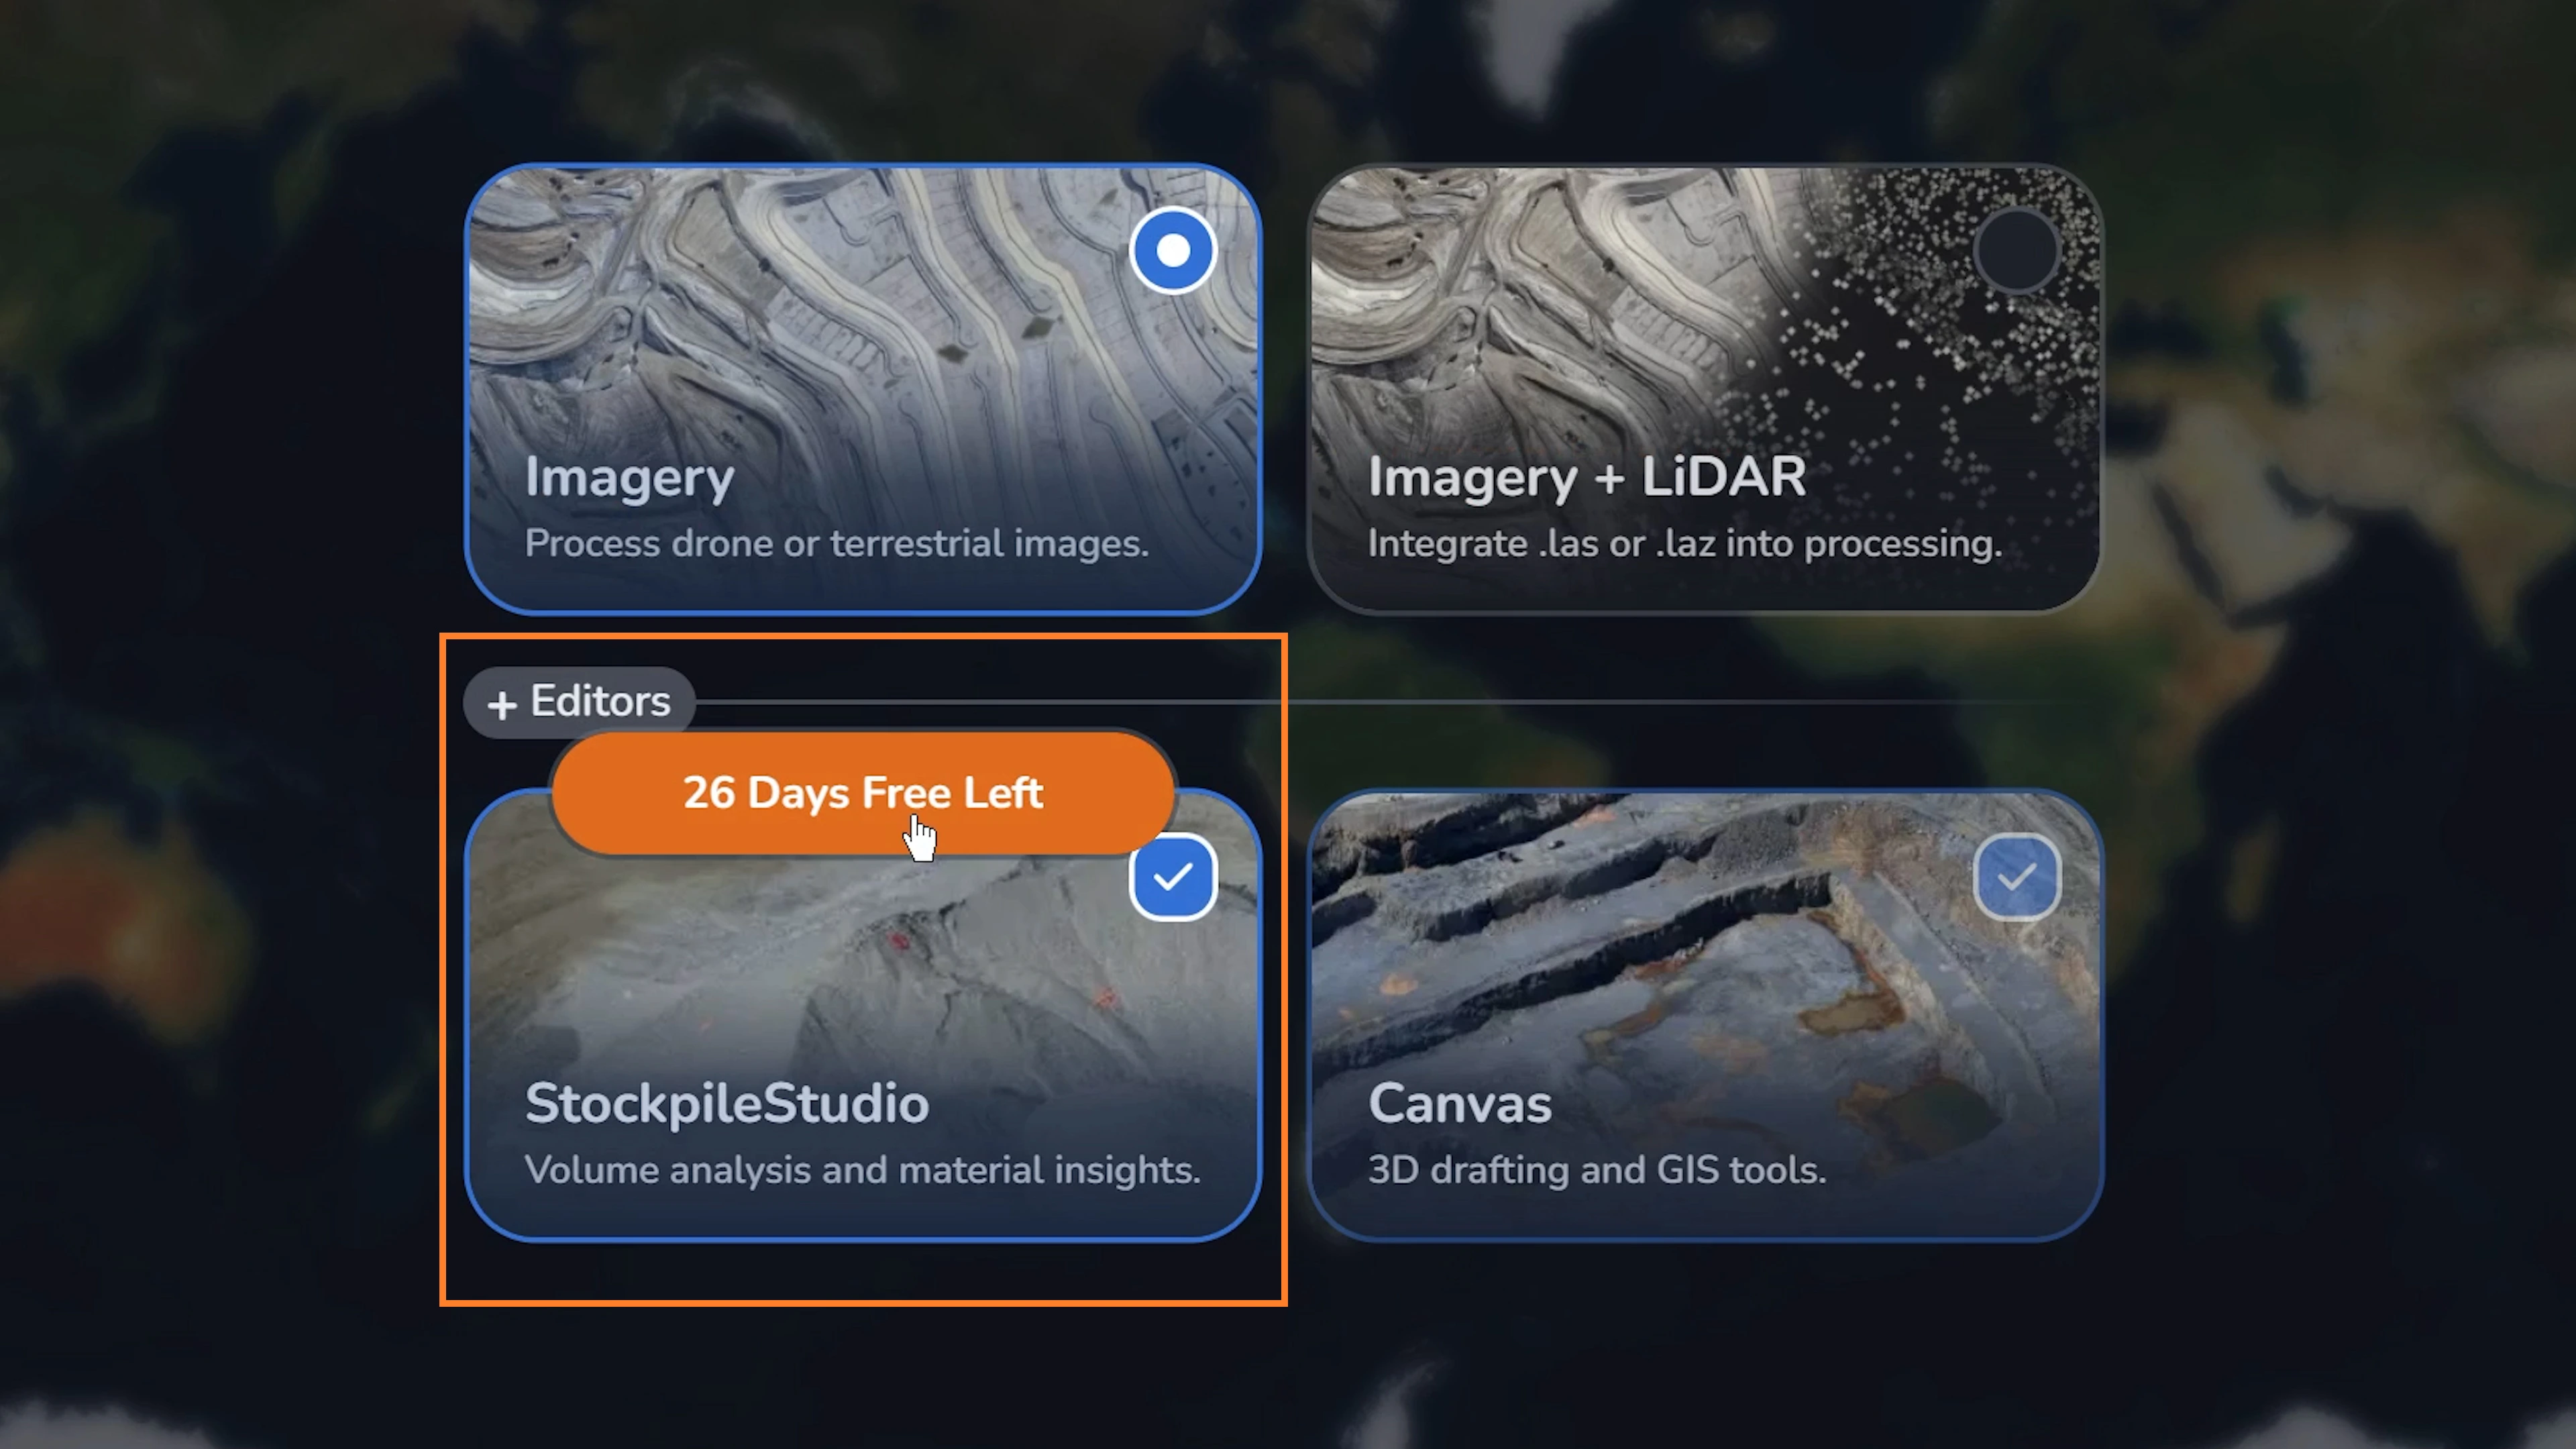
Every user will be granted a one-month free trial of StockpileStudio, allowing you to test the module on real projects and evaluate its impact within your existing workflow.
Keyboard Shortcuts
Selecting Multiple Stockpiles
- Hold Alt and click+drag to box select stockpiles.
- Hold Shift + click to select stockpiles.
Drawing Polygons
- Hold Shift + click hold to trace or draw polygons freely instead of clicking at each vertice.
Basic Layout
Upon loading the StockpileStudio tab, you will see two toolbars along the left hand side. The first bar is the ADD toolbar. Here, you are able to select:
Auto Stockpiles:
Automatically detects potential stockpiles based on a confidence threshold. Lower thresholds return fewer, high-confidence stockpiles. Higher thresholds include more detections, but may also capture non-stockpile objects such as trees or other terrain features. Selected stockpiles will appear with a green highlighted boundary. When you have selected your desired stockpile percentage, click Add Stockpiles.
Pick Stockpiles:
Allows you to hover over individual piles to add them to your selection. The stockpile boundary is automatically detected, and added to your selection when you click on the respective stockpile.
Outline Stockpiles:
Allows you to manually draw a custom polygon to define a stockpile or area of interest.
- You can create a polygon by clicking to place individual vertices, or draw more quickly by holding SHIFT + clicking, and dragging to trace the polygon.
- To complete the polygon, hit the Right Mouse Button
- To finish that polygon and continue to create polygons, hit the middle mouse button.
Surface Intelligence: Conveyors, Vegetation, and Non-Material Features
StockpileStudio automatically calculates volumes from the project’s Digital Elevation Model (DEM), analyzing surface geometry, slope, and elevation continuity to distinguish material piles from surrounding terrain.
In active yards, conveyors, stacker booms, trucks, loaders, light vegetation, and minor terrain irregularities often become “baked into” the DEM. If left unaddressed, these features can distort pile crests, bias cut/fill comparisons, and introduce systematic error.
In most cases, non-material features will not be incorporated into final volume calculations.
This is achieved through:
- Confidence-based detection that prioritizes stockpile-like morphology and filters out inconsistent surface features
- Base TIN comparison, where volume is calculated against the defined ground surface, minimizing the influence of linear or elevated objects
- Localized surface editing, using the Flatten/Unflatten tool when temporary site conditions intersect a pile
The result is volume measurement that reflects material mass, not temporary infrastructure or surface noise.
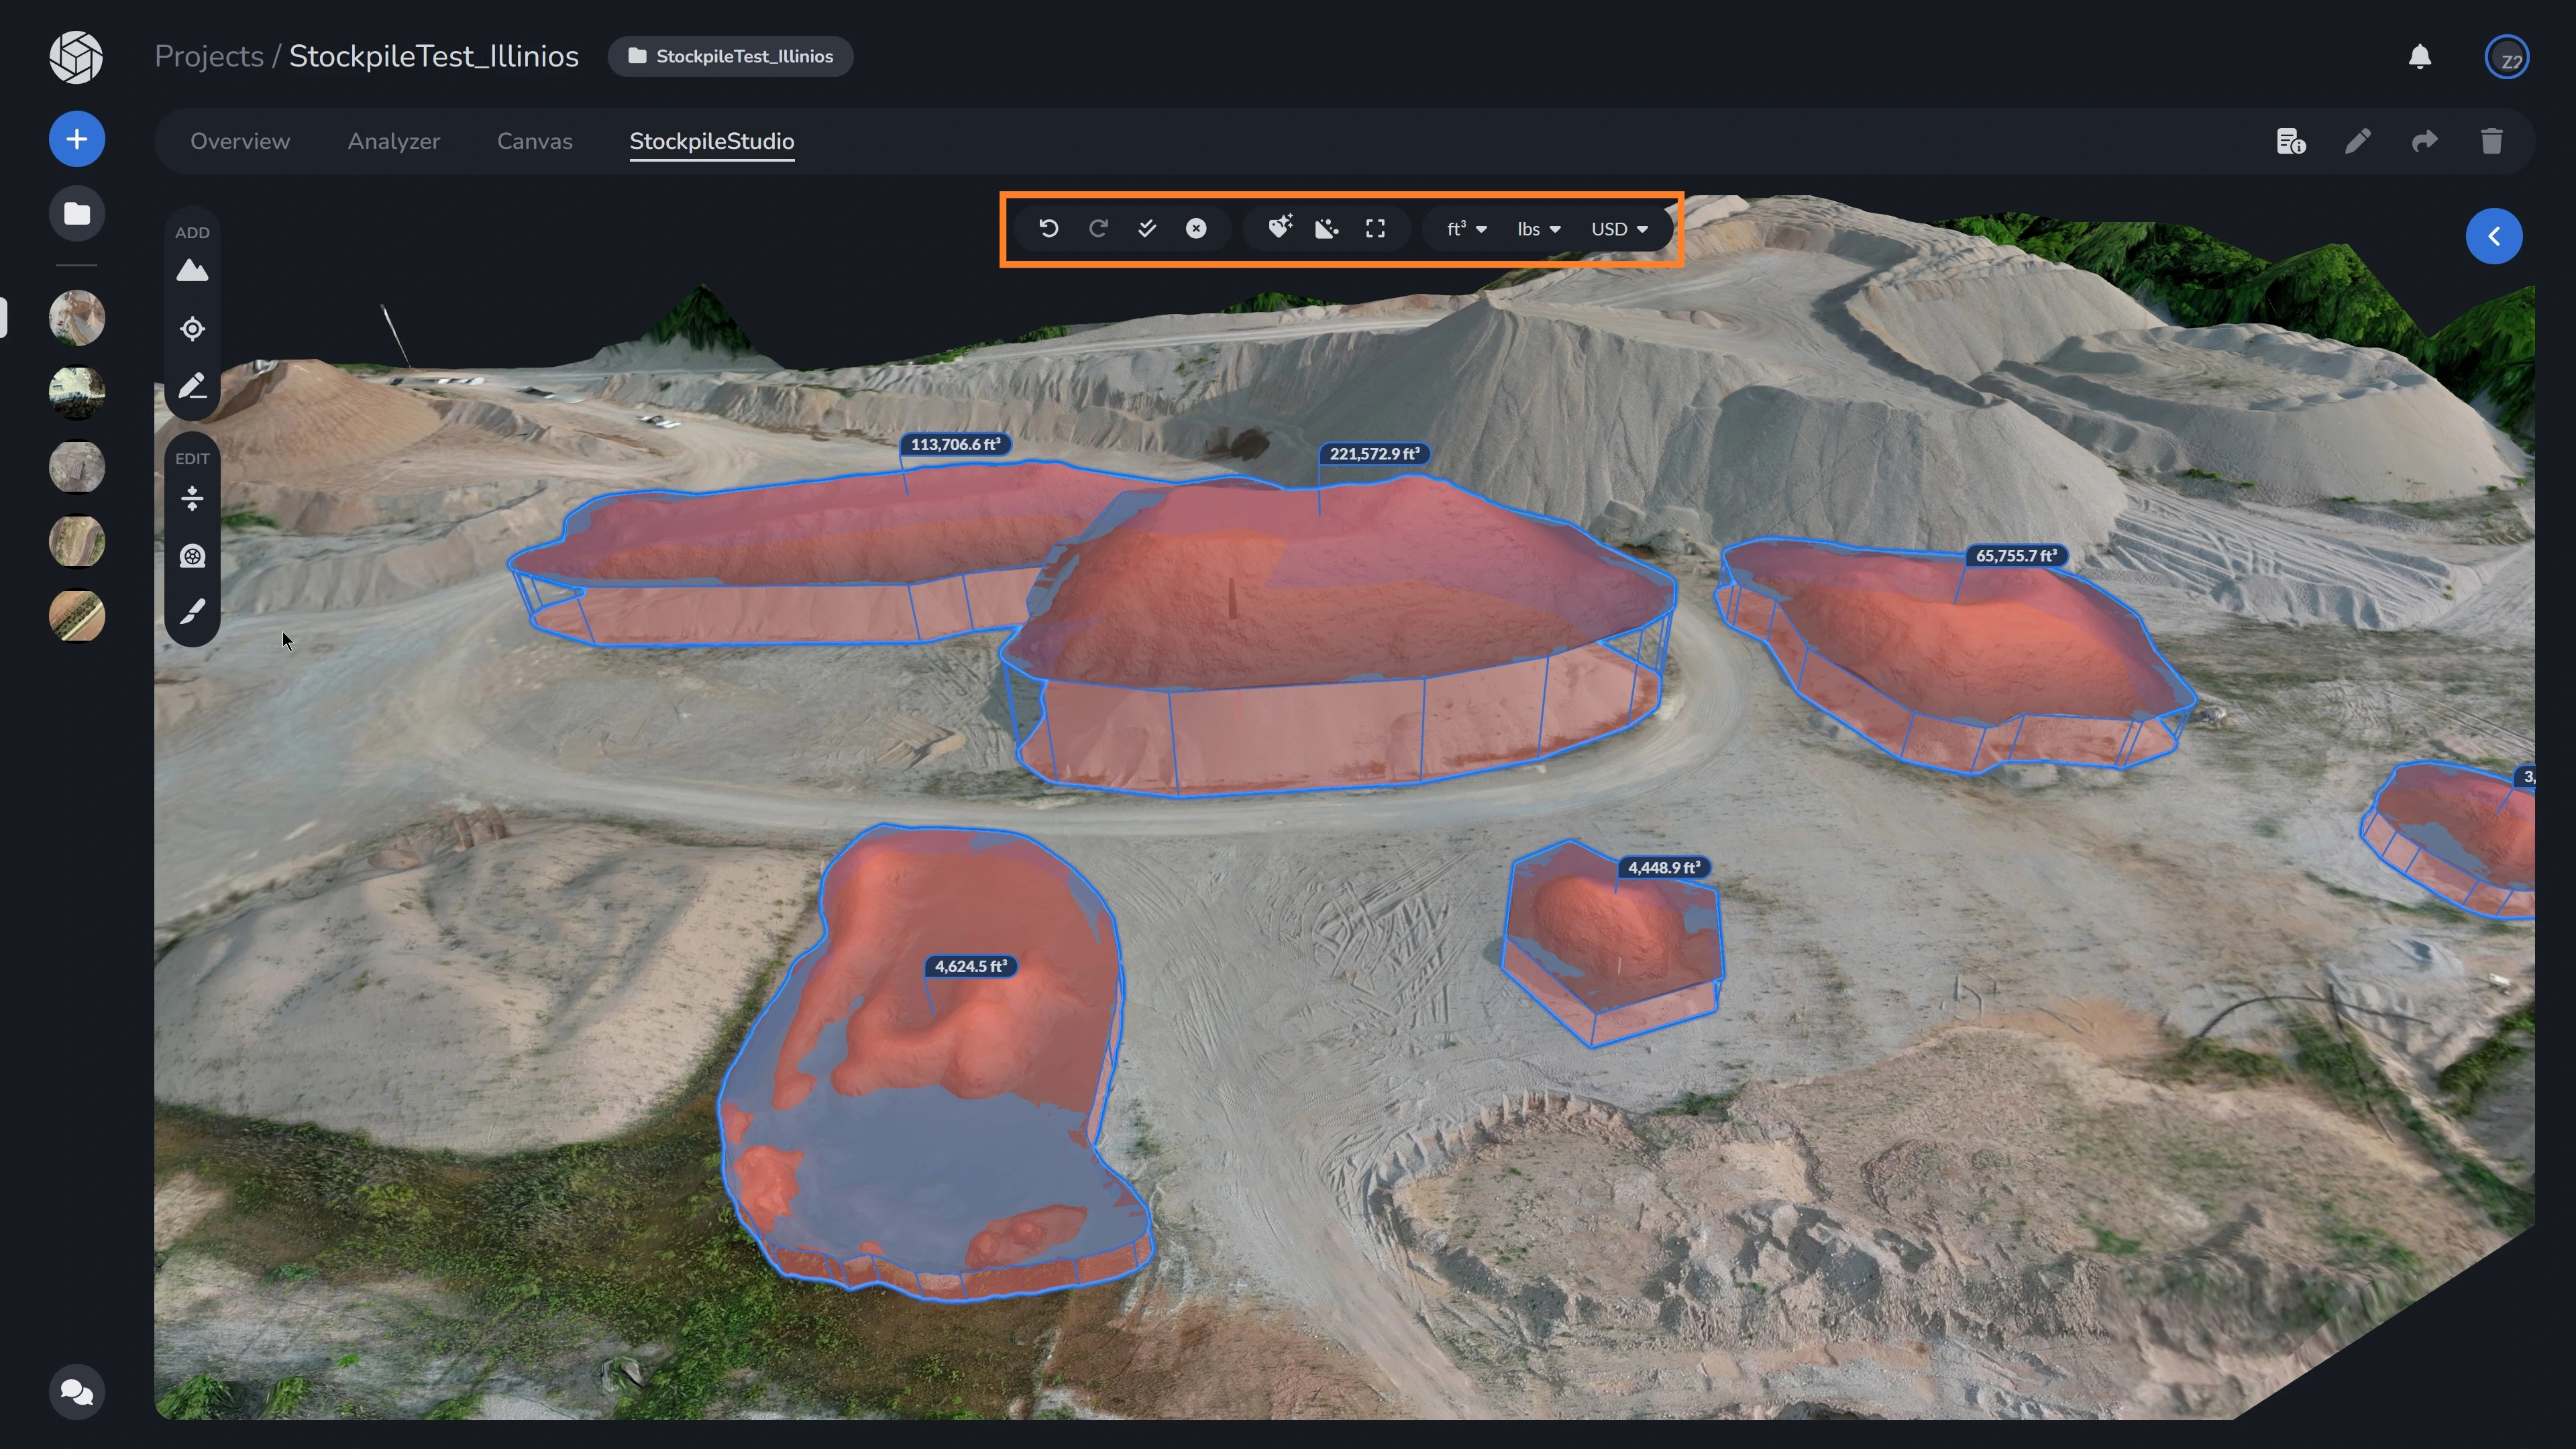
Center Toolbar:
The toolbar located on the top center of the module allows you to (from left to right):
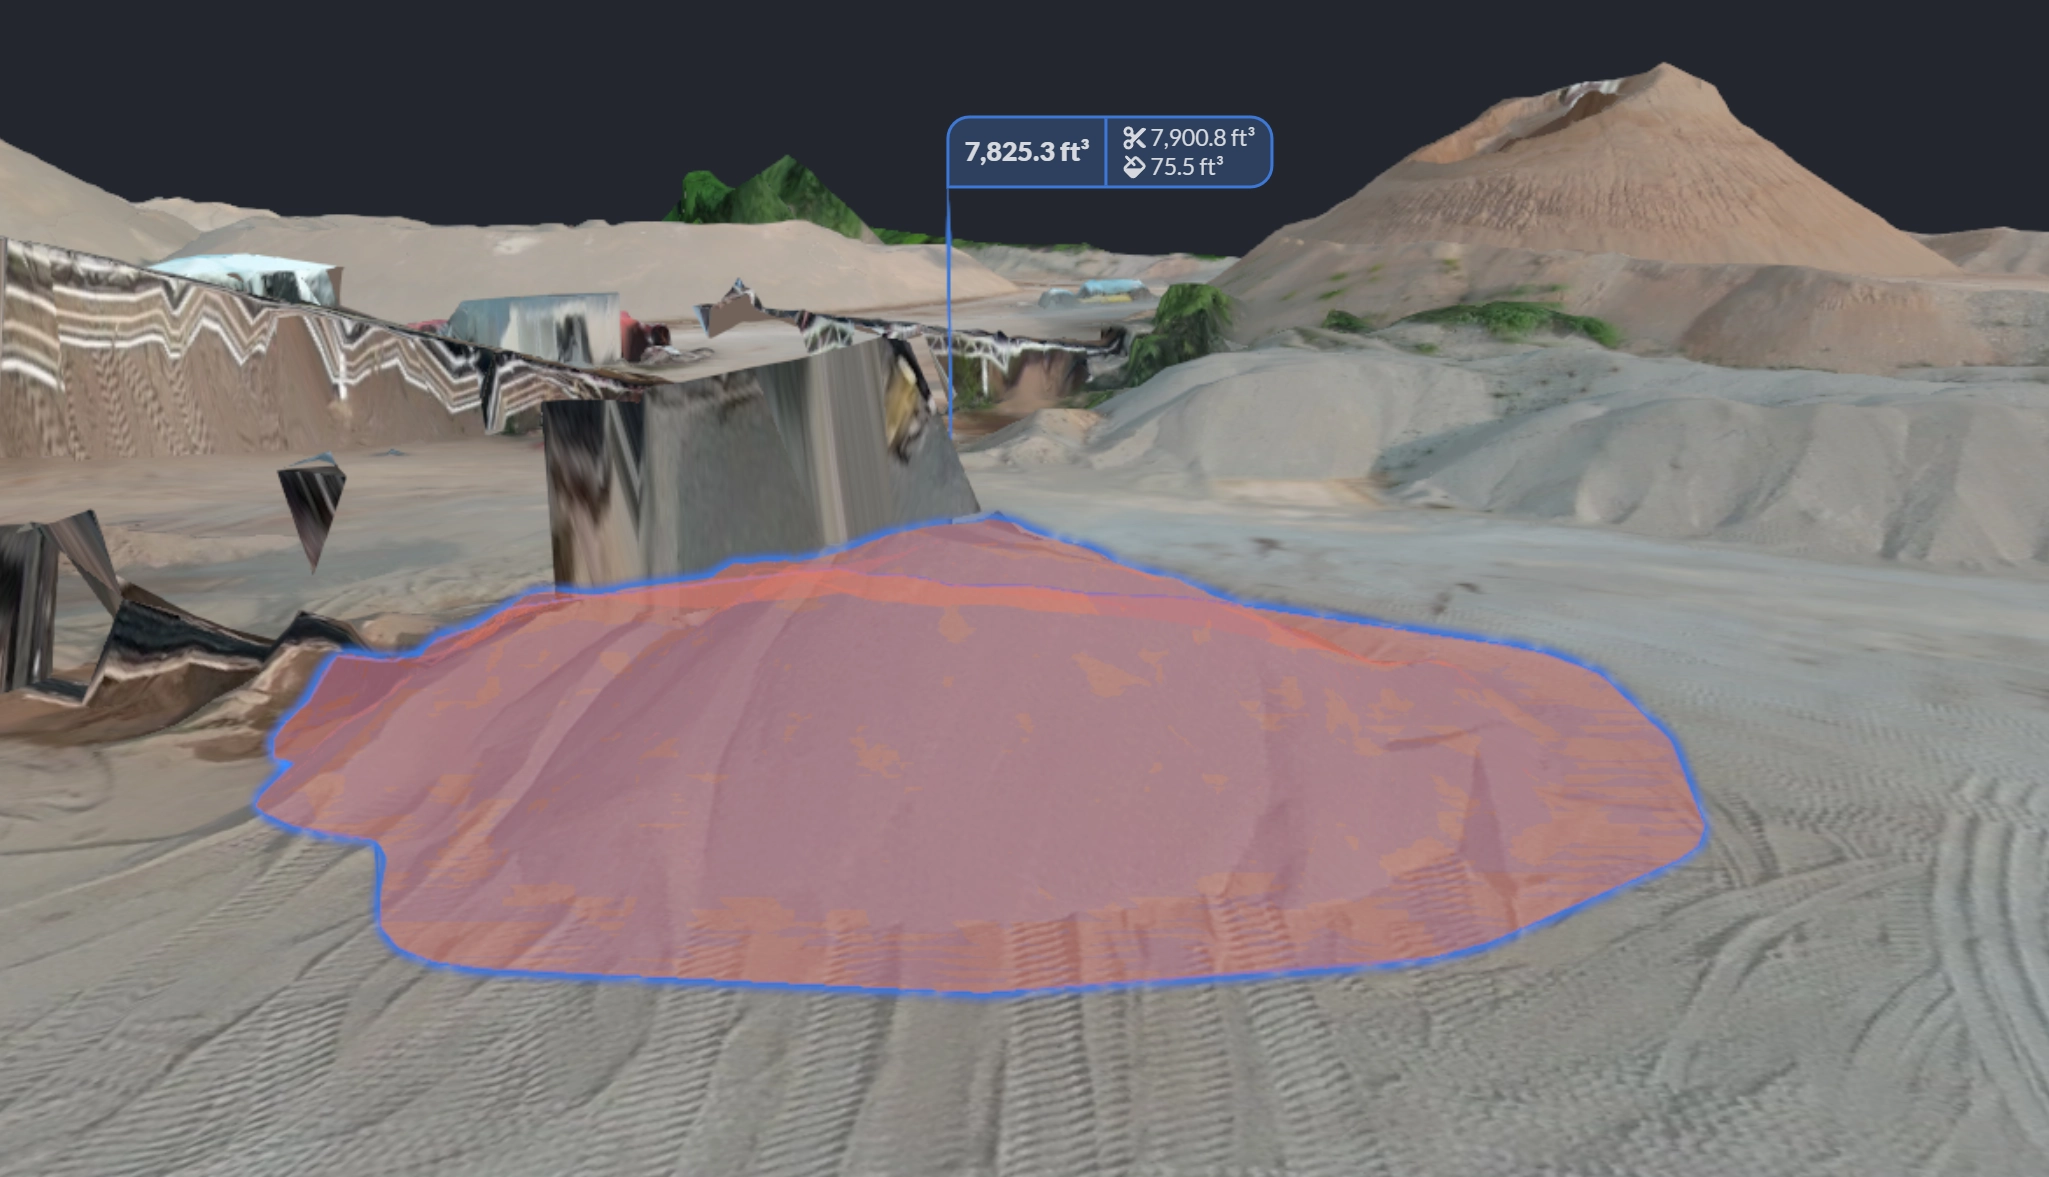
Upon your stockpiles being created, each stockpile will appear with an elevated overlay of the stockpile, along with a label displaying its name (if given one), volume, cut, and fill.
Stockpile Submenu:
By clicking the blue expand button on the top right, you are able to view and edit information for each or multiple stockpiles. You can select multiple stockpiles by clicking on them while holding shift. In this submenu, you are able to see how many stockpiles you have selected, and the cumulative volume, cut, and fill of your selection. You are also able to assign a material, open up the edit materials dropdown to enter in your aggregate types, and customize the label name/description. You can click each stockpile individually, or select multiple to give repeat descriptions and material labels.
Assigning the Base Layer:
Before calculating volume, you must define the base TIN surface — the surface that represents the ground beneath the stockpile. The software calculates volume by comparing the stockpile surface to this base.
Auto
Generates a base TIN automatically using the 3D boundary points of the stockpile. The software estimates the underlying ground surface based on the perimeter geometry of the pile.
Use this when:- The pile sits on natural or uneven terrain
- You do not have a predefined base surface
- You want a quick, reliable estimate
Flat
Creates a horizontal base surface using the 2D boundary of the stockpile at a specified elevation. This assumes the stockpile sits on a level surface (e.g., concrete pad or graded yard). When a single stockpile is selected, the Base Elevation will be displayed and can be chosen by specifying the exact elevation by entering it into the prompt, or you can click the "Pick Elevation" button and click on any point in the scene to use that elevation.
Use this when:- The stockpile sits on a flat pad
- You know the base elevation
- You need a simplified comparison surface
Compare
Allows you to compare your current stockpile against a previously surveyed surface. Upload a .dxf file representing the base TIN. This allows you to measure change over time, compare material accumulation, and calculate cut/fill between survey dates.
Use this when:- You have historical survey data
- You are tracking inventory changes
- You need audit-level comparison
Measuring Bin Stockpiles
Stockpiles stored in bins or containment walls require a different base definition than free-standing piles.
When material sits inside a bin, bunker, or walled containment area, the underlying surface is typically a known flat floor (concrete pad or graded base). In these cases, select Flat under the Base options instead of Auto.
After selecting Flat, use the Pick Elevation tool to define the ground elevation of the bin floor. This creates a horizontal base TIN at the specified elevation, ensuring the calculated volume represents only the material above the known base surface.
This approach removes ambiguity and ensures the reported volume reflects actual stored material, not underlying geometry.
If you have multiple stockpiles selected, you can also select to Join Stockpiles (which will merge the two together),export the .DXF or delete the stockpile.
Generating a Volume Report:
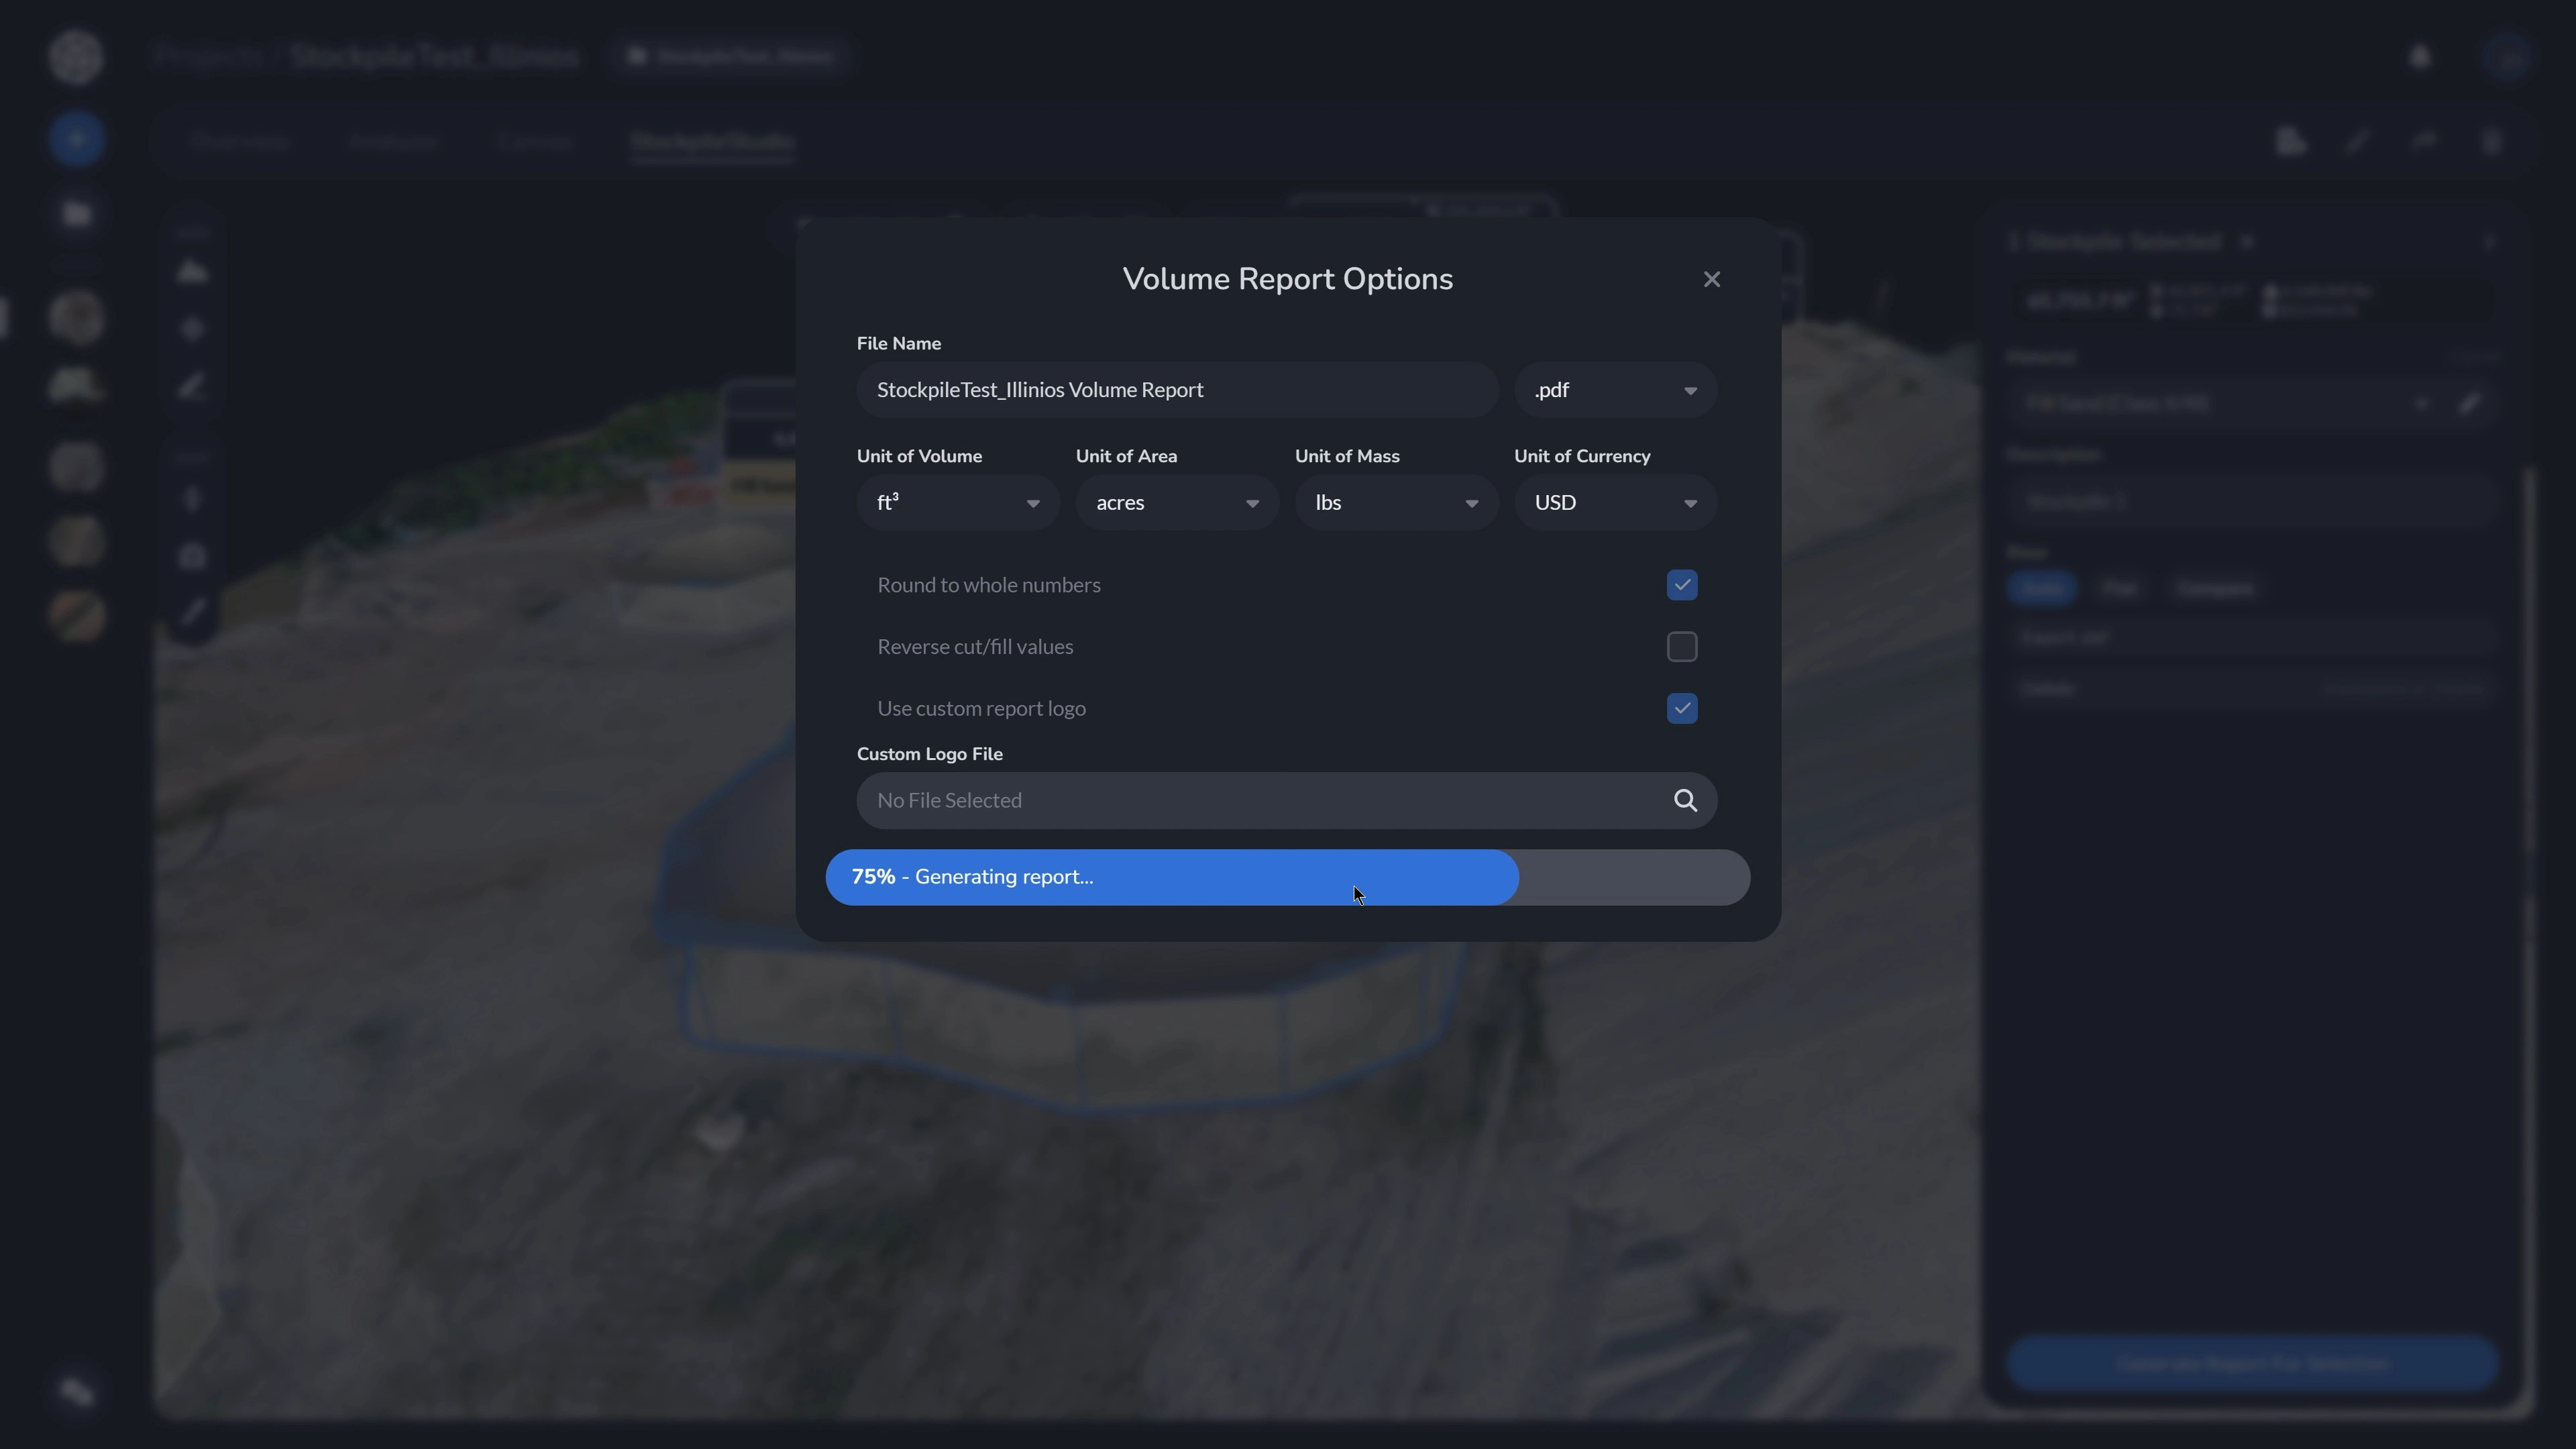
Upon completion, you are able to generate a volume report. Select your file name, type, units/currency using the drop downs, and toggle whether you would like to Round to the Nearest Integer, Reverse Cut/Fill Values, and Use a Custom Report Logo, which you can then upload.
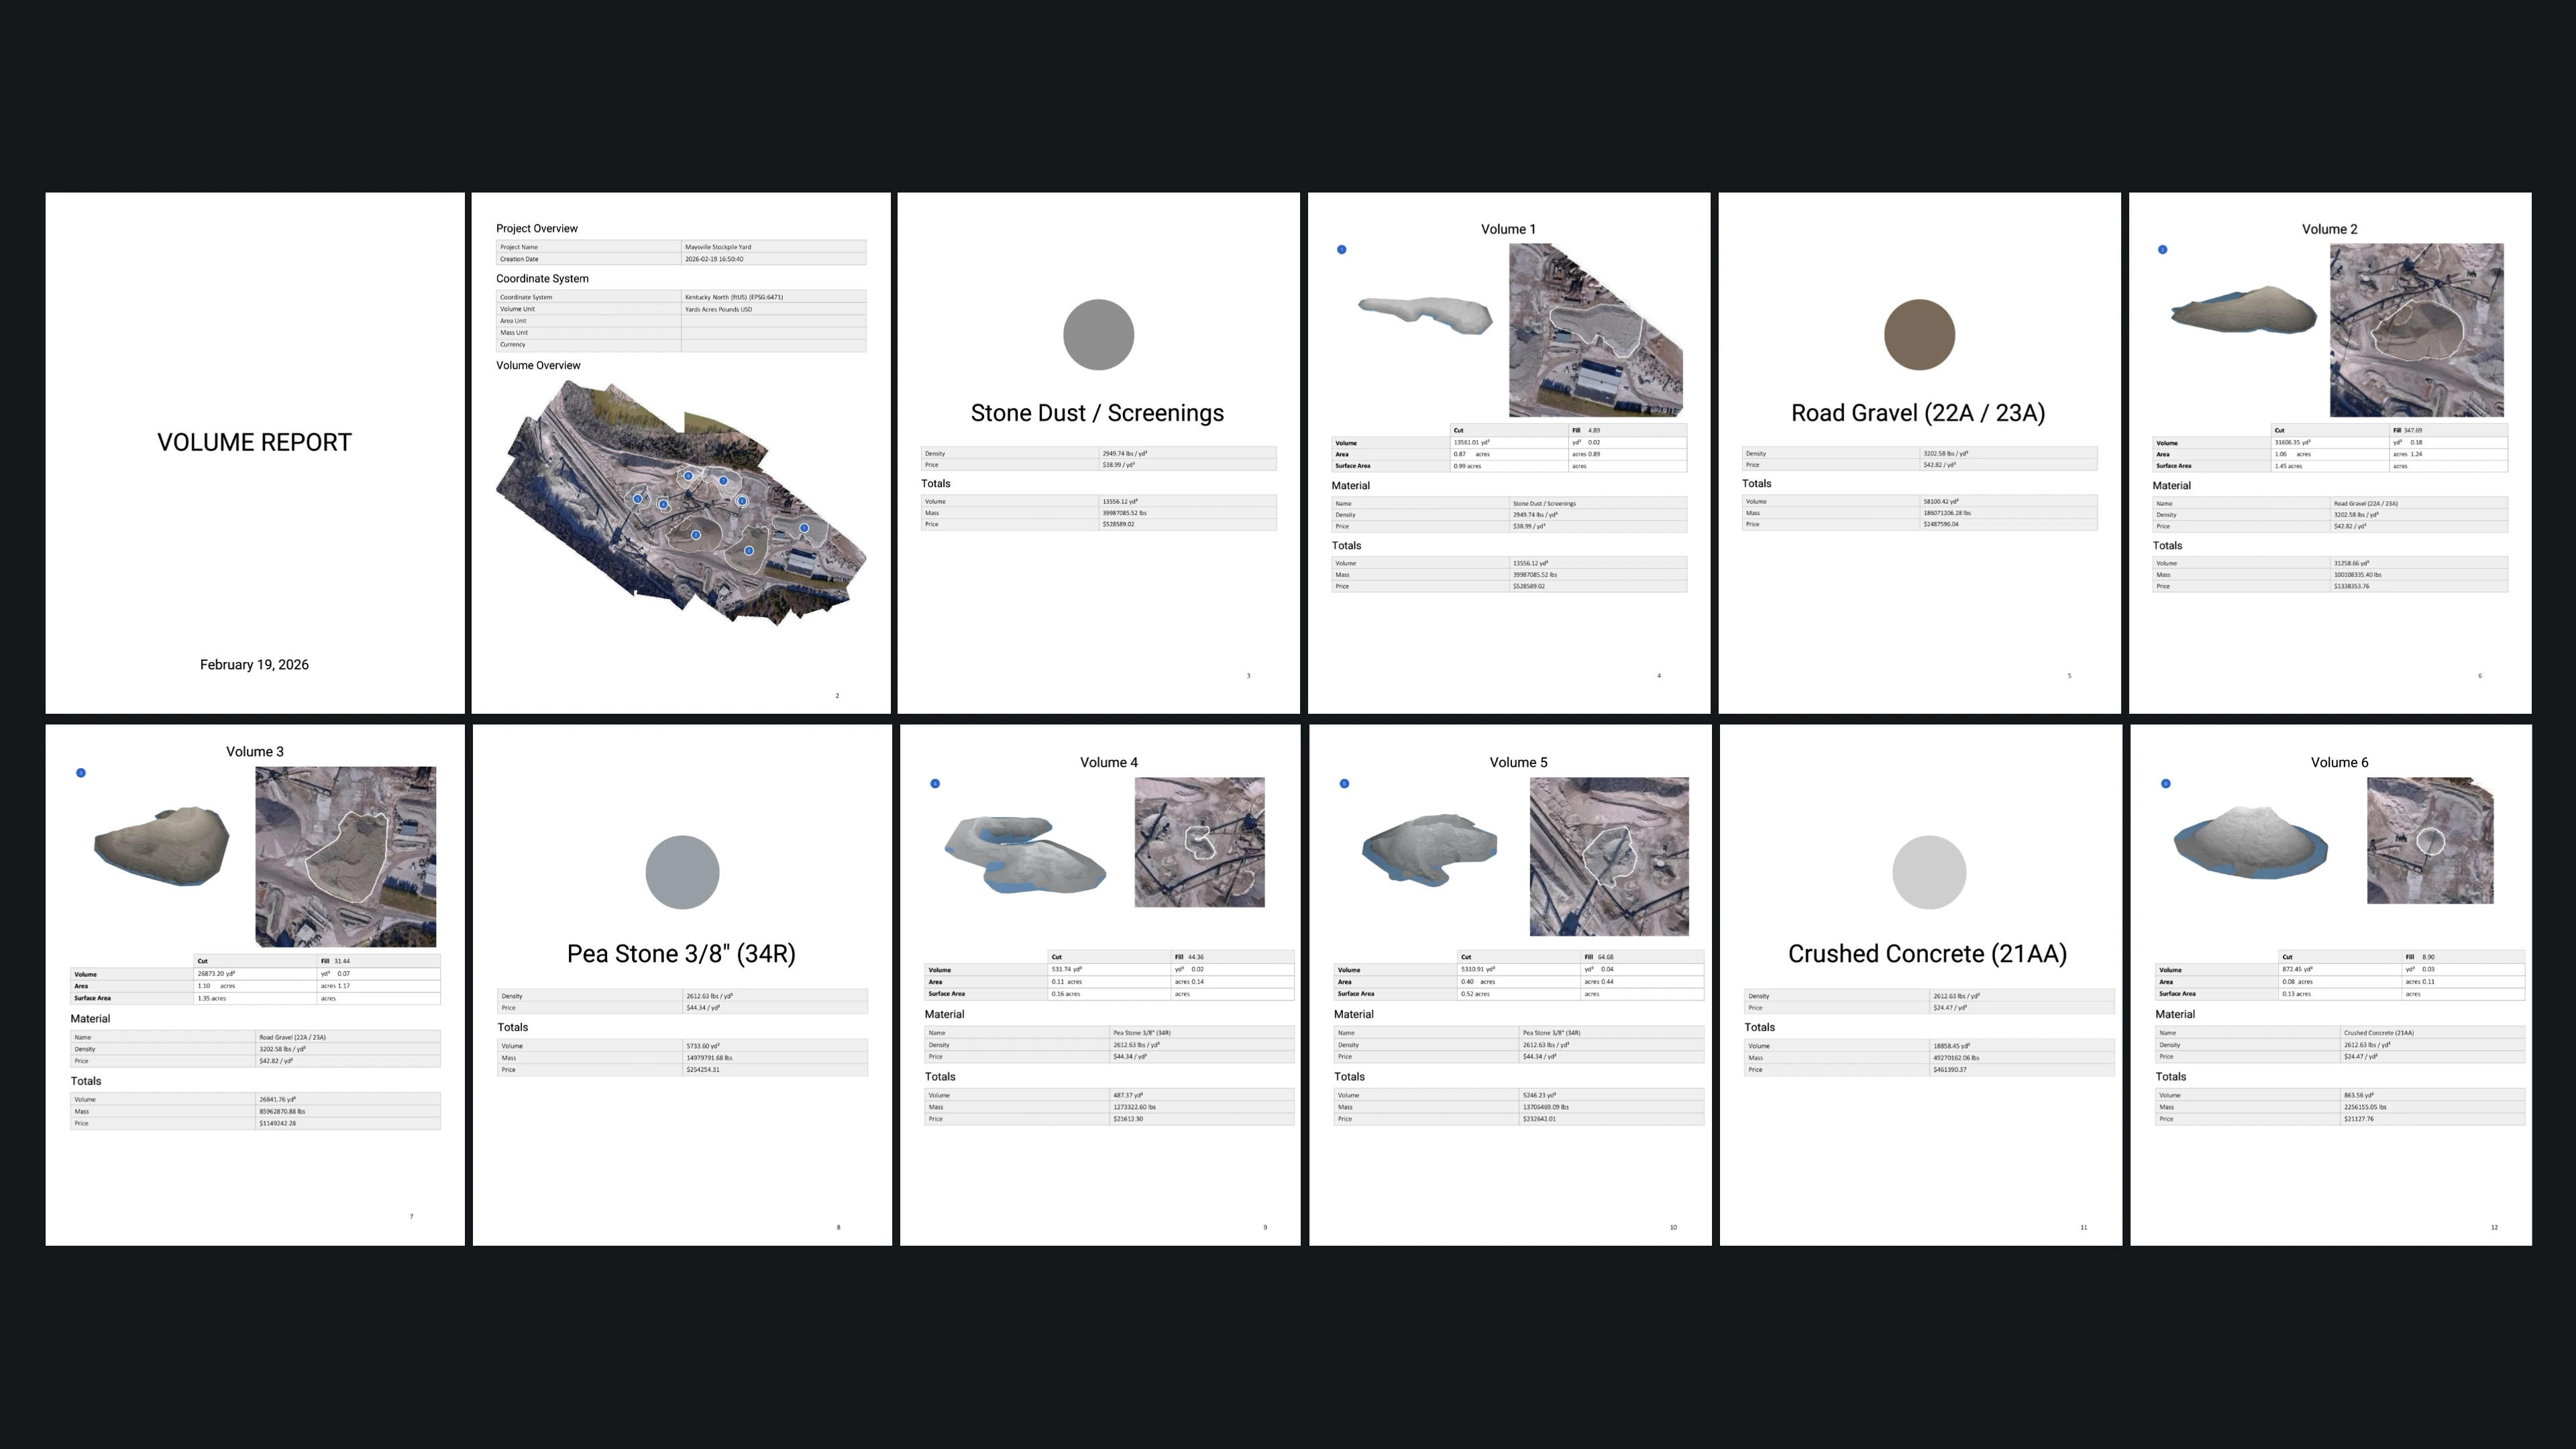
Once generated, the report consolidates all stockpile volumes, material information, and totals into a structured document ready for distribution to clients, internal teams, or project stakeholders.
Edit Toolbar:
You can use the EDIT toolbar on the left to edit the stockpiles you’ve created and have selected.
Grow/Carve Tool
The Grow and Carve tool gives you precise control over stockpile boundaries after automated detection.
If a pile needs to be extended beyond the detected edge, for example, where material gradually blends into surrounding terrain, you can draw a polygon to grow the stockpile to its intended boundary.
If part of a detected pile shouldn’t be included, such as overlapping material, equipment tracks, or misidentified ground, hold Ctrl and draw a polygon to carve that section out.
This keeps boundary definition intentional, so the volume reflects operational reality, not just geometric detection.
Flatten/Unflatten Tool
The Flatten/Unflatten tool gives you localized control over the surface when objects sitting on top of a stockpile need to be excluded from measurement.
While automated detection removes most non-material features, there are cases — such as conveyors or equipment, where you may want to manually simplify the surface in a specific area. By drawing a polygon over that region, you can flatten it to remove the influence of those features on your volume calculation. If you need to restore the original modeled surface, undo your previous flattening or hold Ctrl while drawing the polygon to unflatten. This keeps the edit reversible and ensures your measurement reflects material, not temporary site conditions.
Split Stockpile
The Split tool allows you to divide a single detected stockpile into multiple independent volumes.
This is useful when one continuous surface actually represents different materials, phases, or ownership areas. Instead of treating it as one combined mass, you can draw a line across the stockpile to define a logical separation. Right-click to finalize the split.
Each resulting section can then be measured and reported independently, keeping volumes aligned with how the site is actually managed.
Adding Materials:
To manage materials, open the Materials submenu by clicking the expand button in the top right corner of the module. Make sure no stockpiles are selected before choosing Edit Materials. You can also access this menu from the central top toolbar.
To create a new material, click “Add Material” at the bottom of the Materials panel. You will be prompted to enter:
- Material name
- Display color
- Density
- Cost
Be sure your preferred units of volume, mass, and currency are set in the top center menu before entering density and cost values. This ensures calculations are applied correctly.
Once materials are created, you can assign them to individual stockpiles. When a material is assigned, volume, mass, and total cost are automatically calculated and displayed both in the stockpile labels and within the stockpile information panel.
This allows you to move from simple volume measurement to full material tracking and valuation within the same workflow.
A Smarter Volume Workflow:
StockpileStudio keeps volumetric analysis in app, eliminating manual digitizing, third-party exports, and unnecessary rework. From automated detection to material assignment and branded reporting, everything is handled in one controlled workflow.
Use the one-month free trial of StockpileStudio to test it on real projects and see how it improves speed, consistency, and confidence in your volume reporting.
Please visit our StockpileStudio webpage for more information, and Frequently Asked Questions.