Using the Analyzer Tab
Today we are going to be going over how to use the Analyzer tab in PixElement. A video version of this tutorial can be found below.
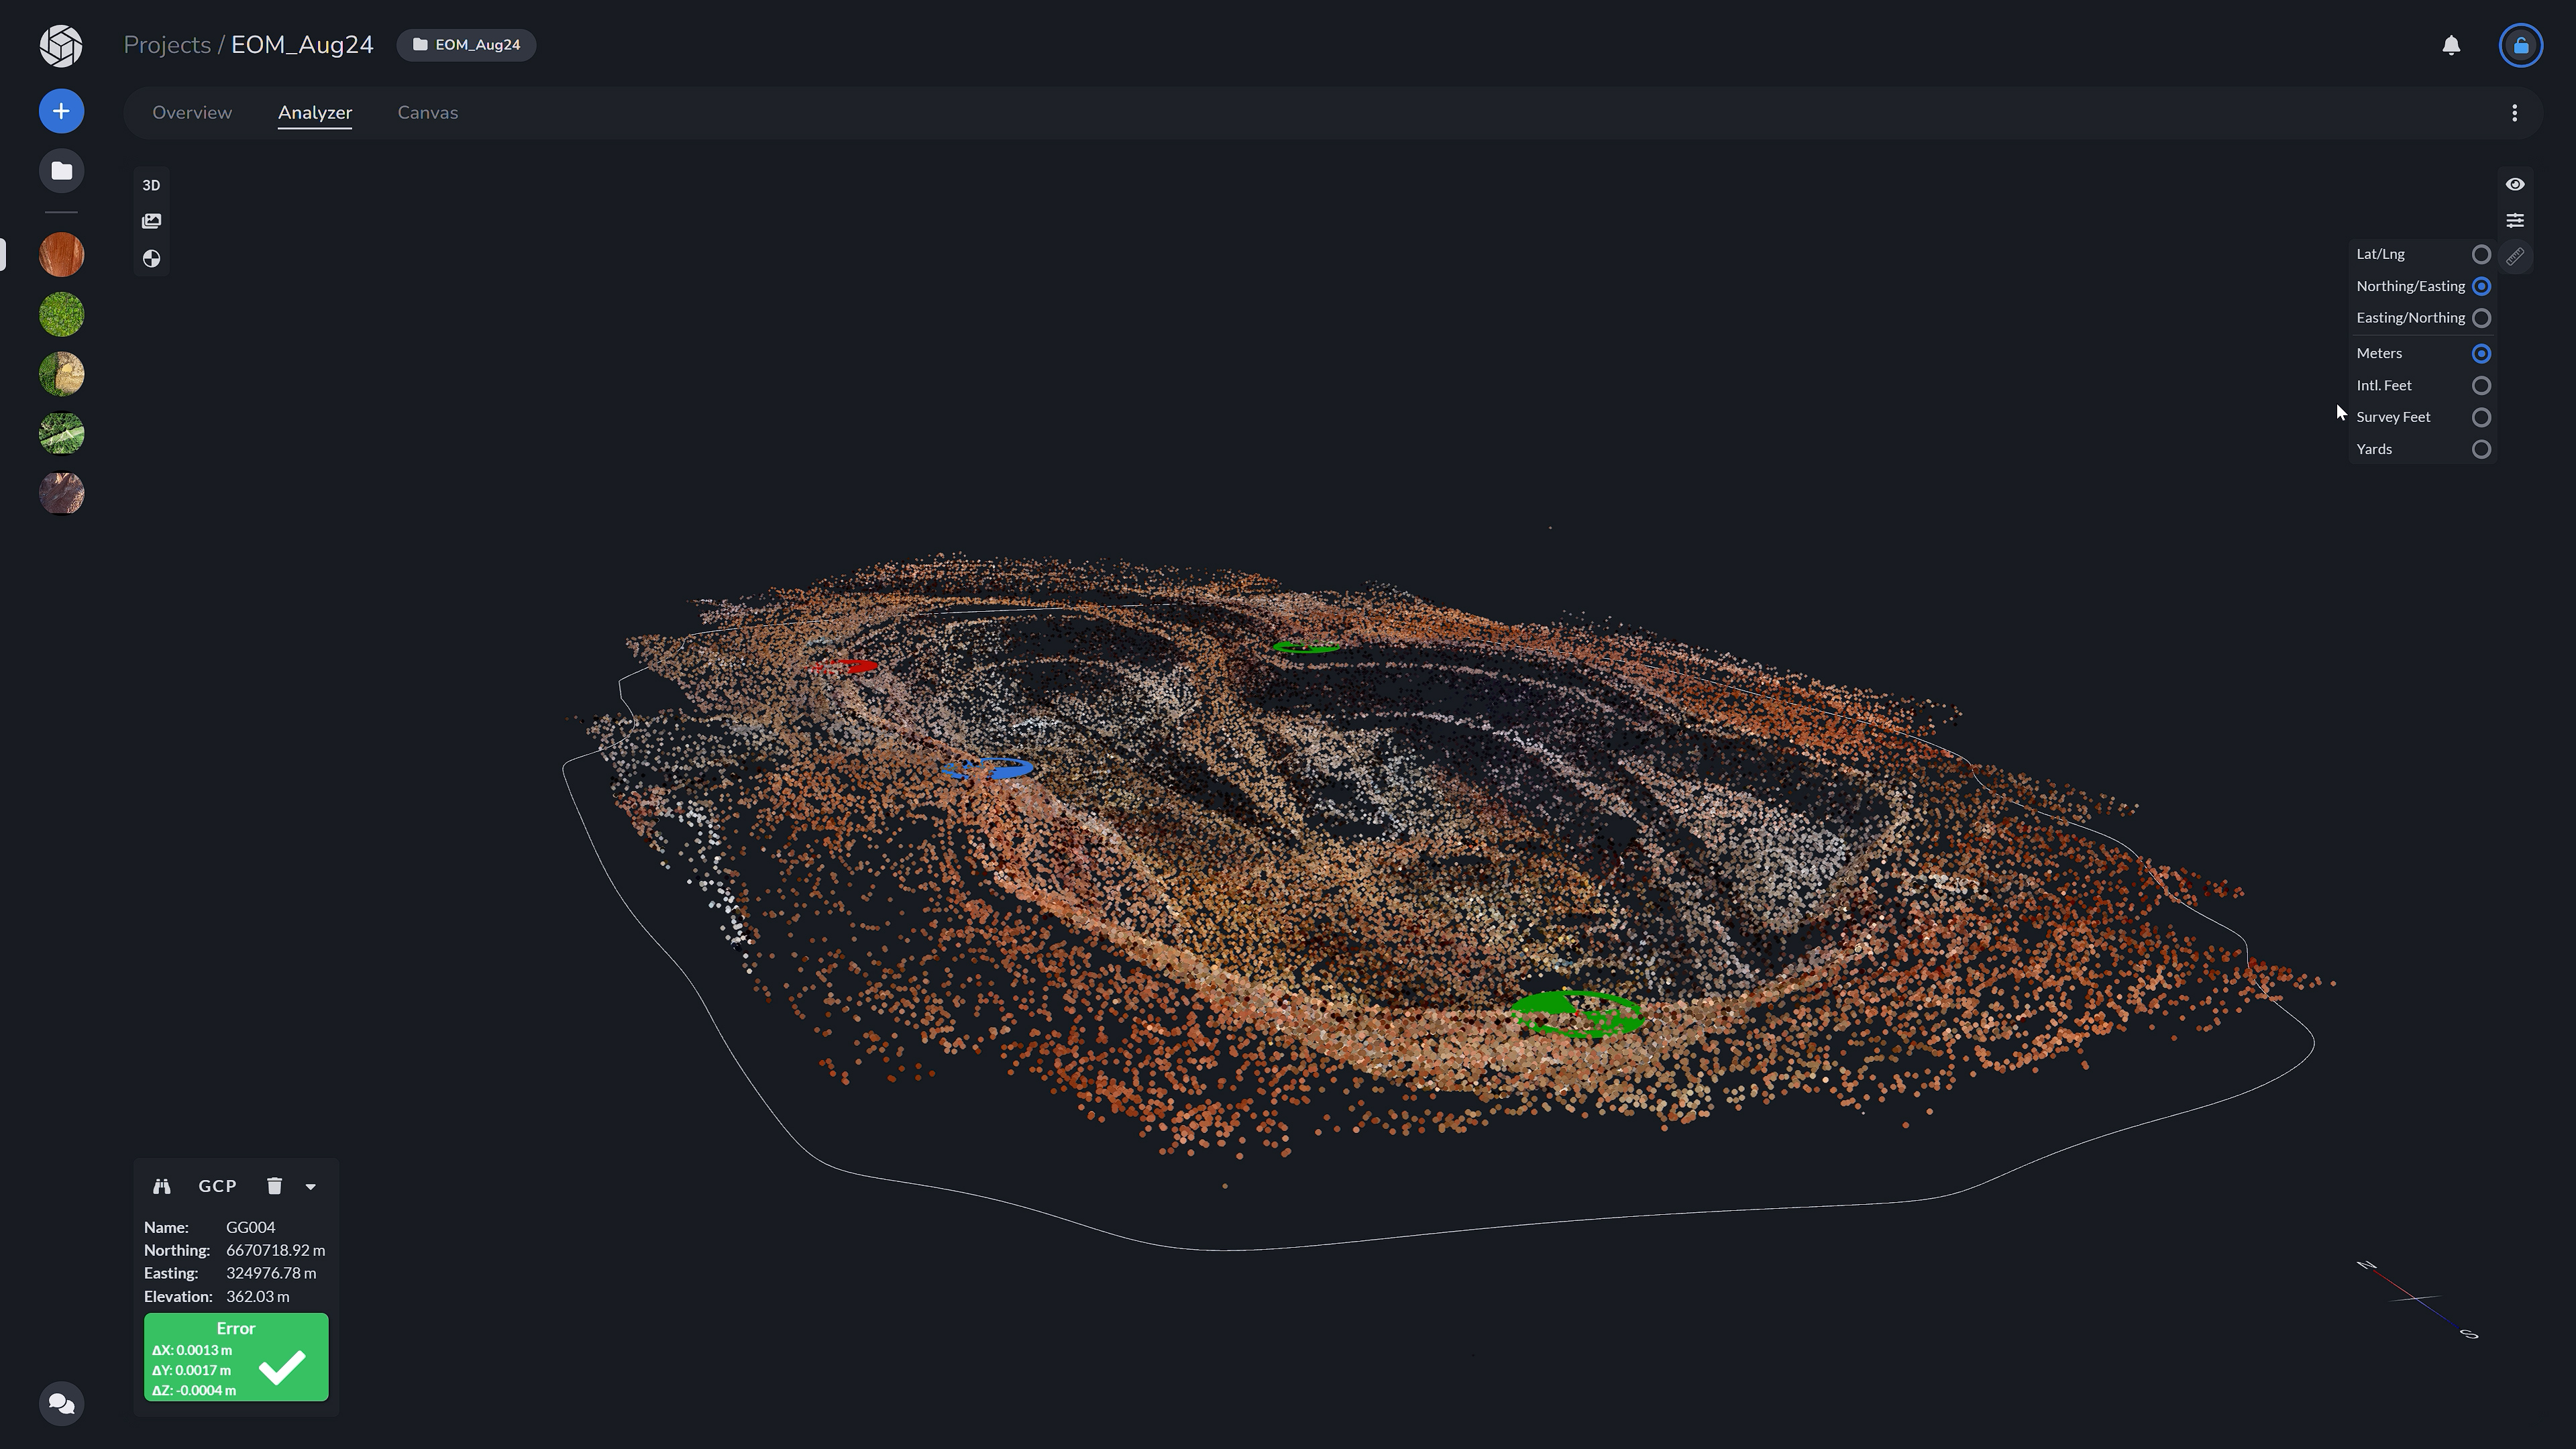
The Analyzer tab is used for viewing the sparse point cloud, editing your reference points and viewing the photos taken by the aerial system.
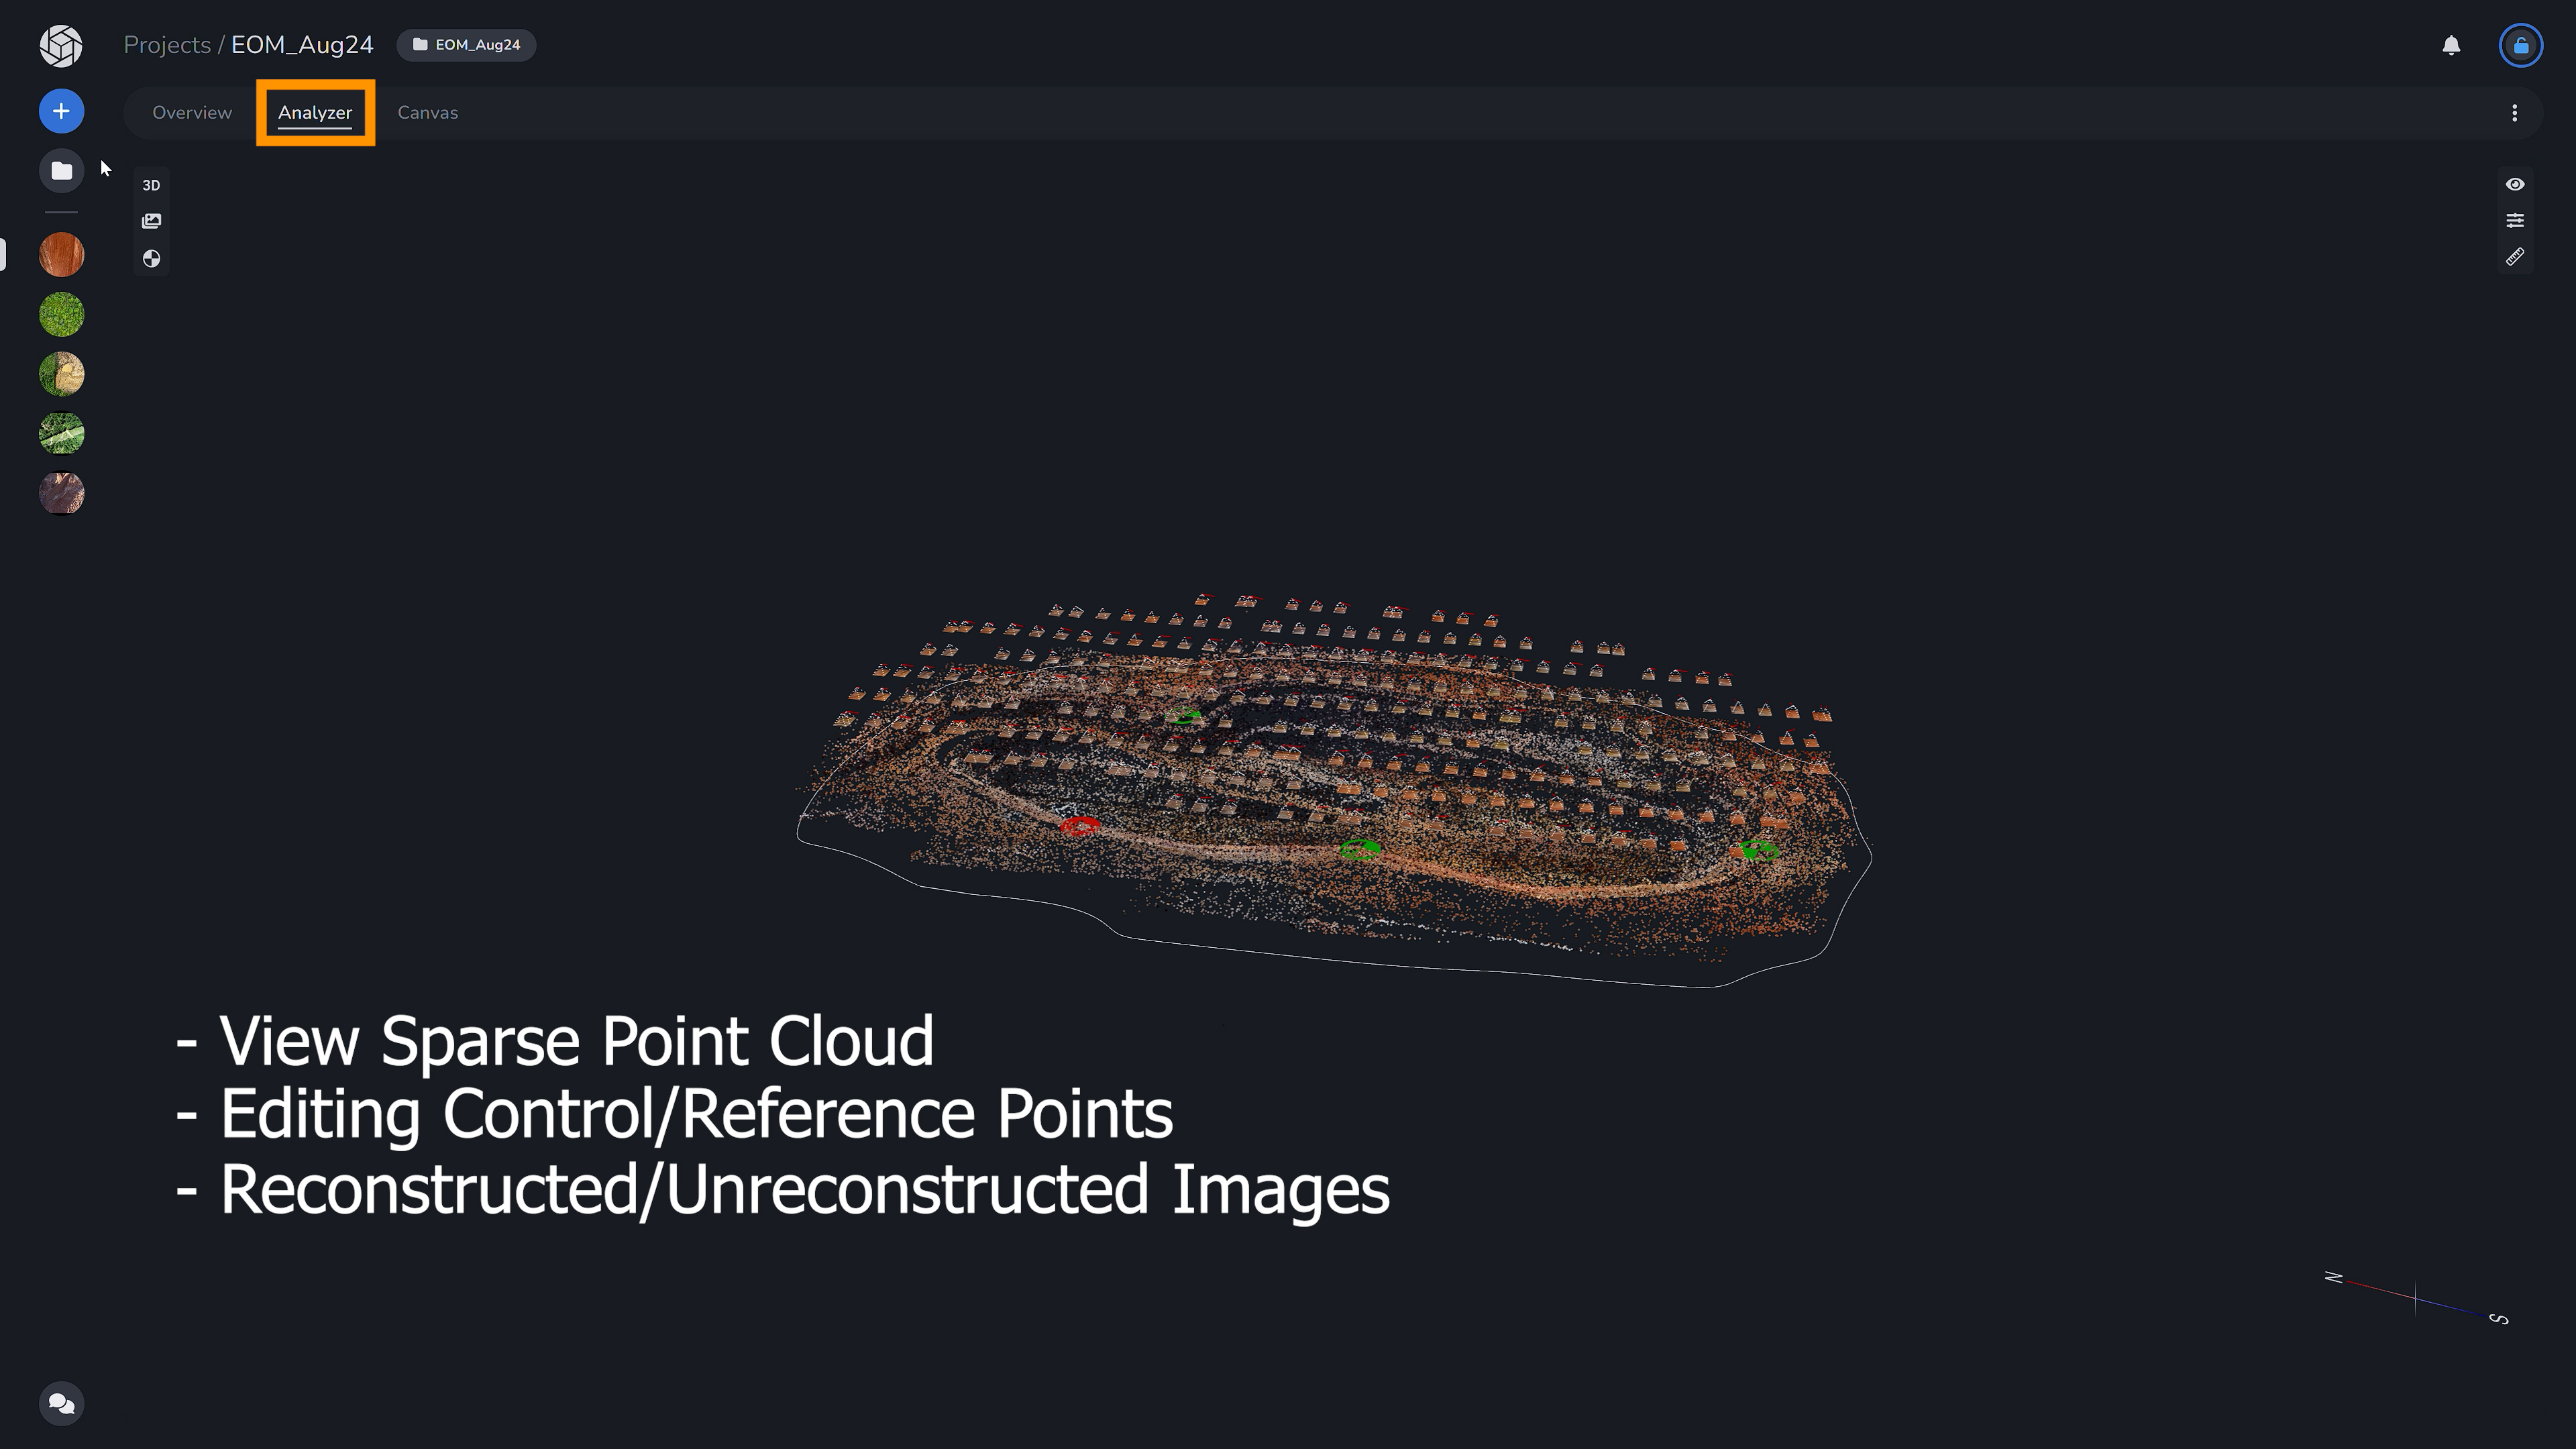
It is a way of getting a quick overview of your project and making edits to your reference points. It is also arguably one of the most important parts of the photogrammetric process, because all of the output products will be derived from the Analyzer/Bundle Adjustment process.
In the Analyzer tab, you can identify outliers and blunders in the input data, identify areas in the project that might have lower accuracy (due to heavy tree cover, water, etc), and ensure that you get the highest quality deliverables possible.
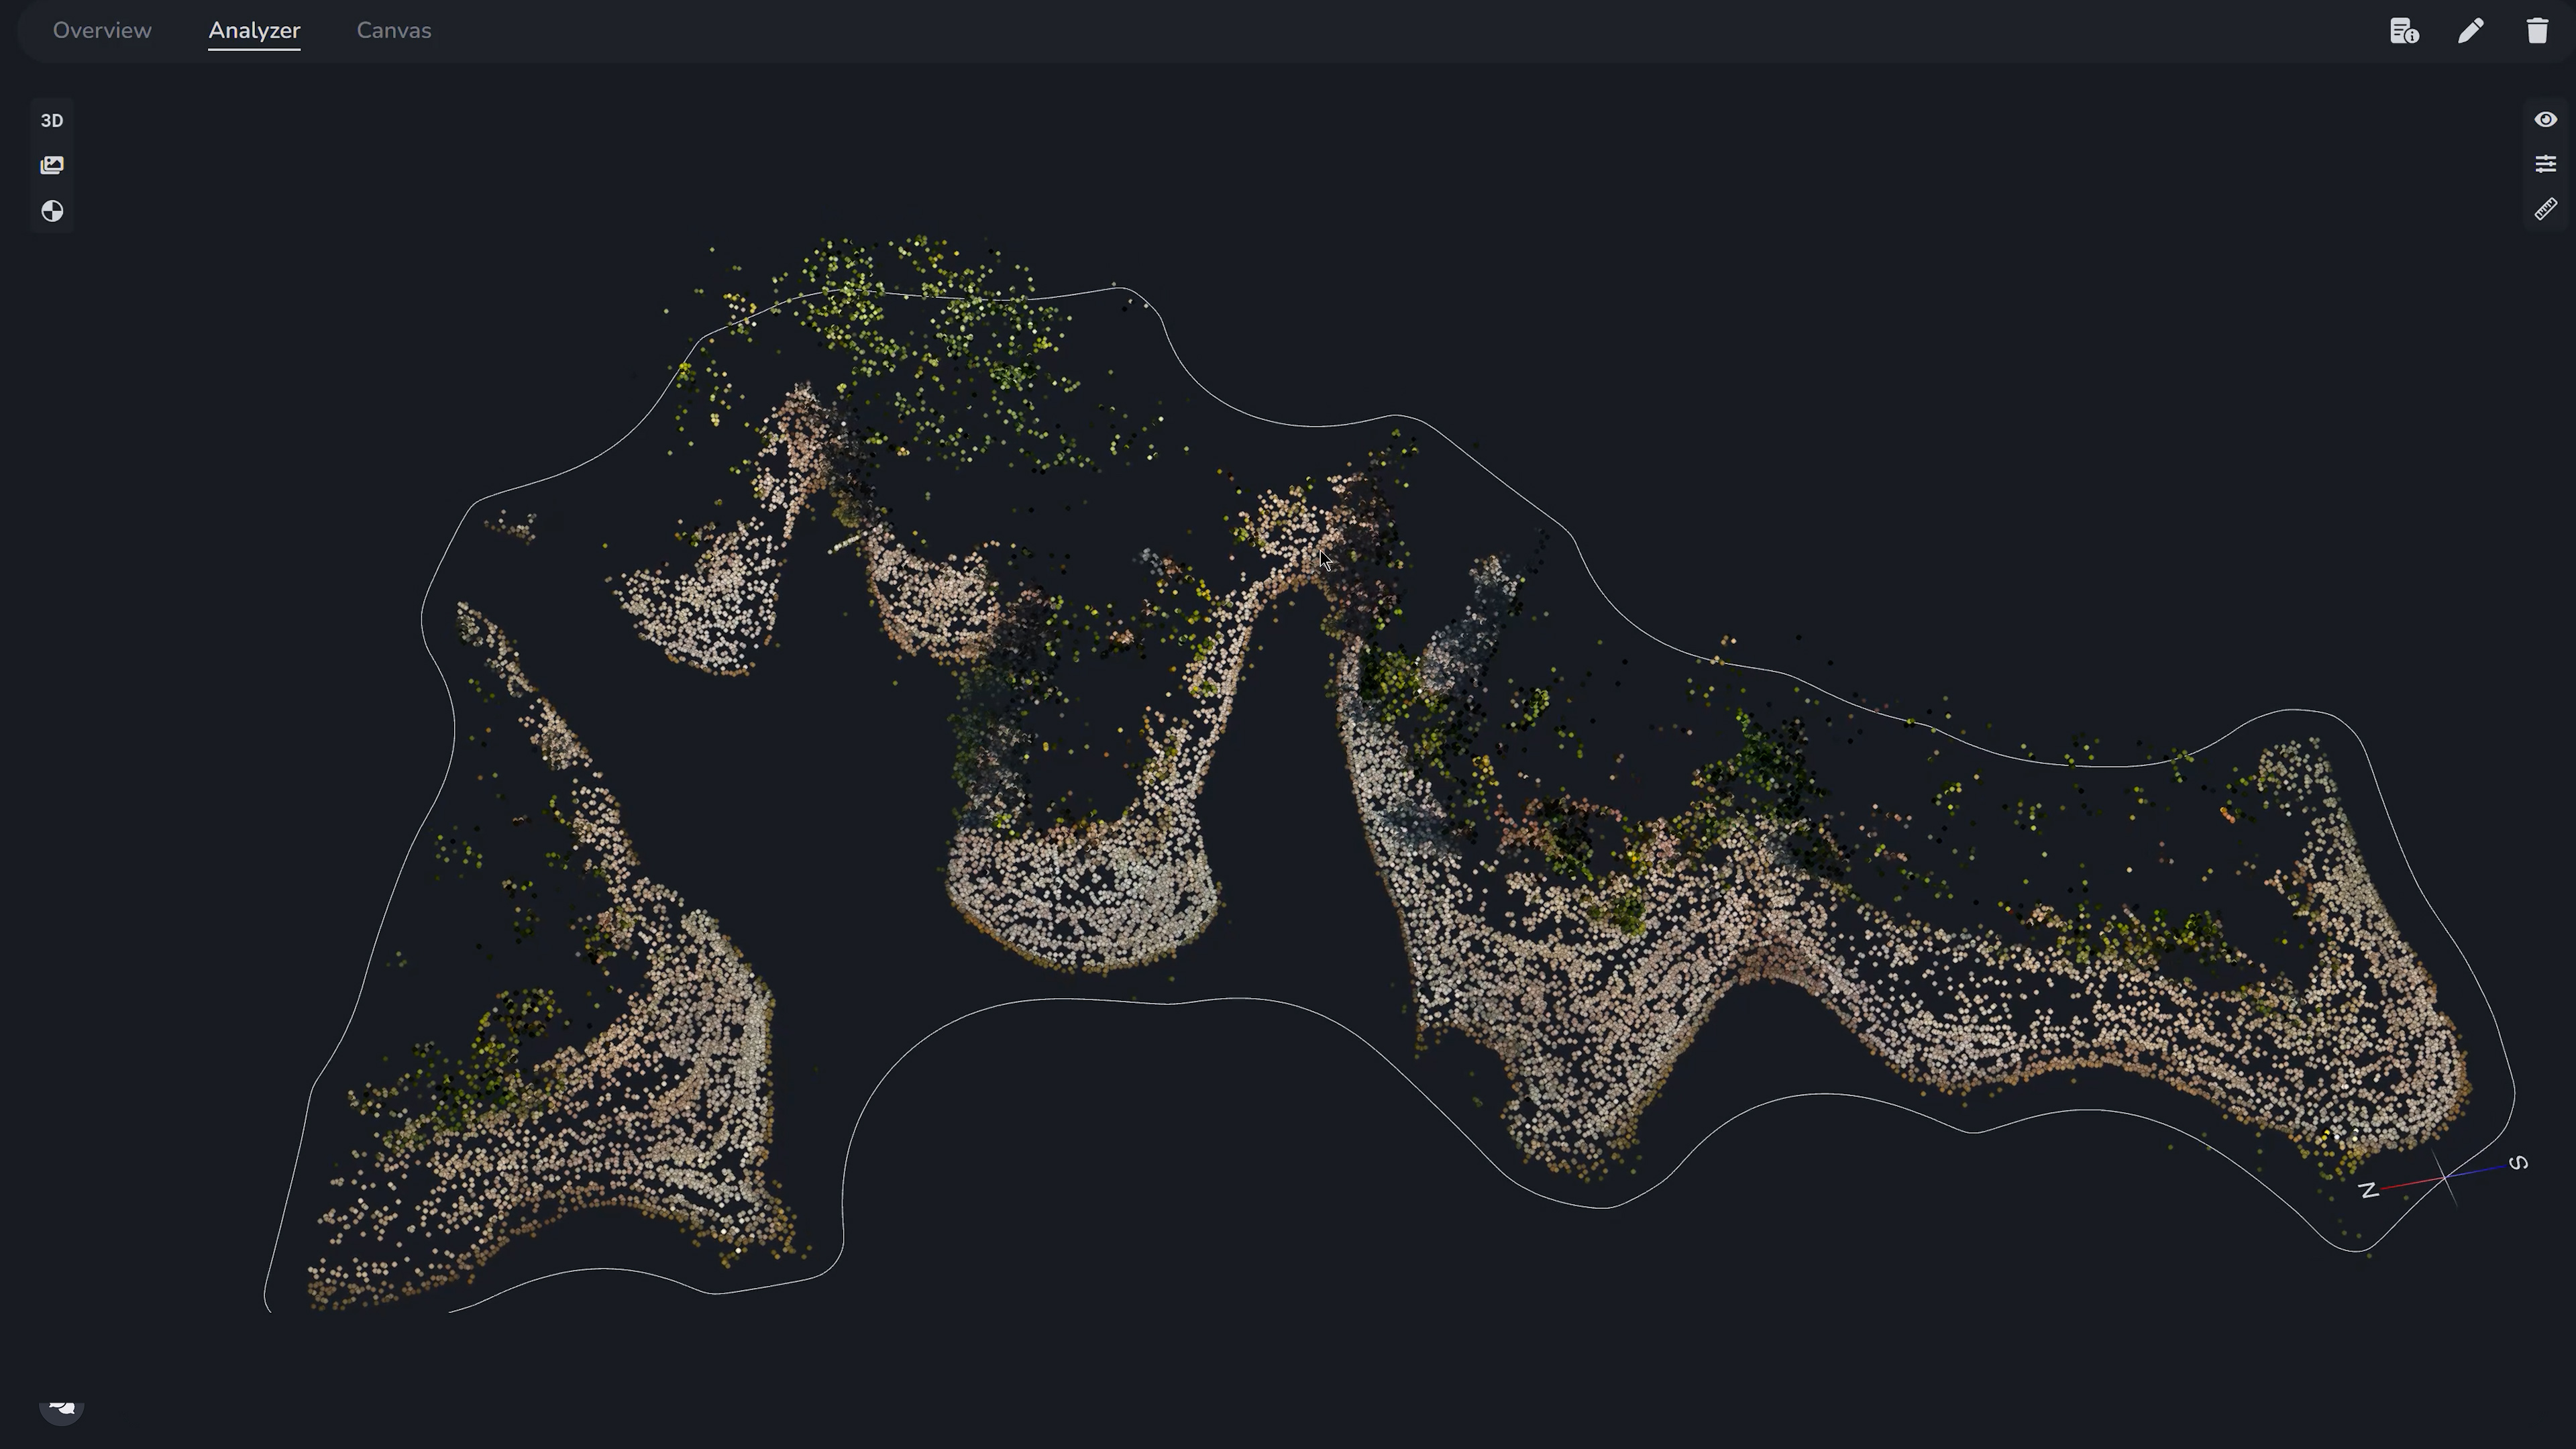
A sparse point cloud serves as an intermediate step in the process of creating a detailed 3D model or map from aerial or terrestrial survey data, particularly in photogrammetry and LiDAR applications. The sparse point cloud represents photo identifiable features that are reconstructed into 3D points during the structure from motion process. The sparse point cloud and the corresponding camera positions and orientations that were determined during bundle adjustment form the basis of ALL other output deliverables.
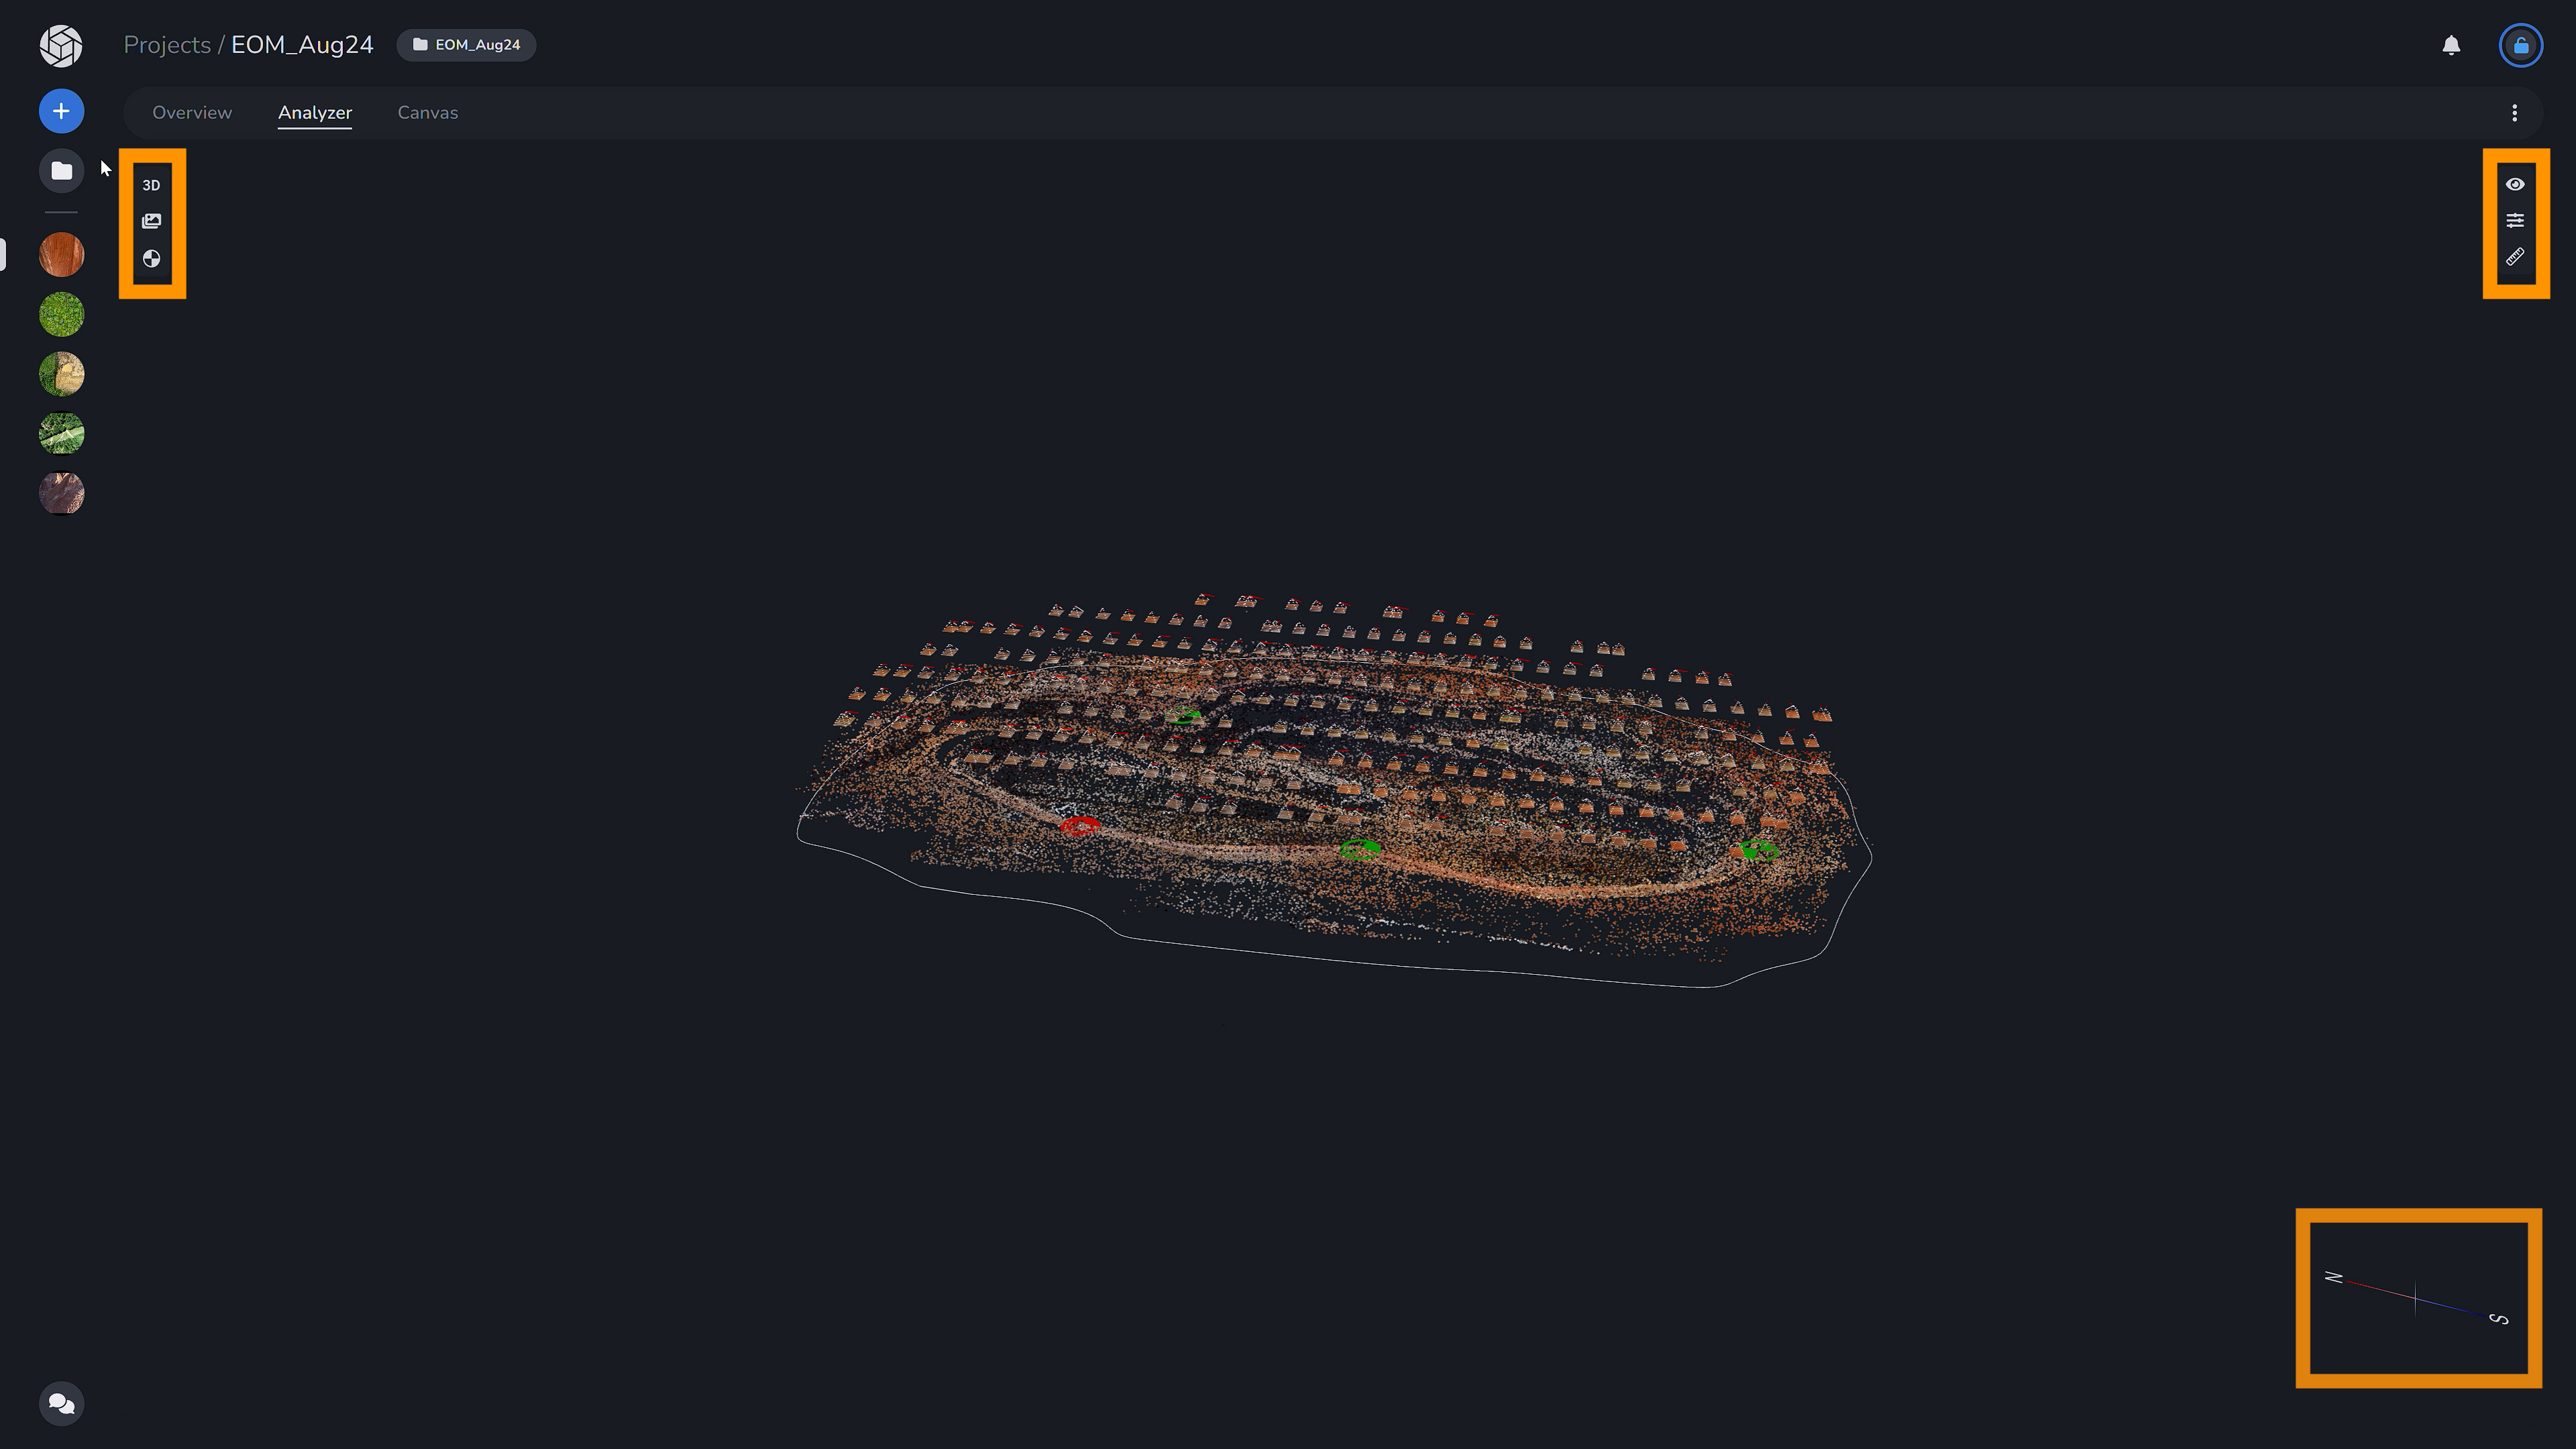
In this view, there is a menu on the left, right and a North-South compass in the bottom right.

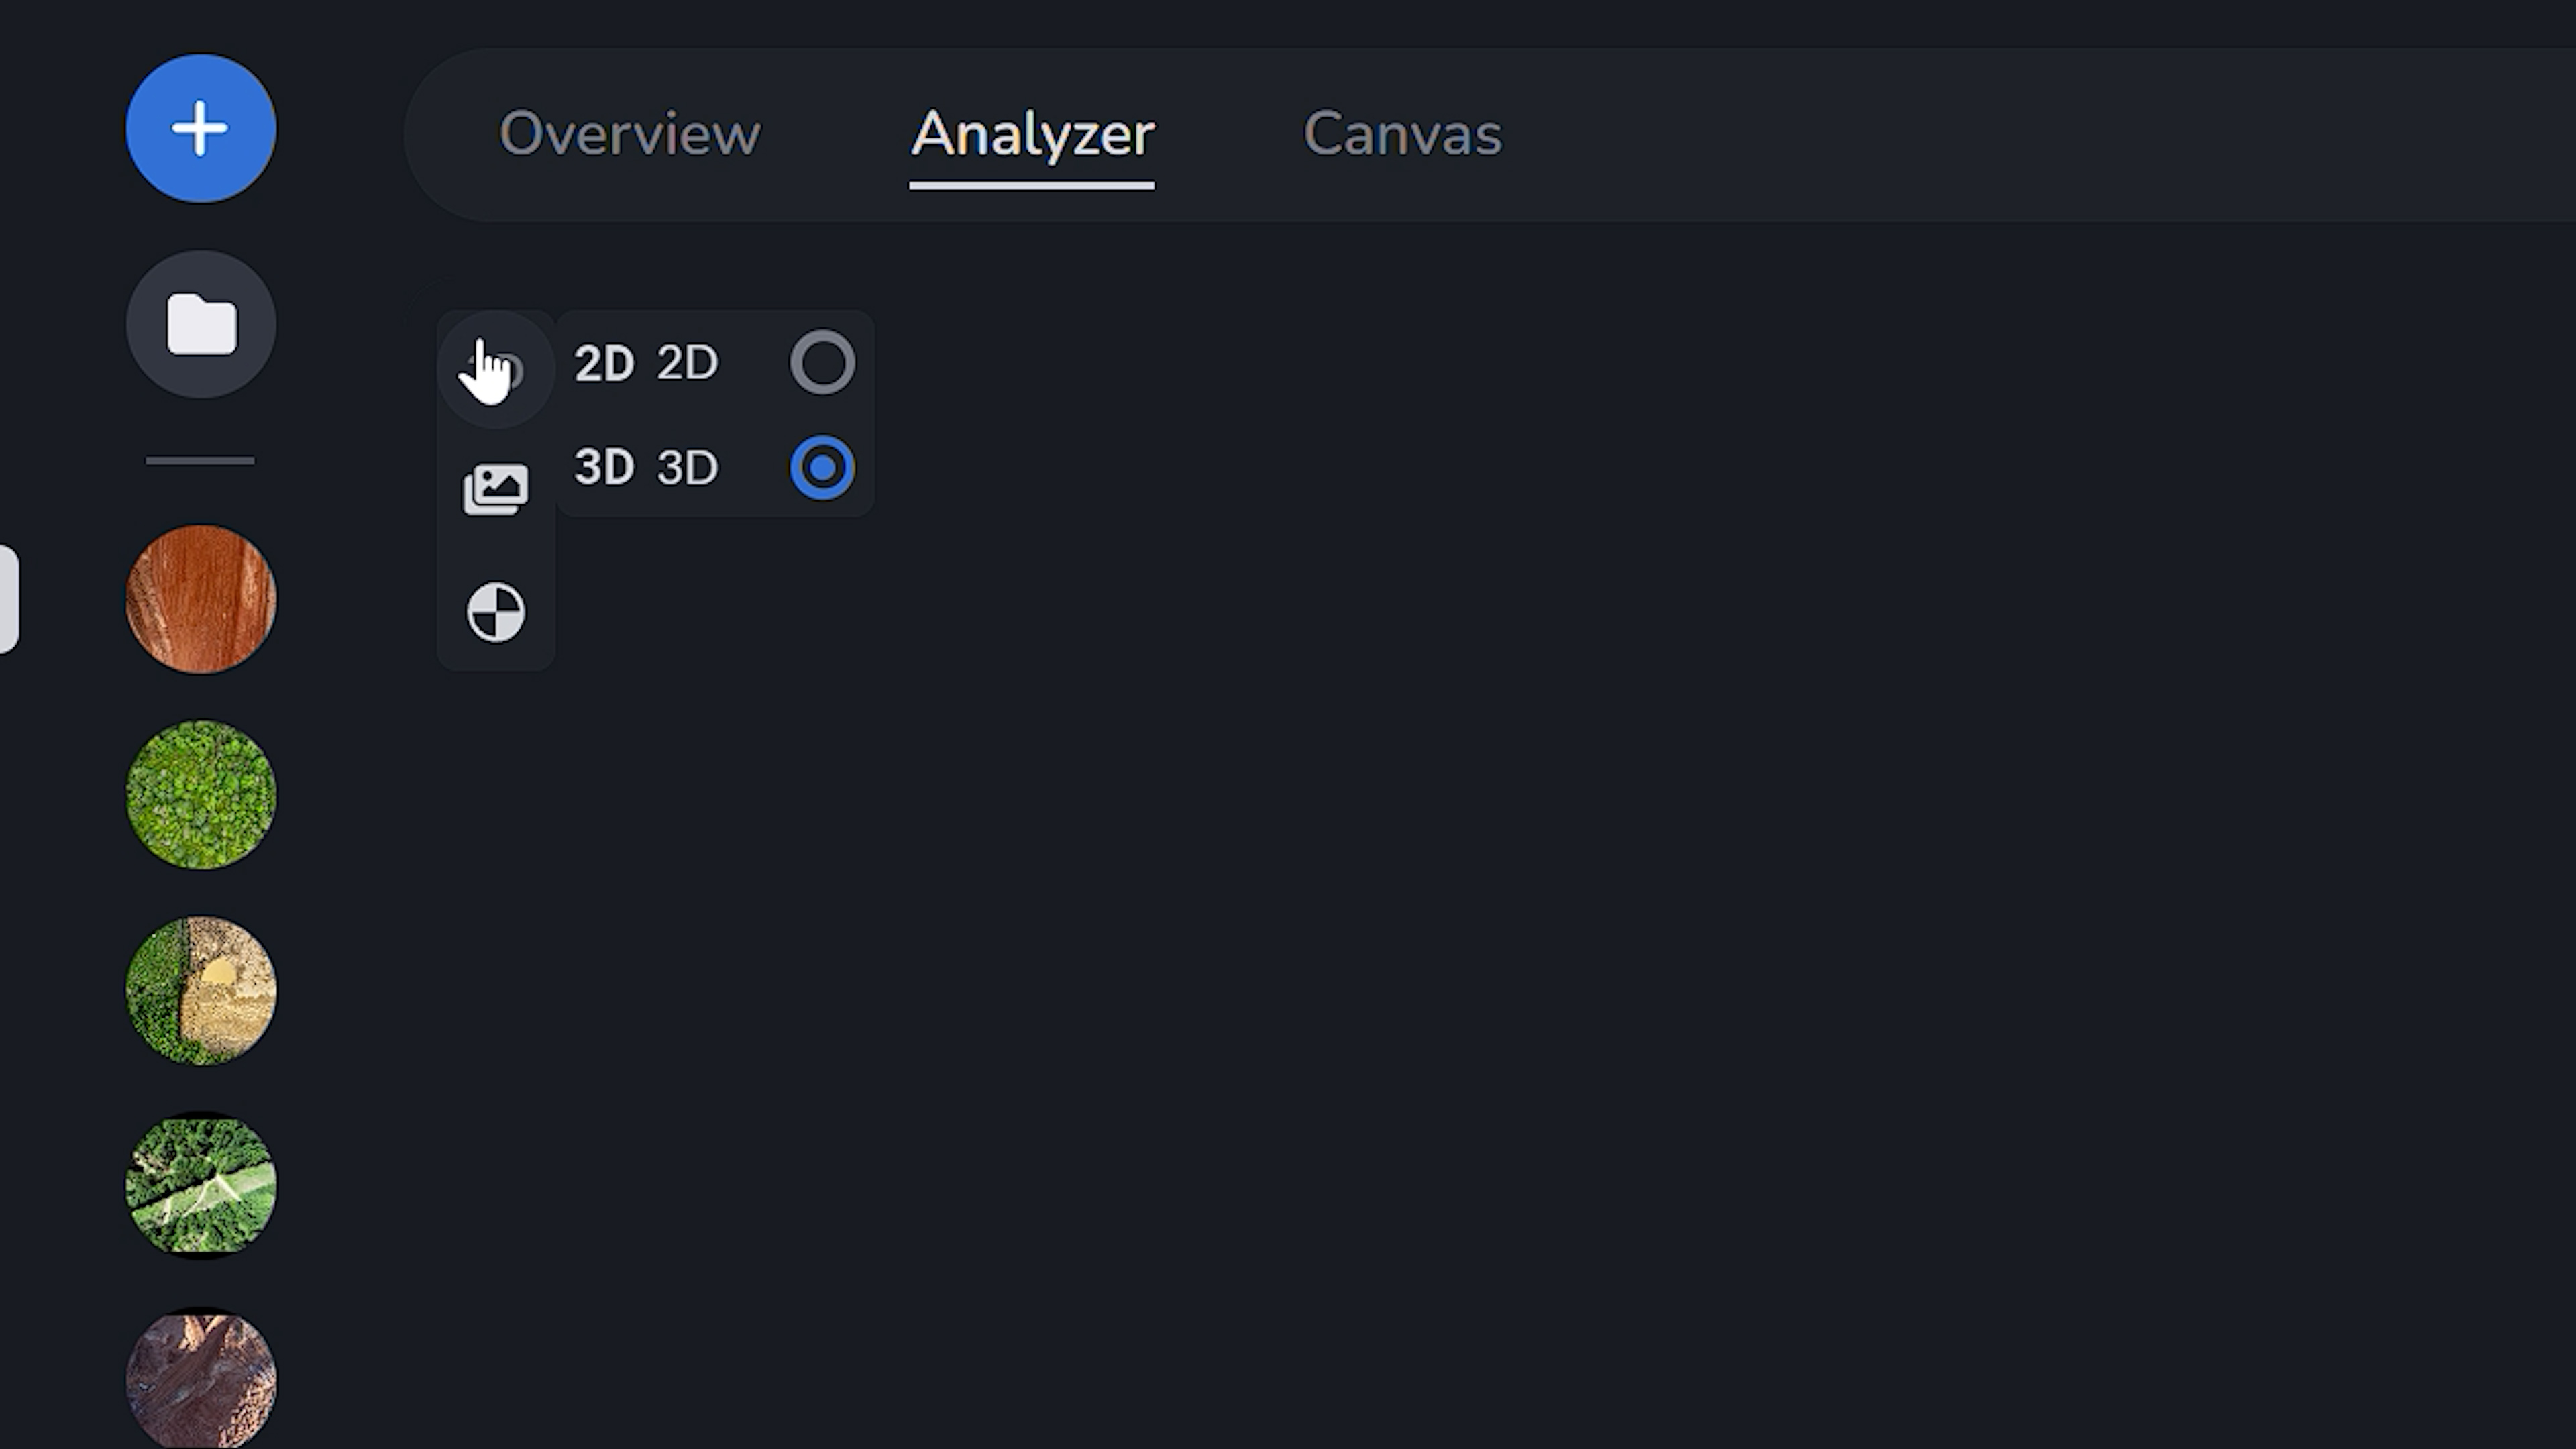
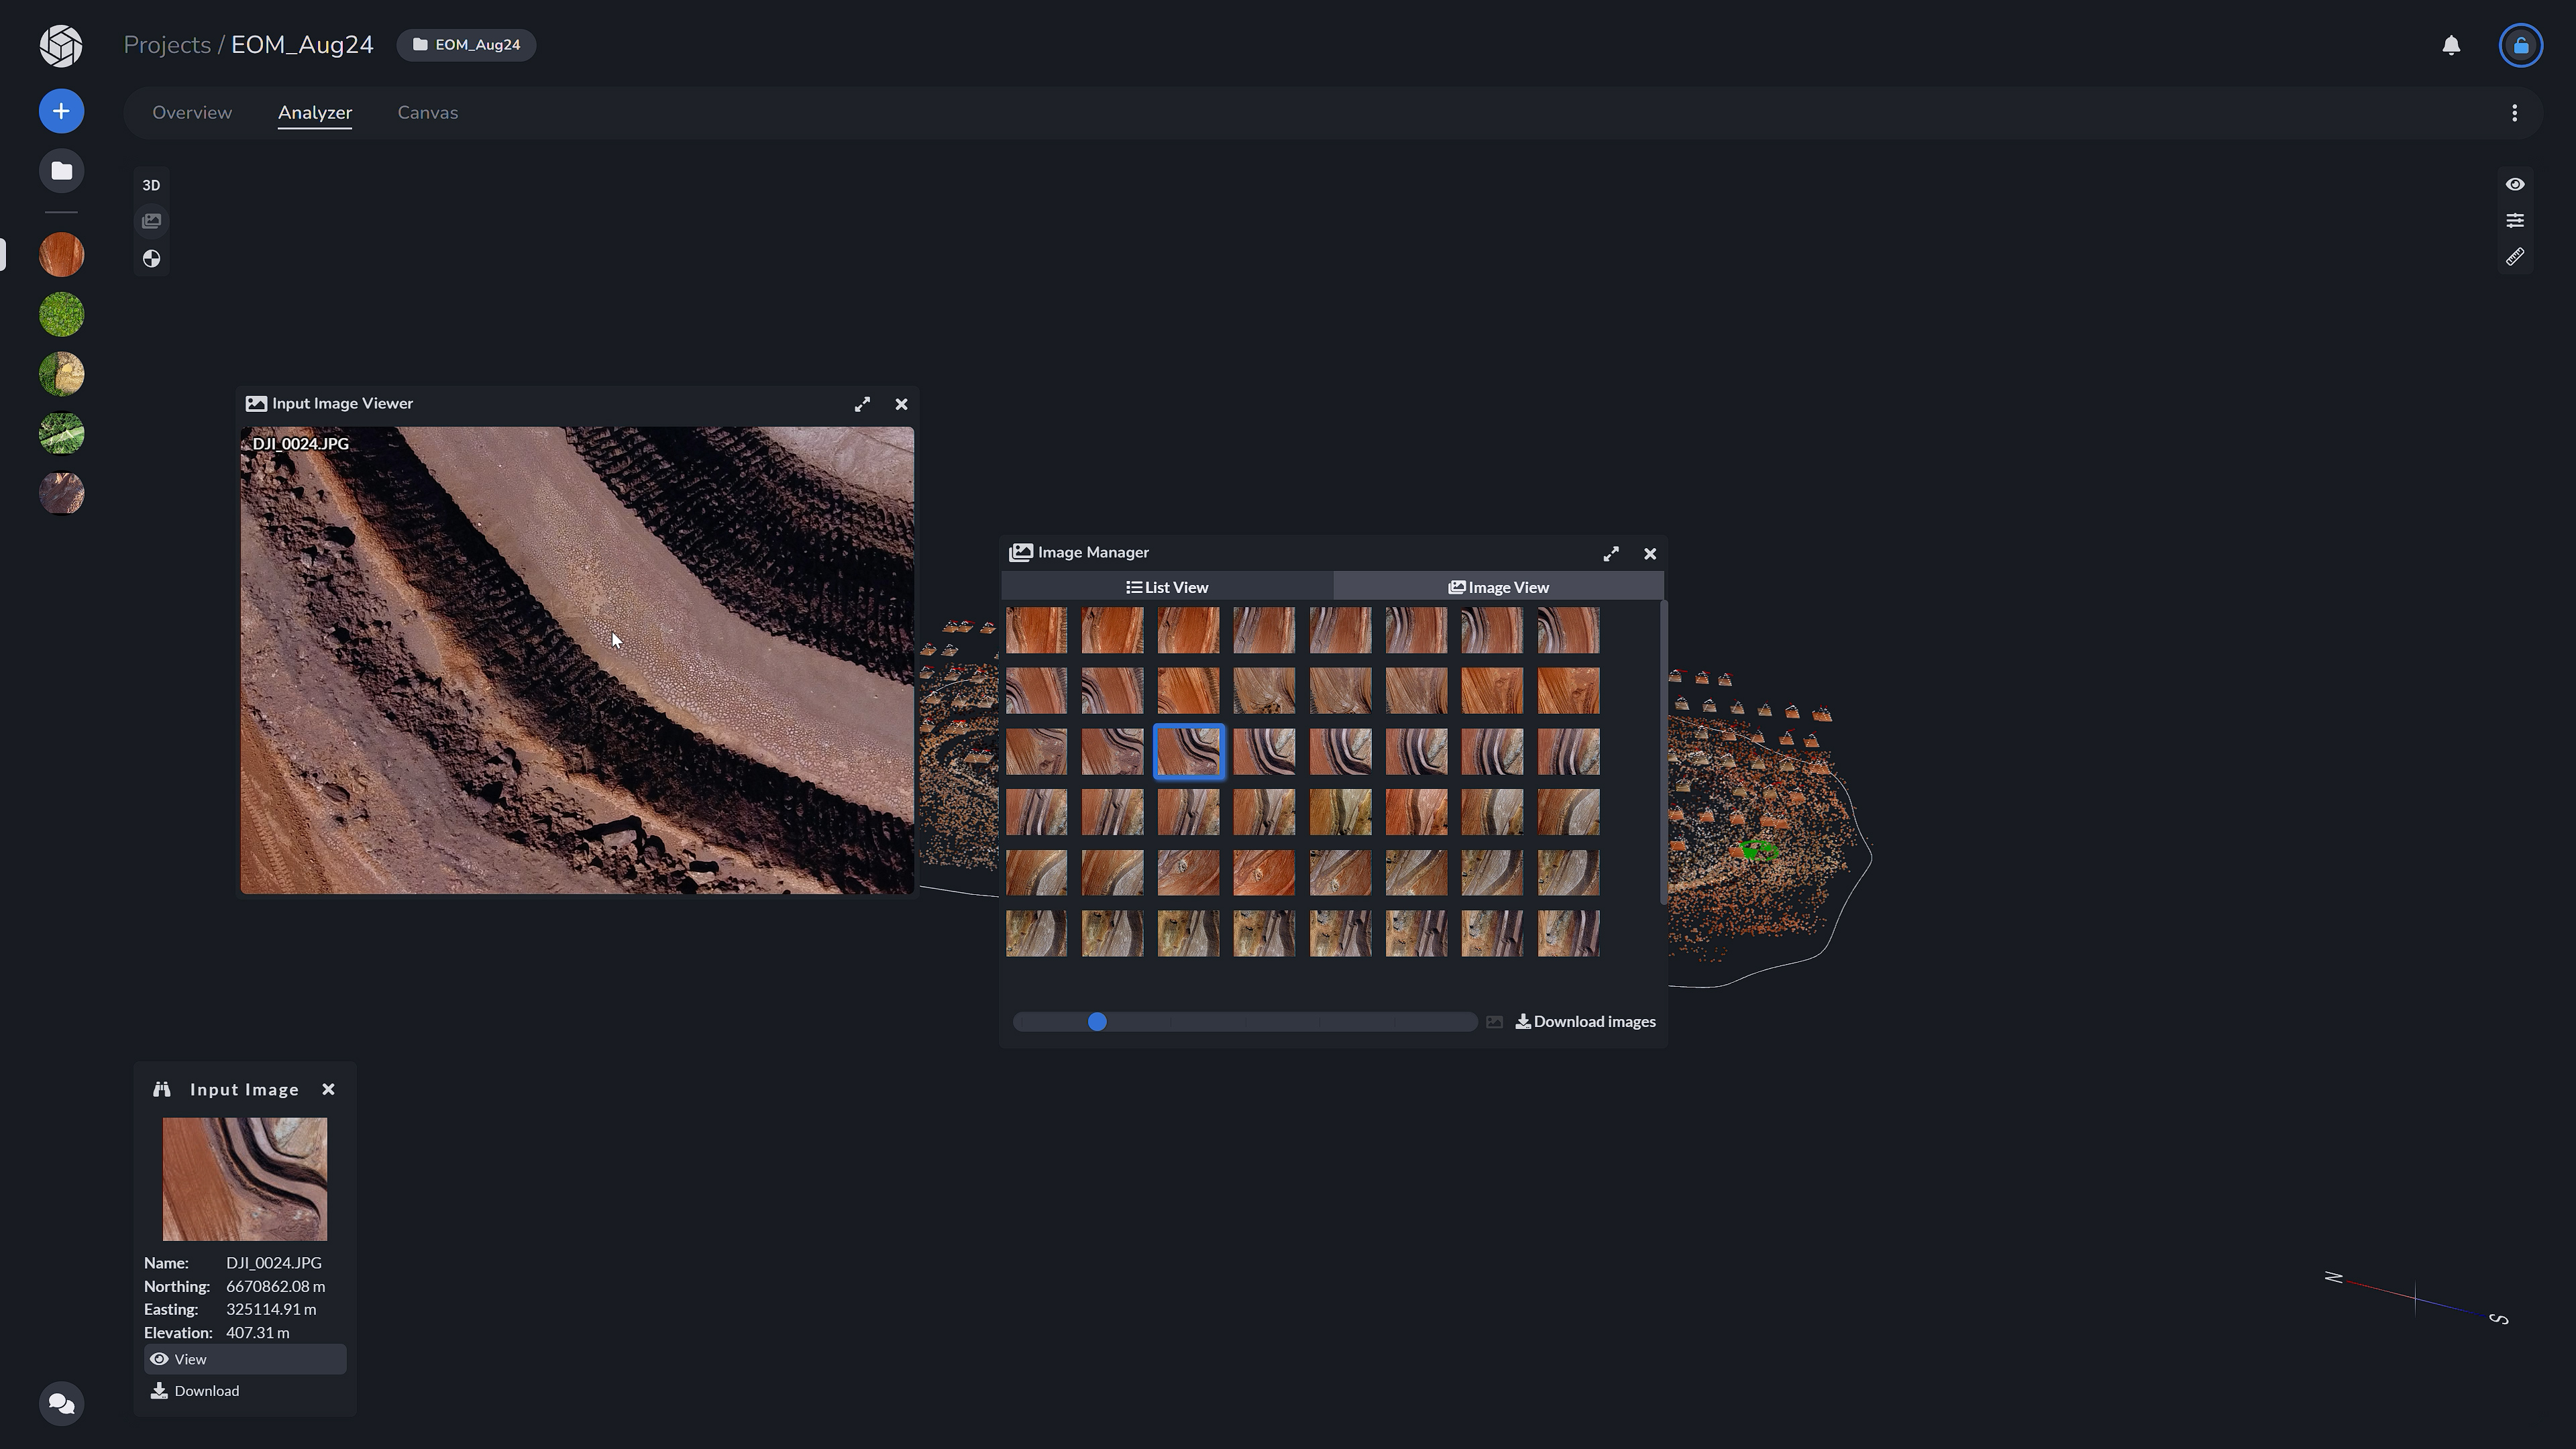
On the top left, you are able to toggle whether you would like to see the sparse point cloud in 2D or 3D. Next you are able to view a list or image view of all of the photos taken in the dataset as well as download the images (Image Manager).
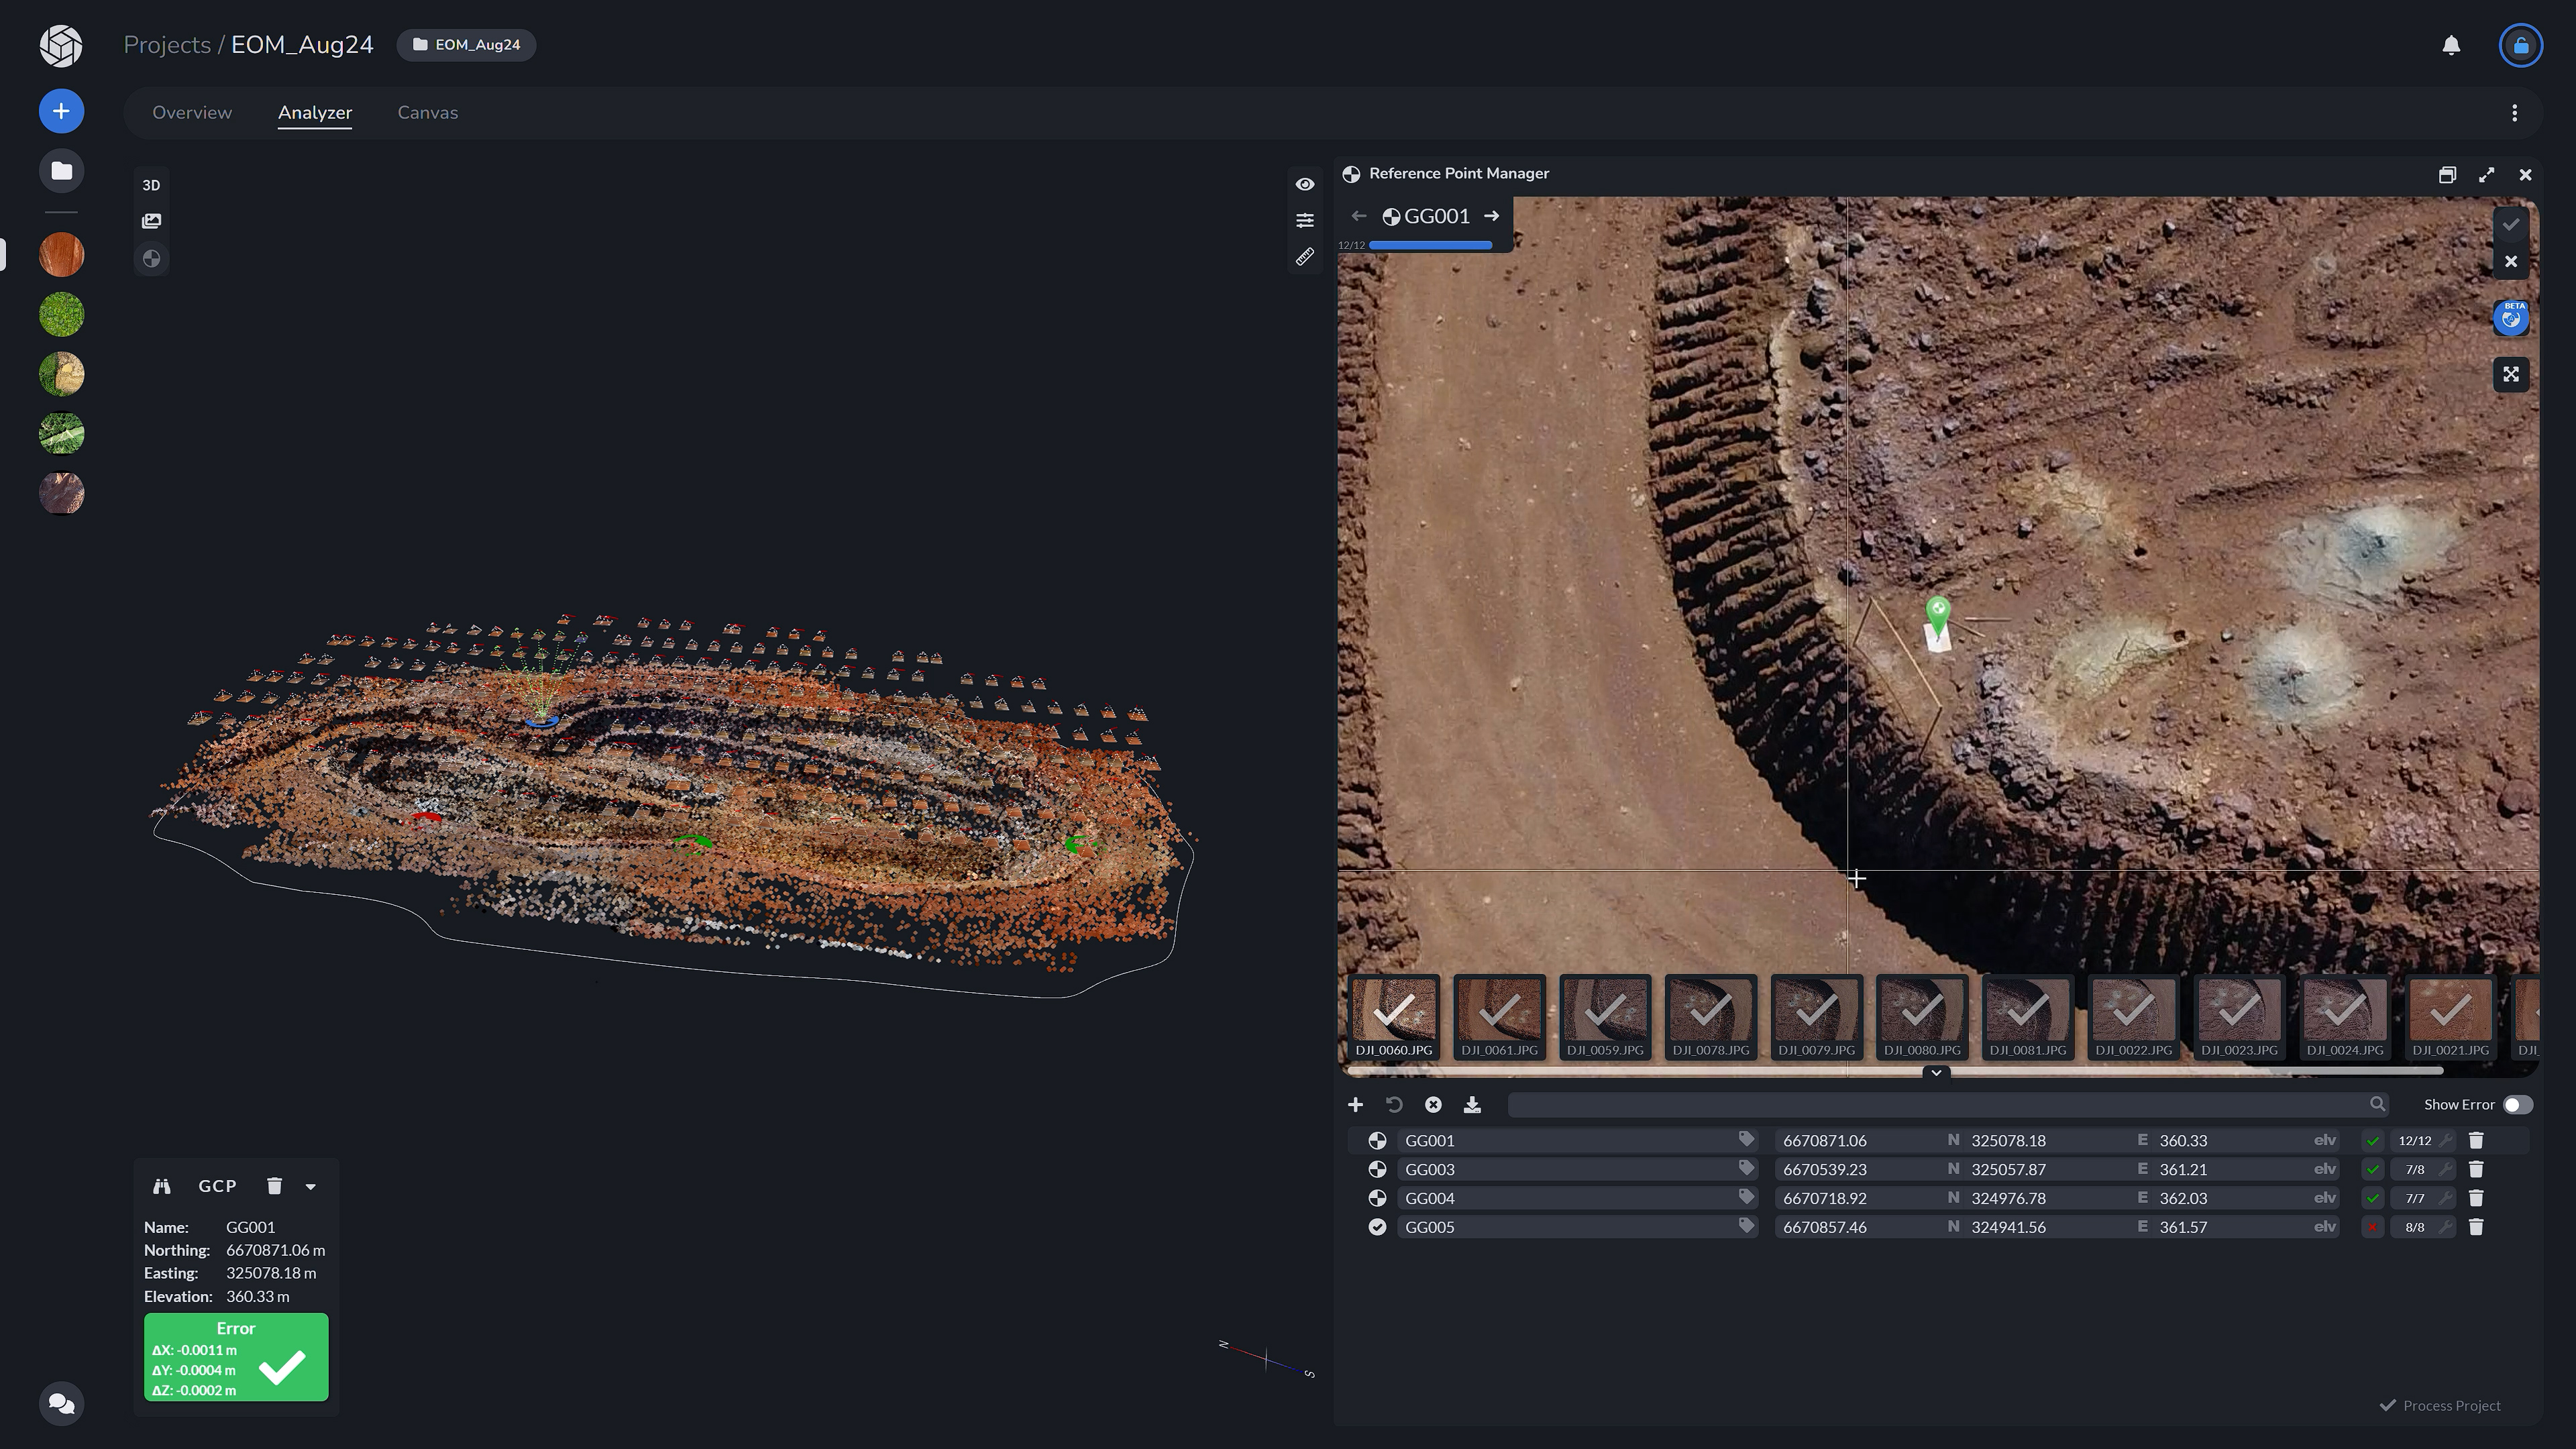
Next is the Reference Point Manager where you can view all of your reference points, add or erase, as well as download your reference points. Upon completing any changes to the Reference Point Manager, you are able to re-process your project.

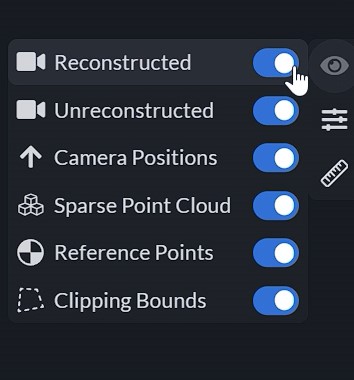
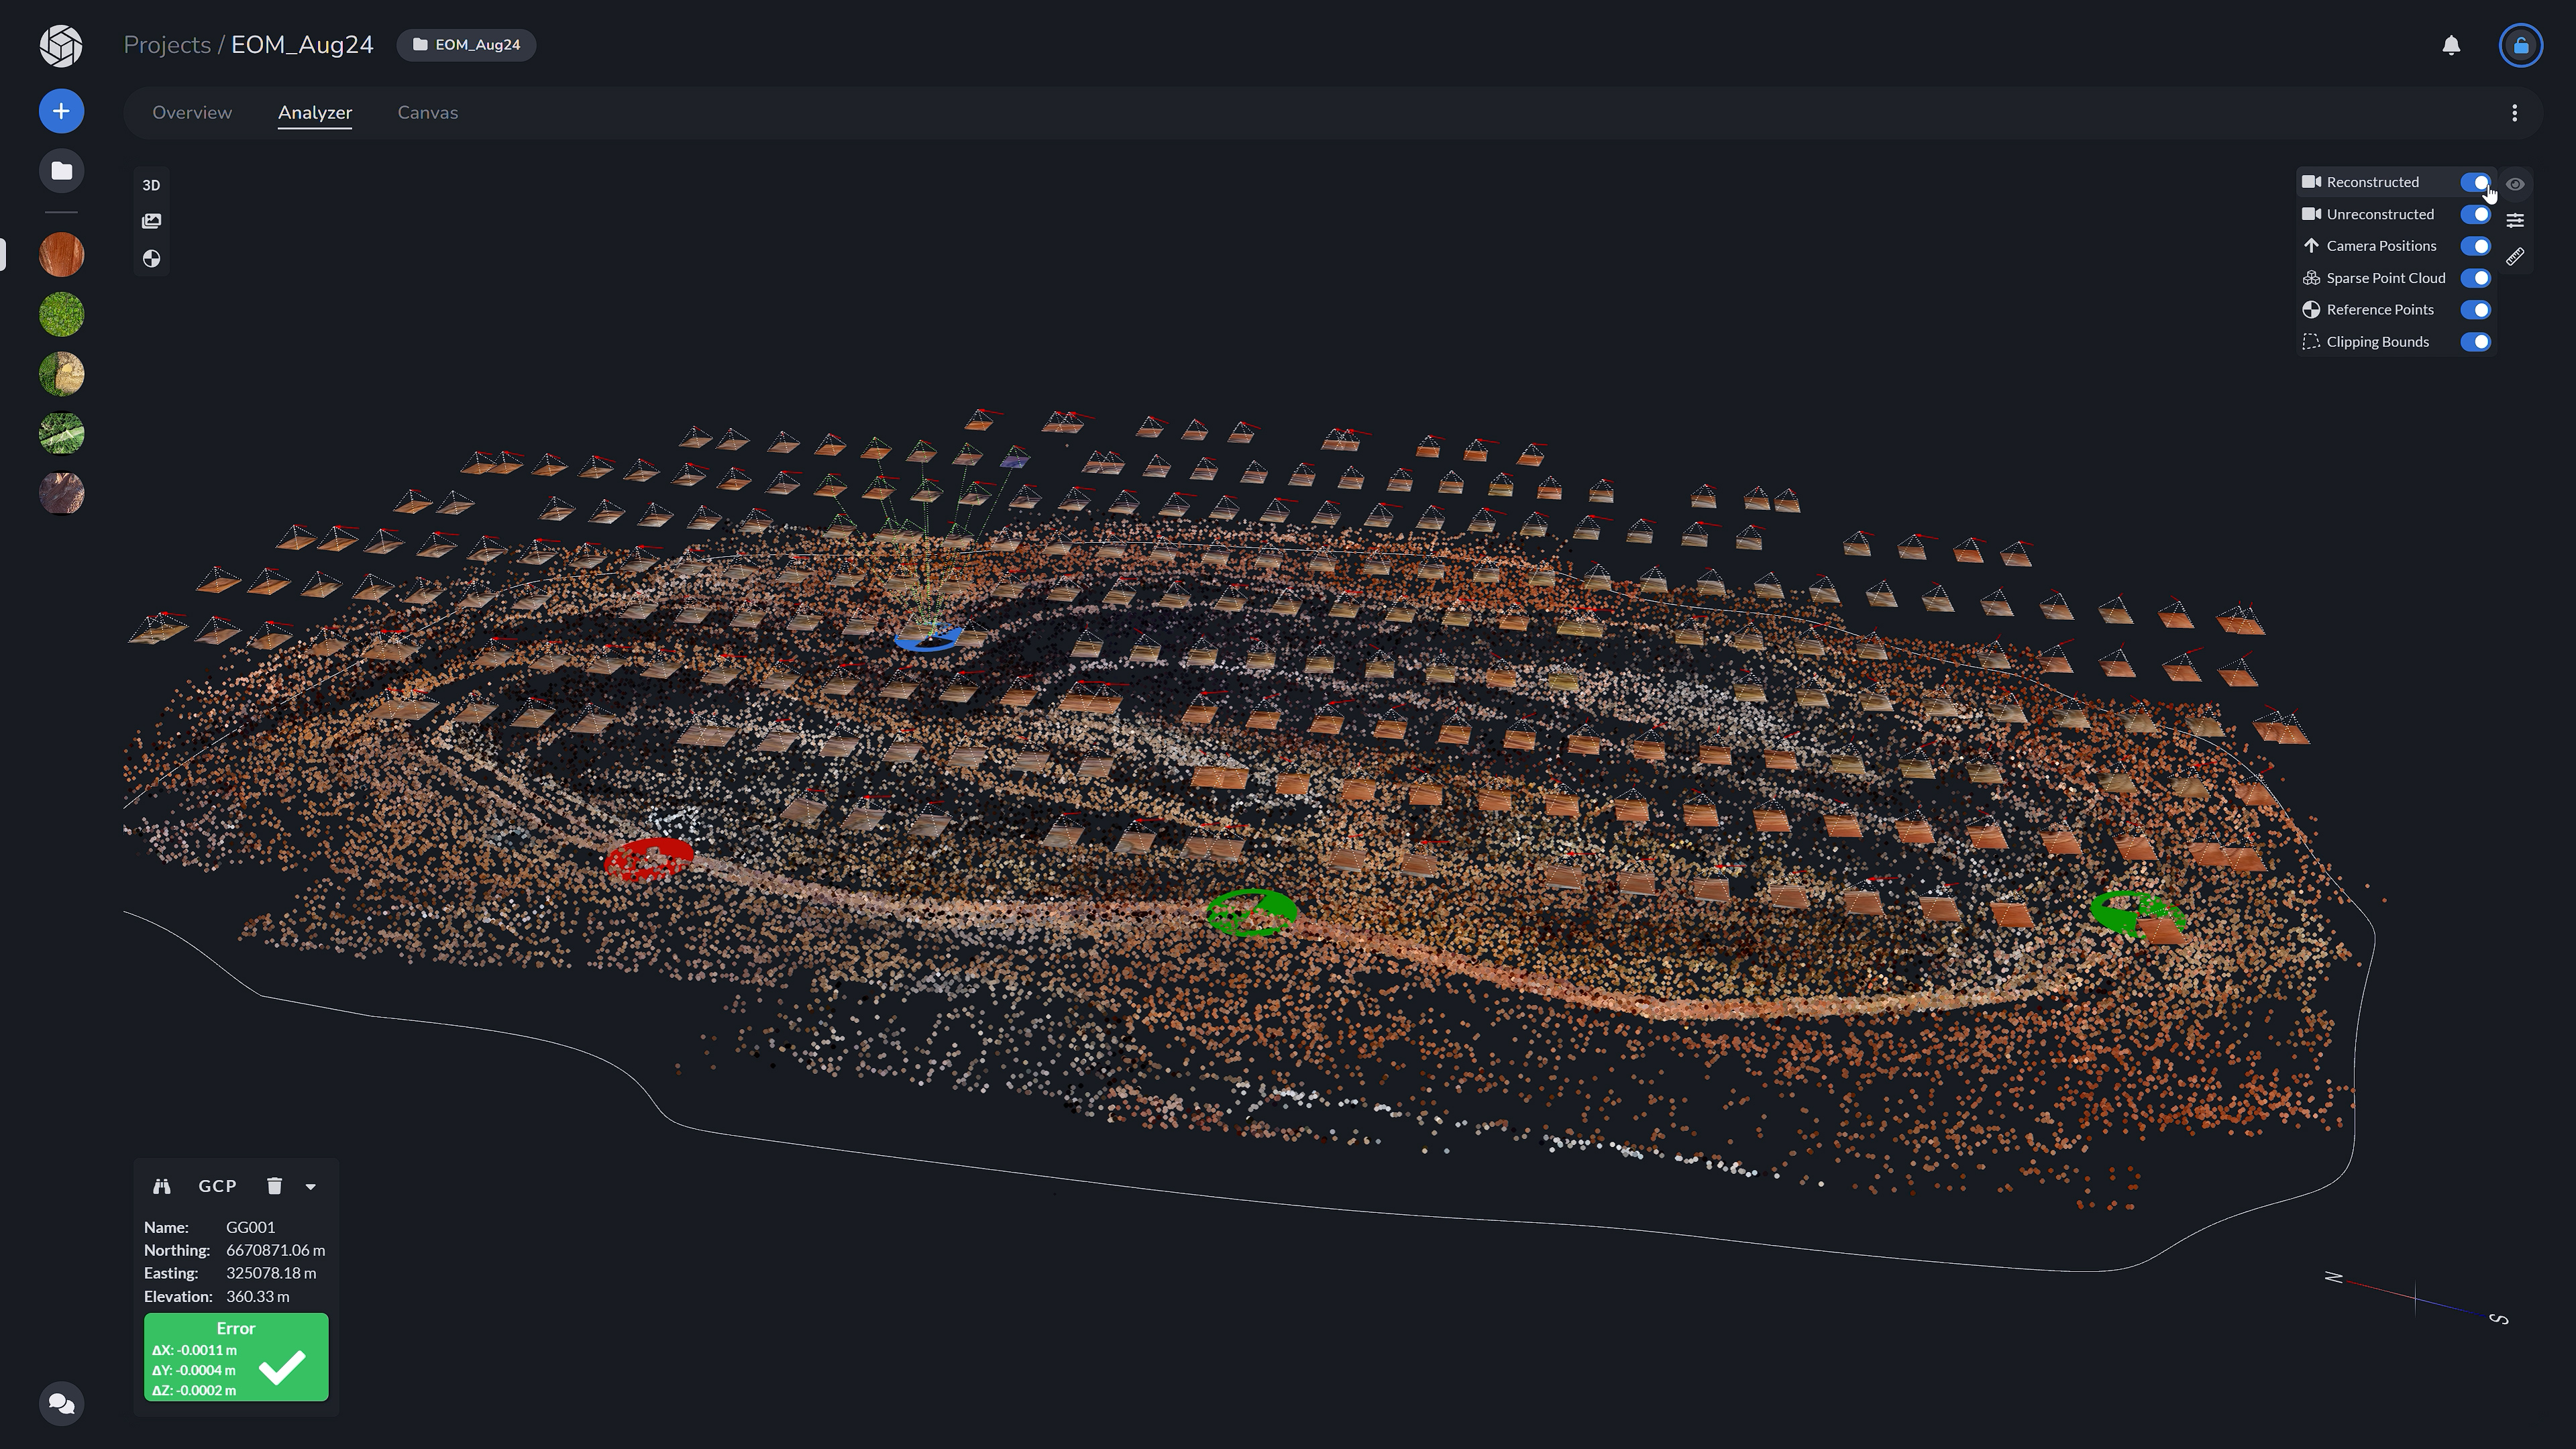
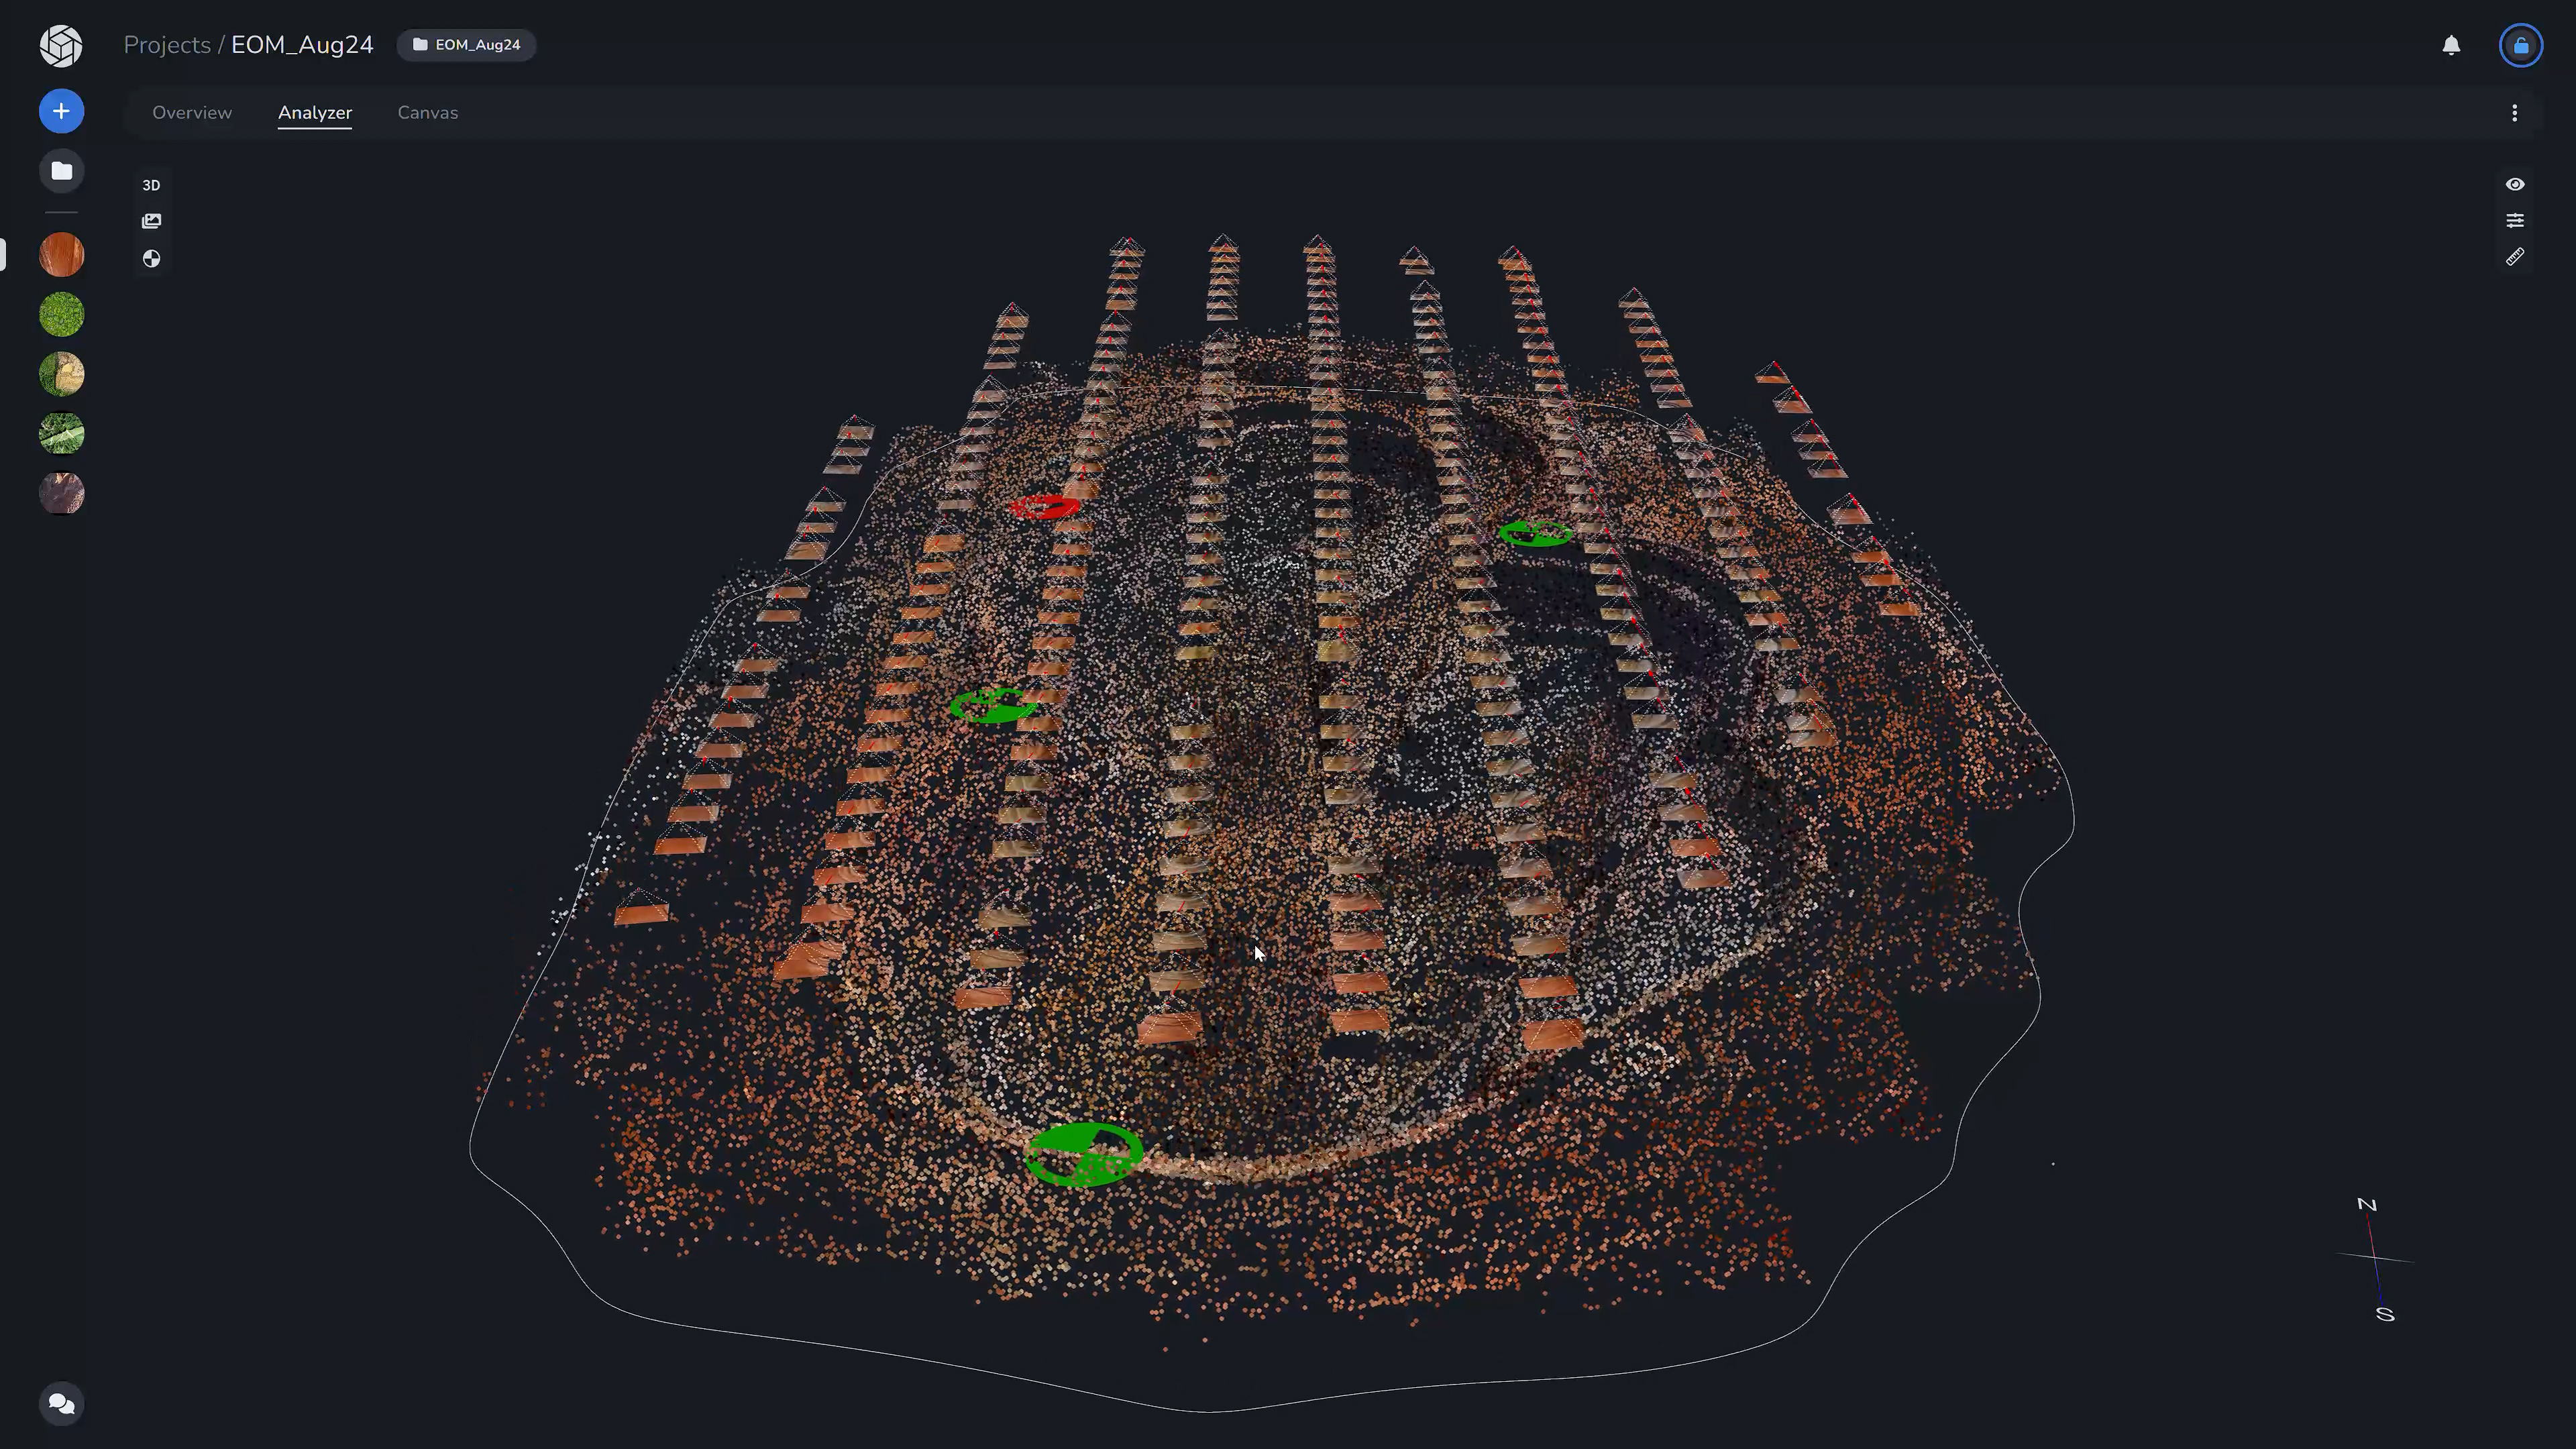
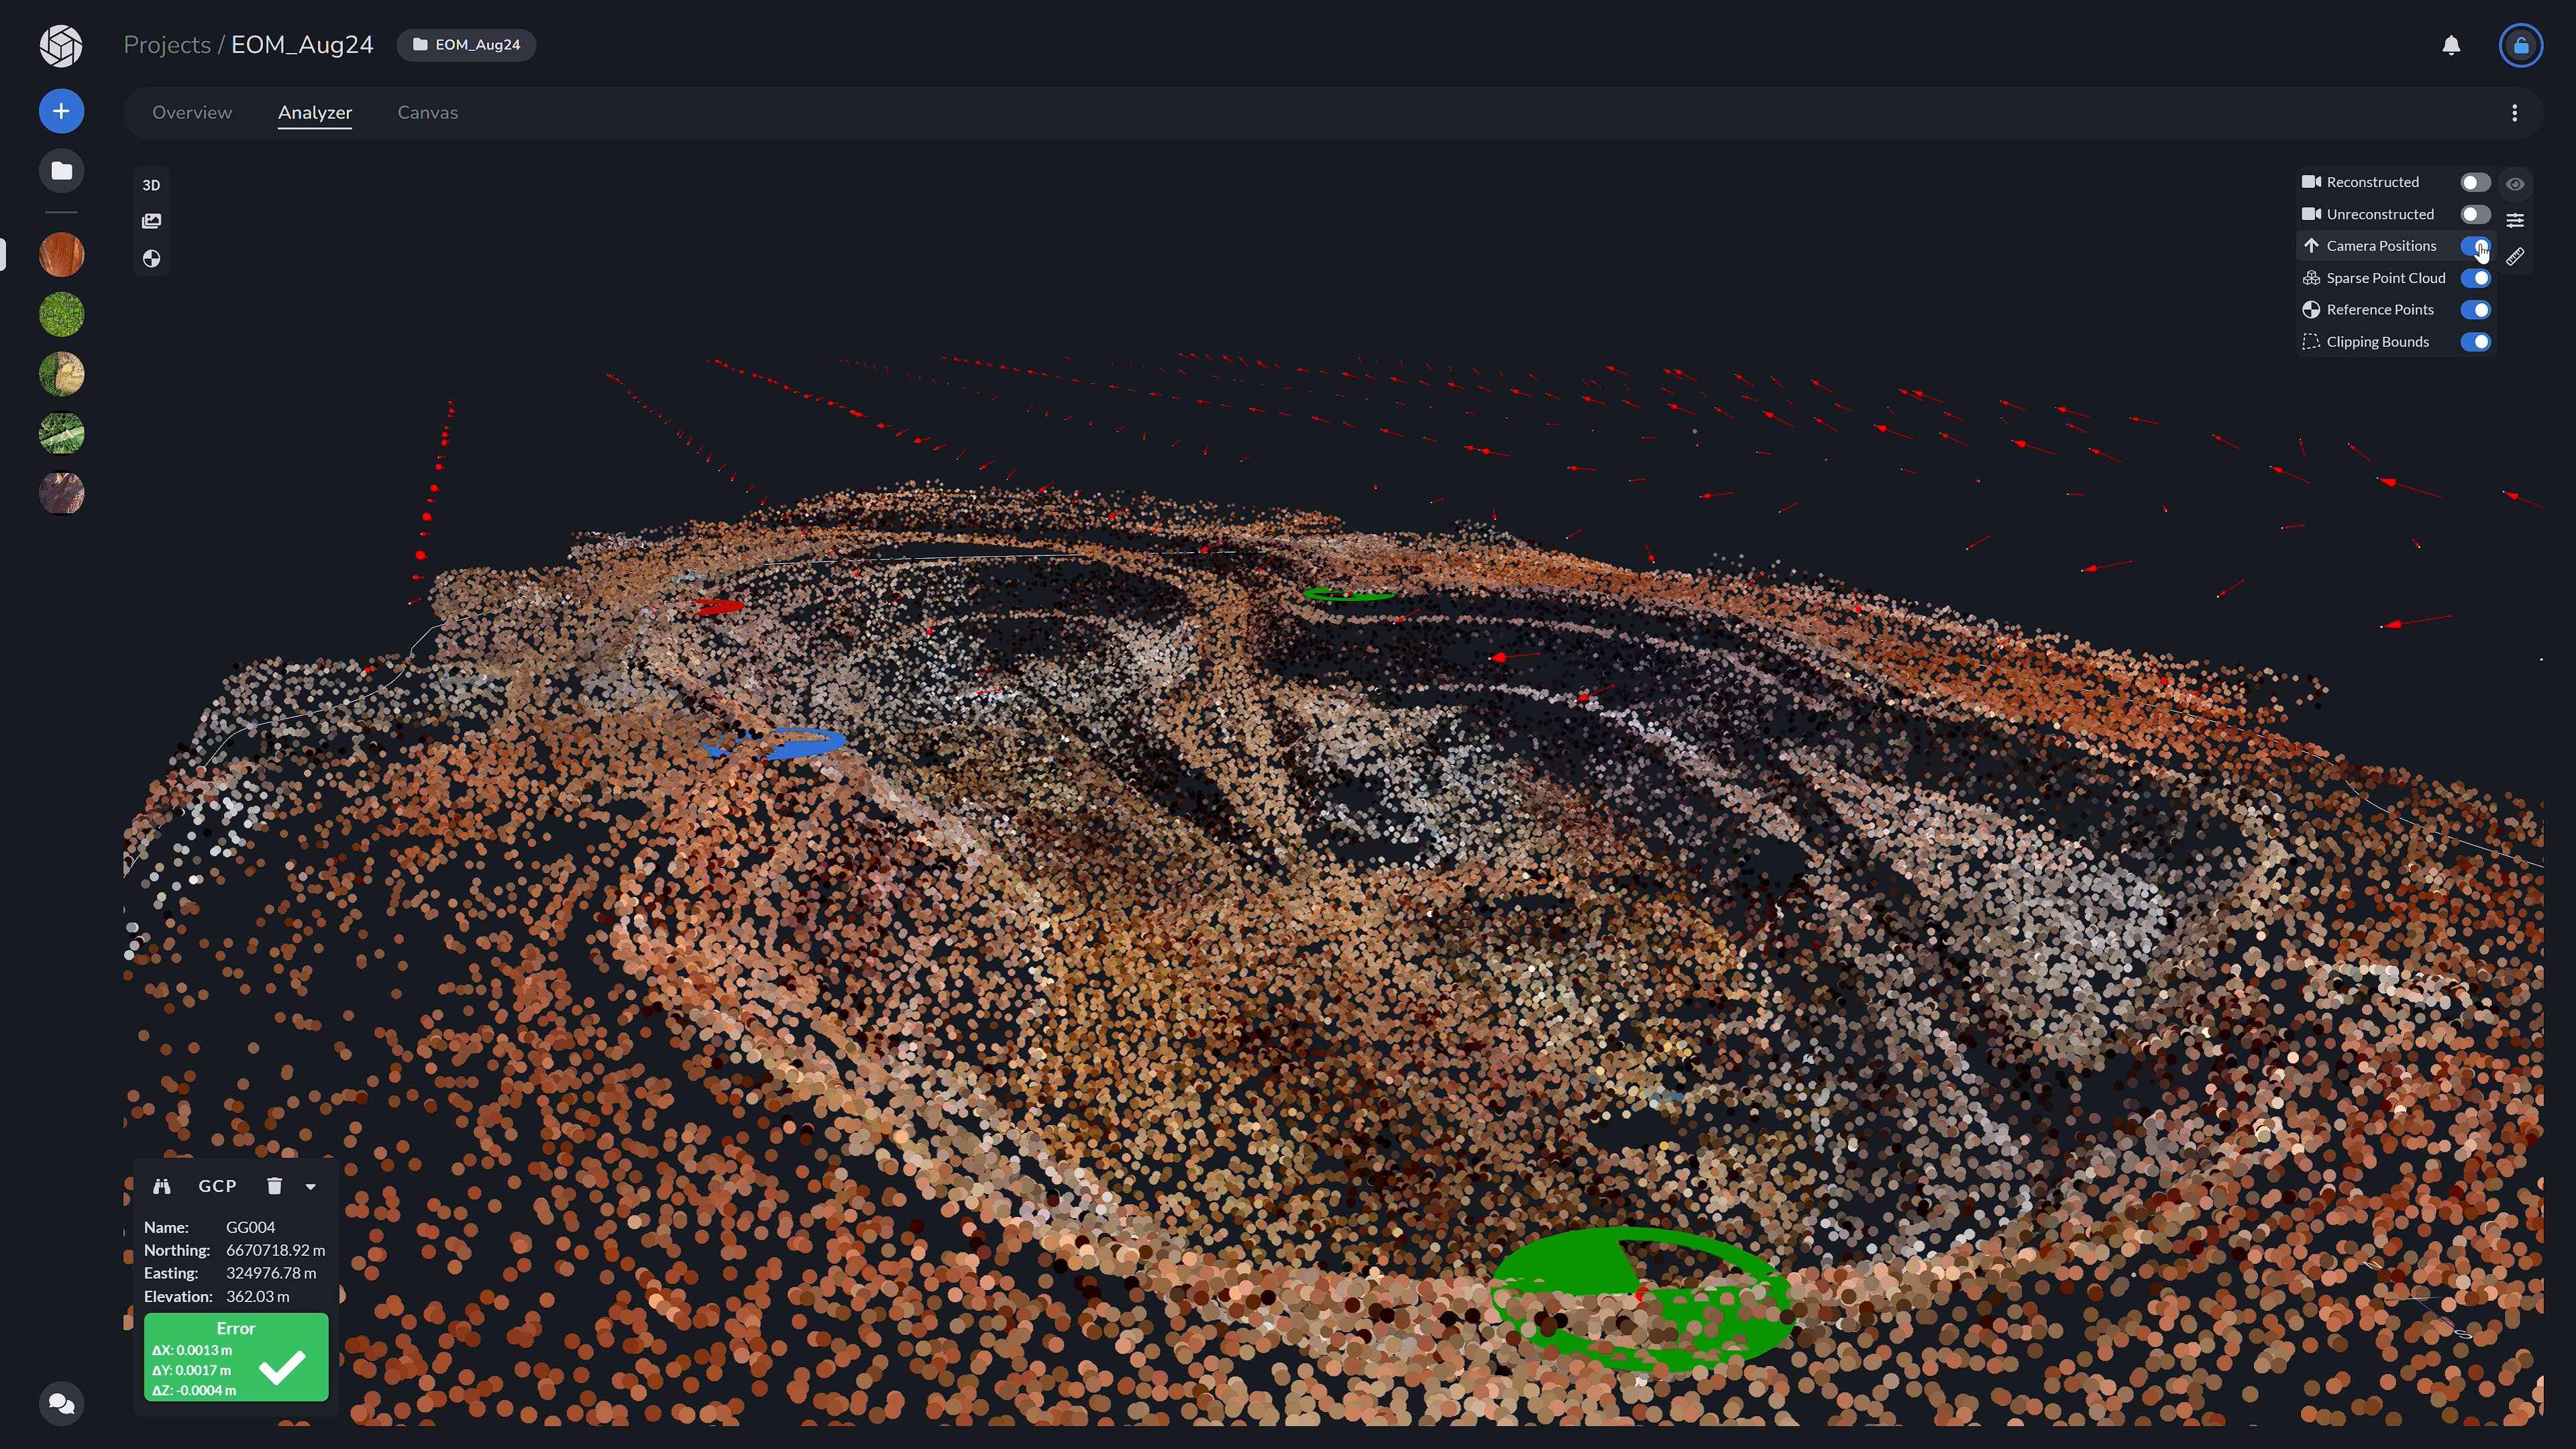
On the top right (Show Tool) is the ability to toggle reconstructed view, unreconstructed view, all of your camera positions which are represented as small red vectors pointing at the angle the individual photos was taken at, toggle the sparse point cloud, as well as your reference points and the clipping boundary.
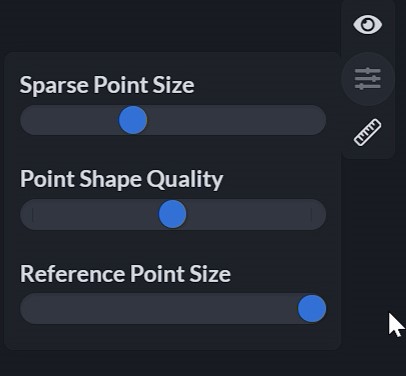
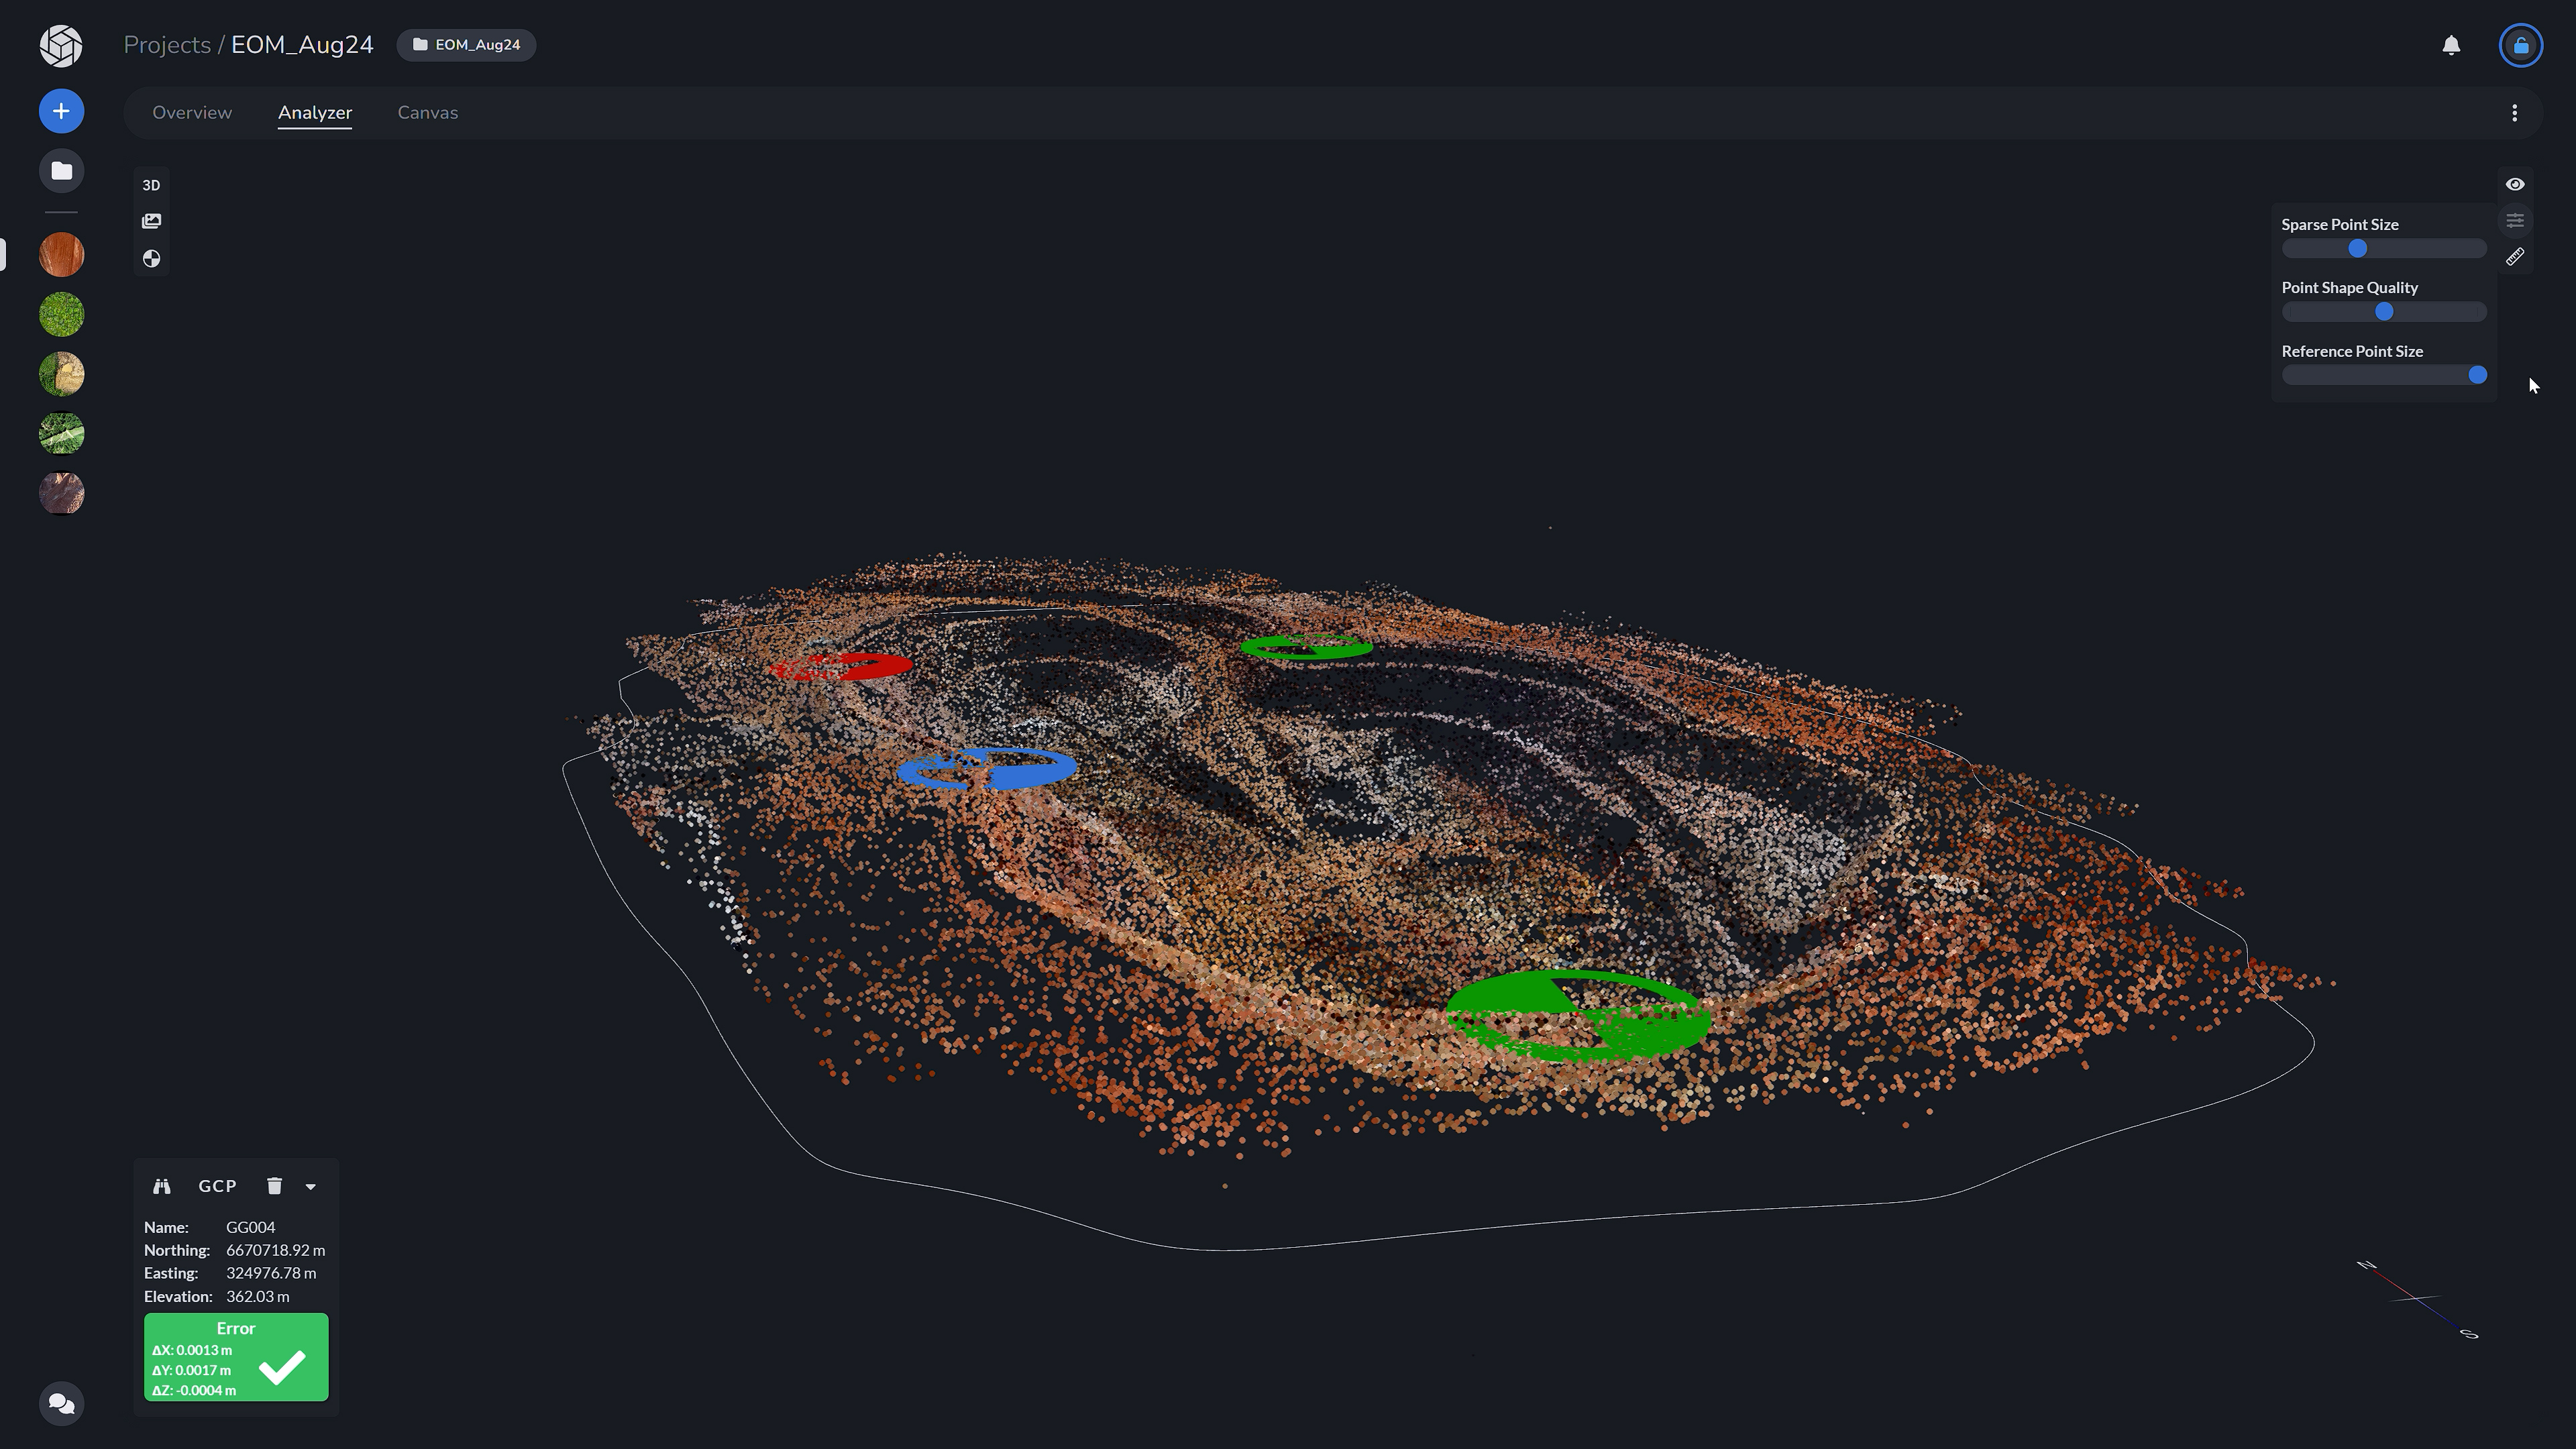
Next, using the Display Settings Tool, you are able to slide to adjust the Sparse Point Size, Point Shape Quality and Reference Point Size.
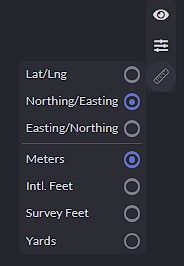
The last tool is the Units Tool where you can change the unit of your reference points.
This wraps up an introduction on how to use the Analyzer tab. Please stay tuned for more in-depth tutorials on specific tools and their functionalities within certain map-based scenarios. We’ll delve deeper into each tool’s capabilities, providing practical examples and case studies to help you master their use and unlock the full potential of your mapping projects.