Starting a LiDAR + Imagery Project in PixElement
Hello and welcome! This tutorial article we will show you how to start a project with LiDAR and imagery data in PixElement.
If you would like to view a video version of this post, please see it here.
Starting the Project
To start a LiDAR + Imagery project, select the option when prompted in the first step of the project creation process. You will then be prompted to upload your datasets. So drag and drop or browse for your images and import them. They will then come up on the map and you can see the footprints of where each photo was taken.

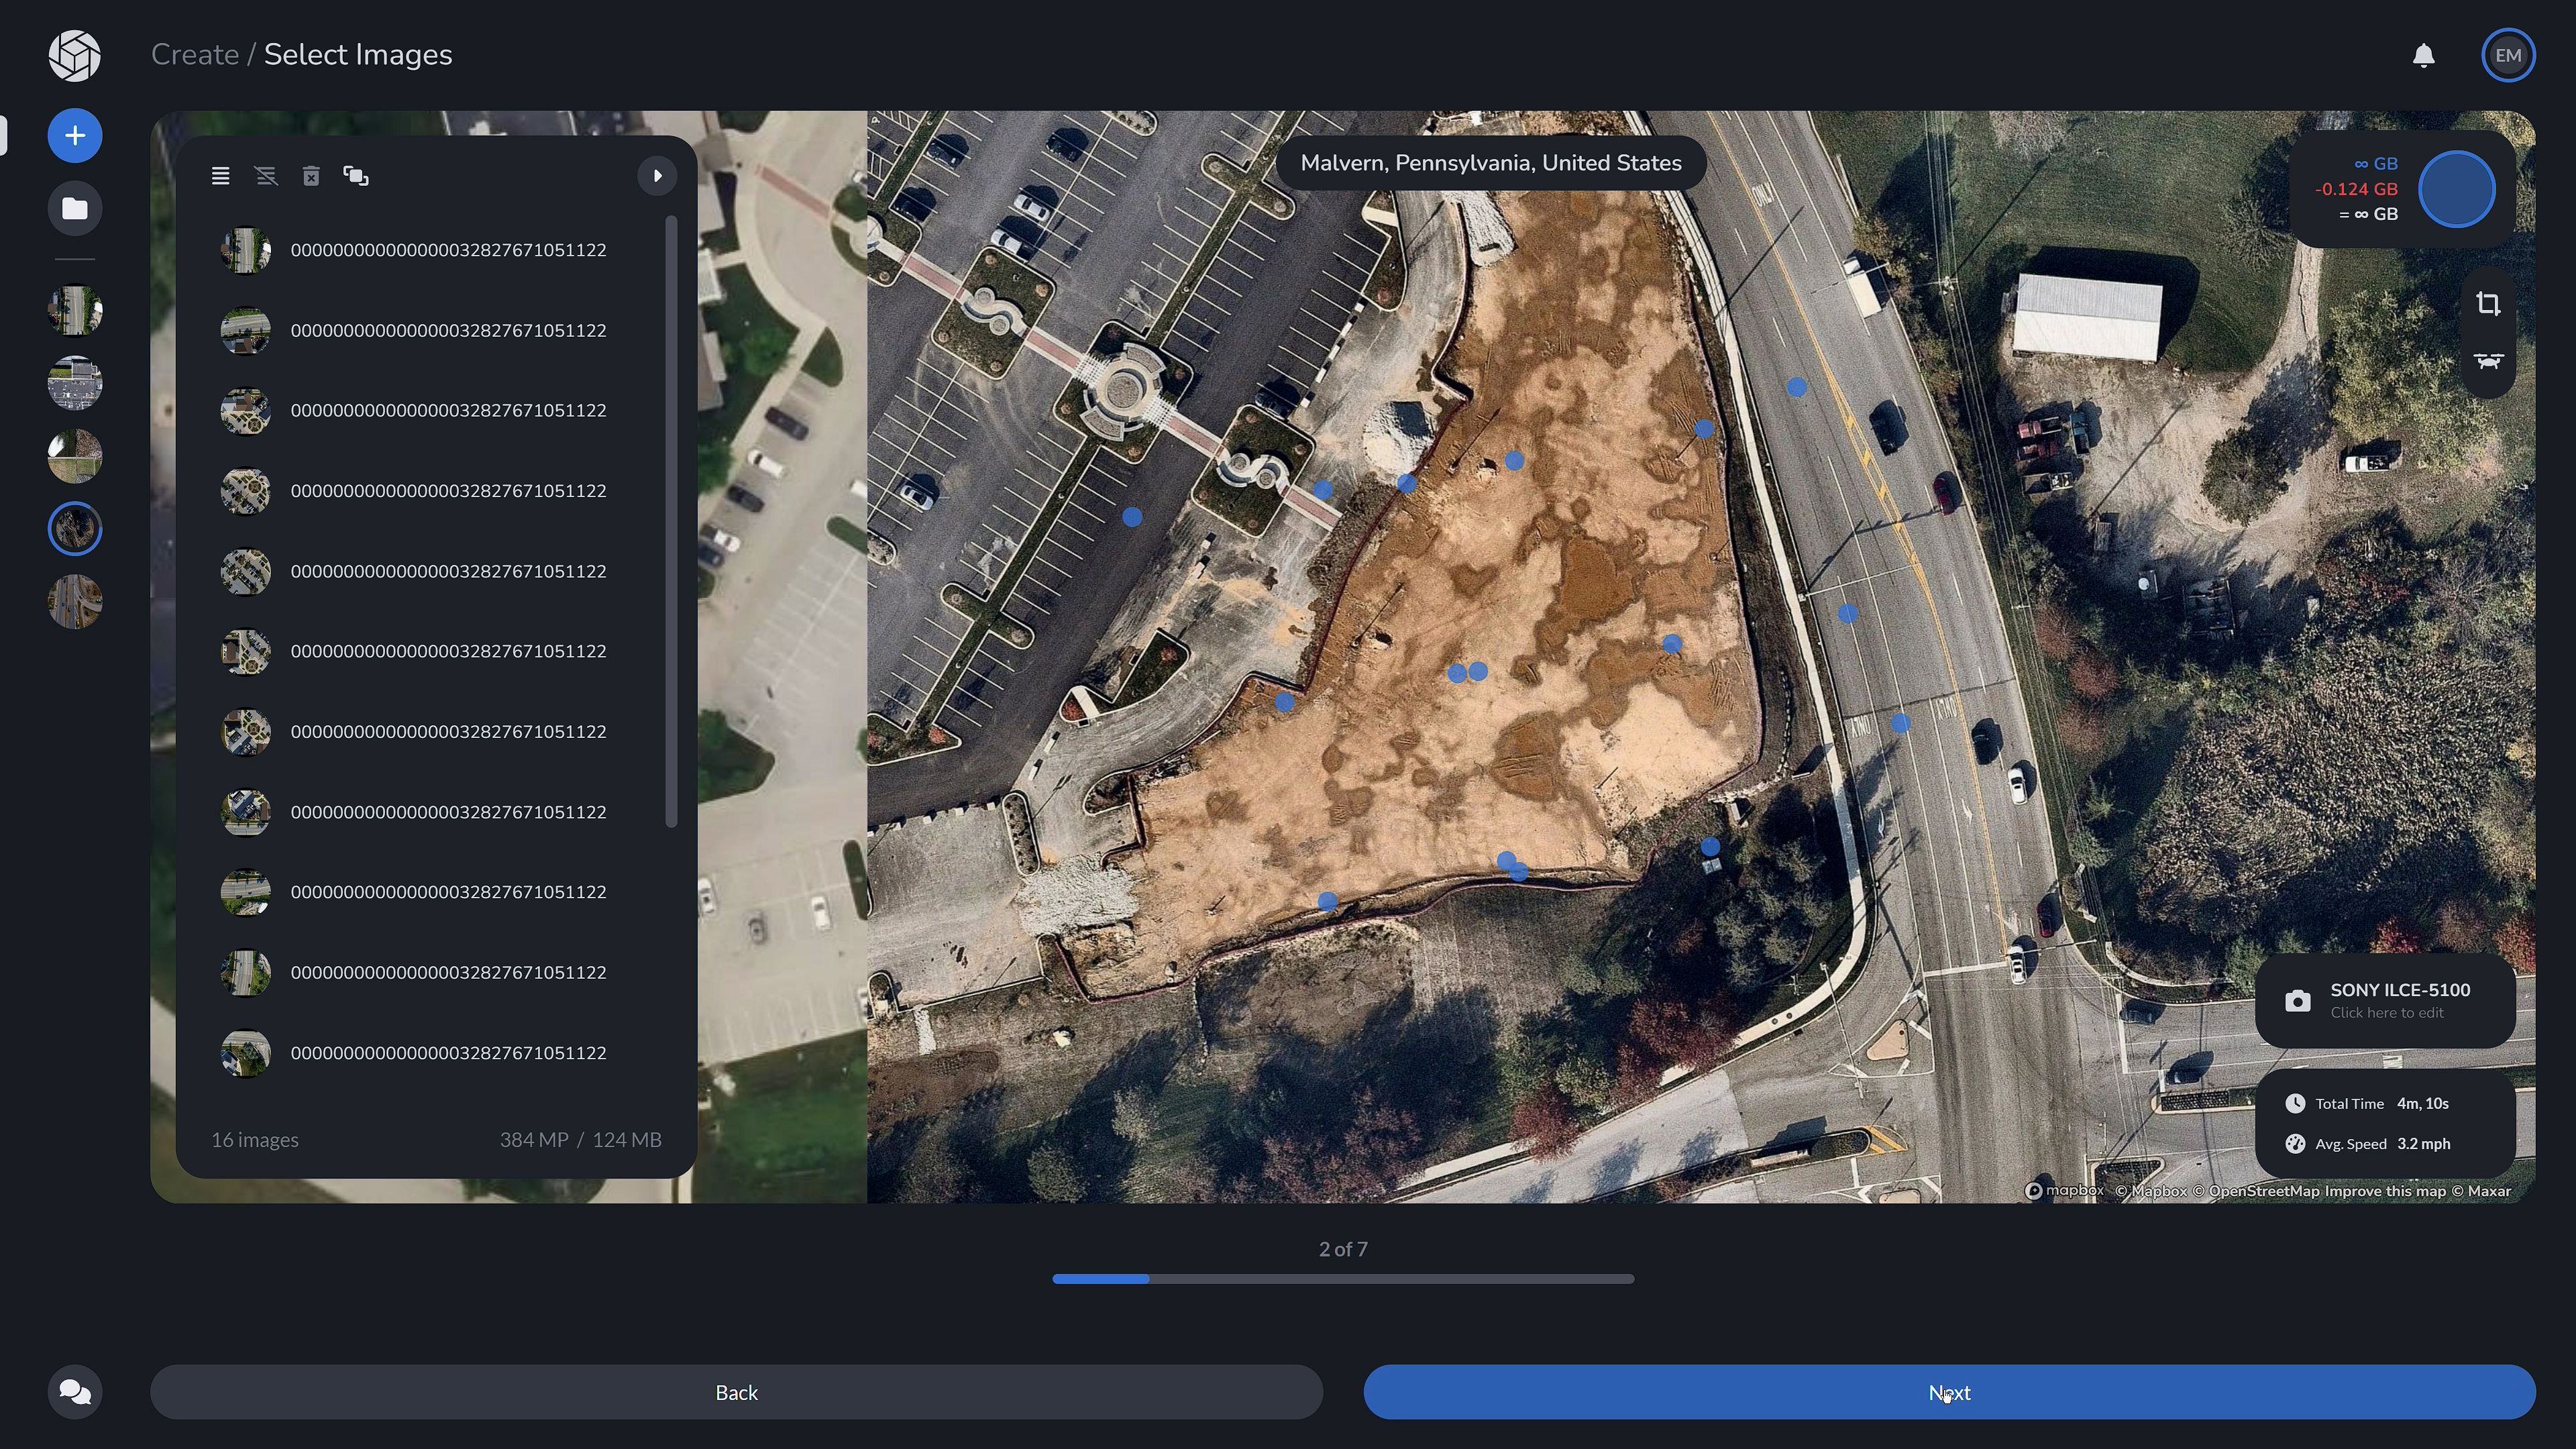
This dataset does not have GCPs present so we will click to pause processing to add some tiepoints later on.
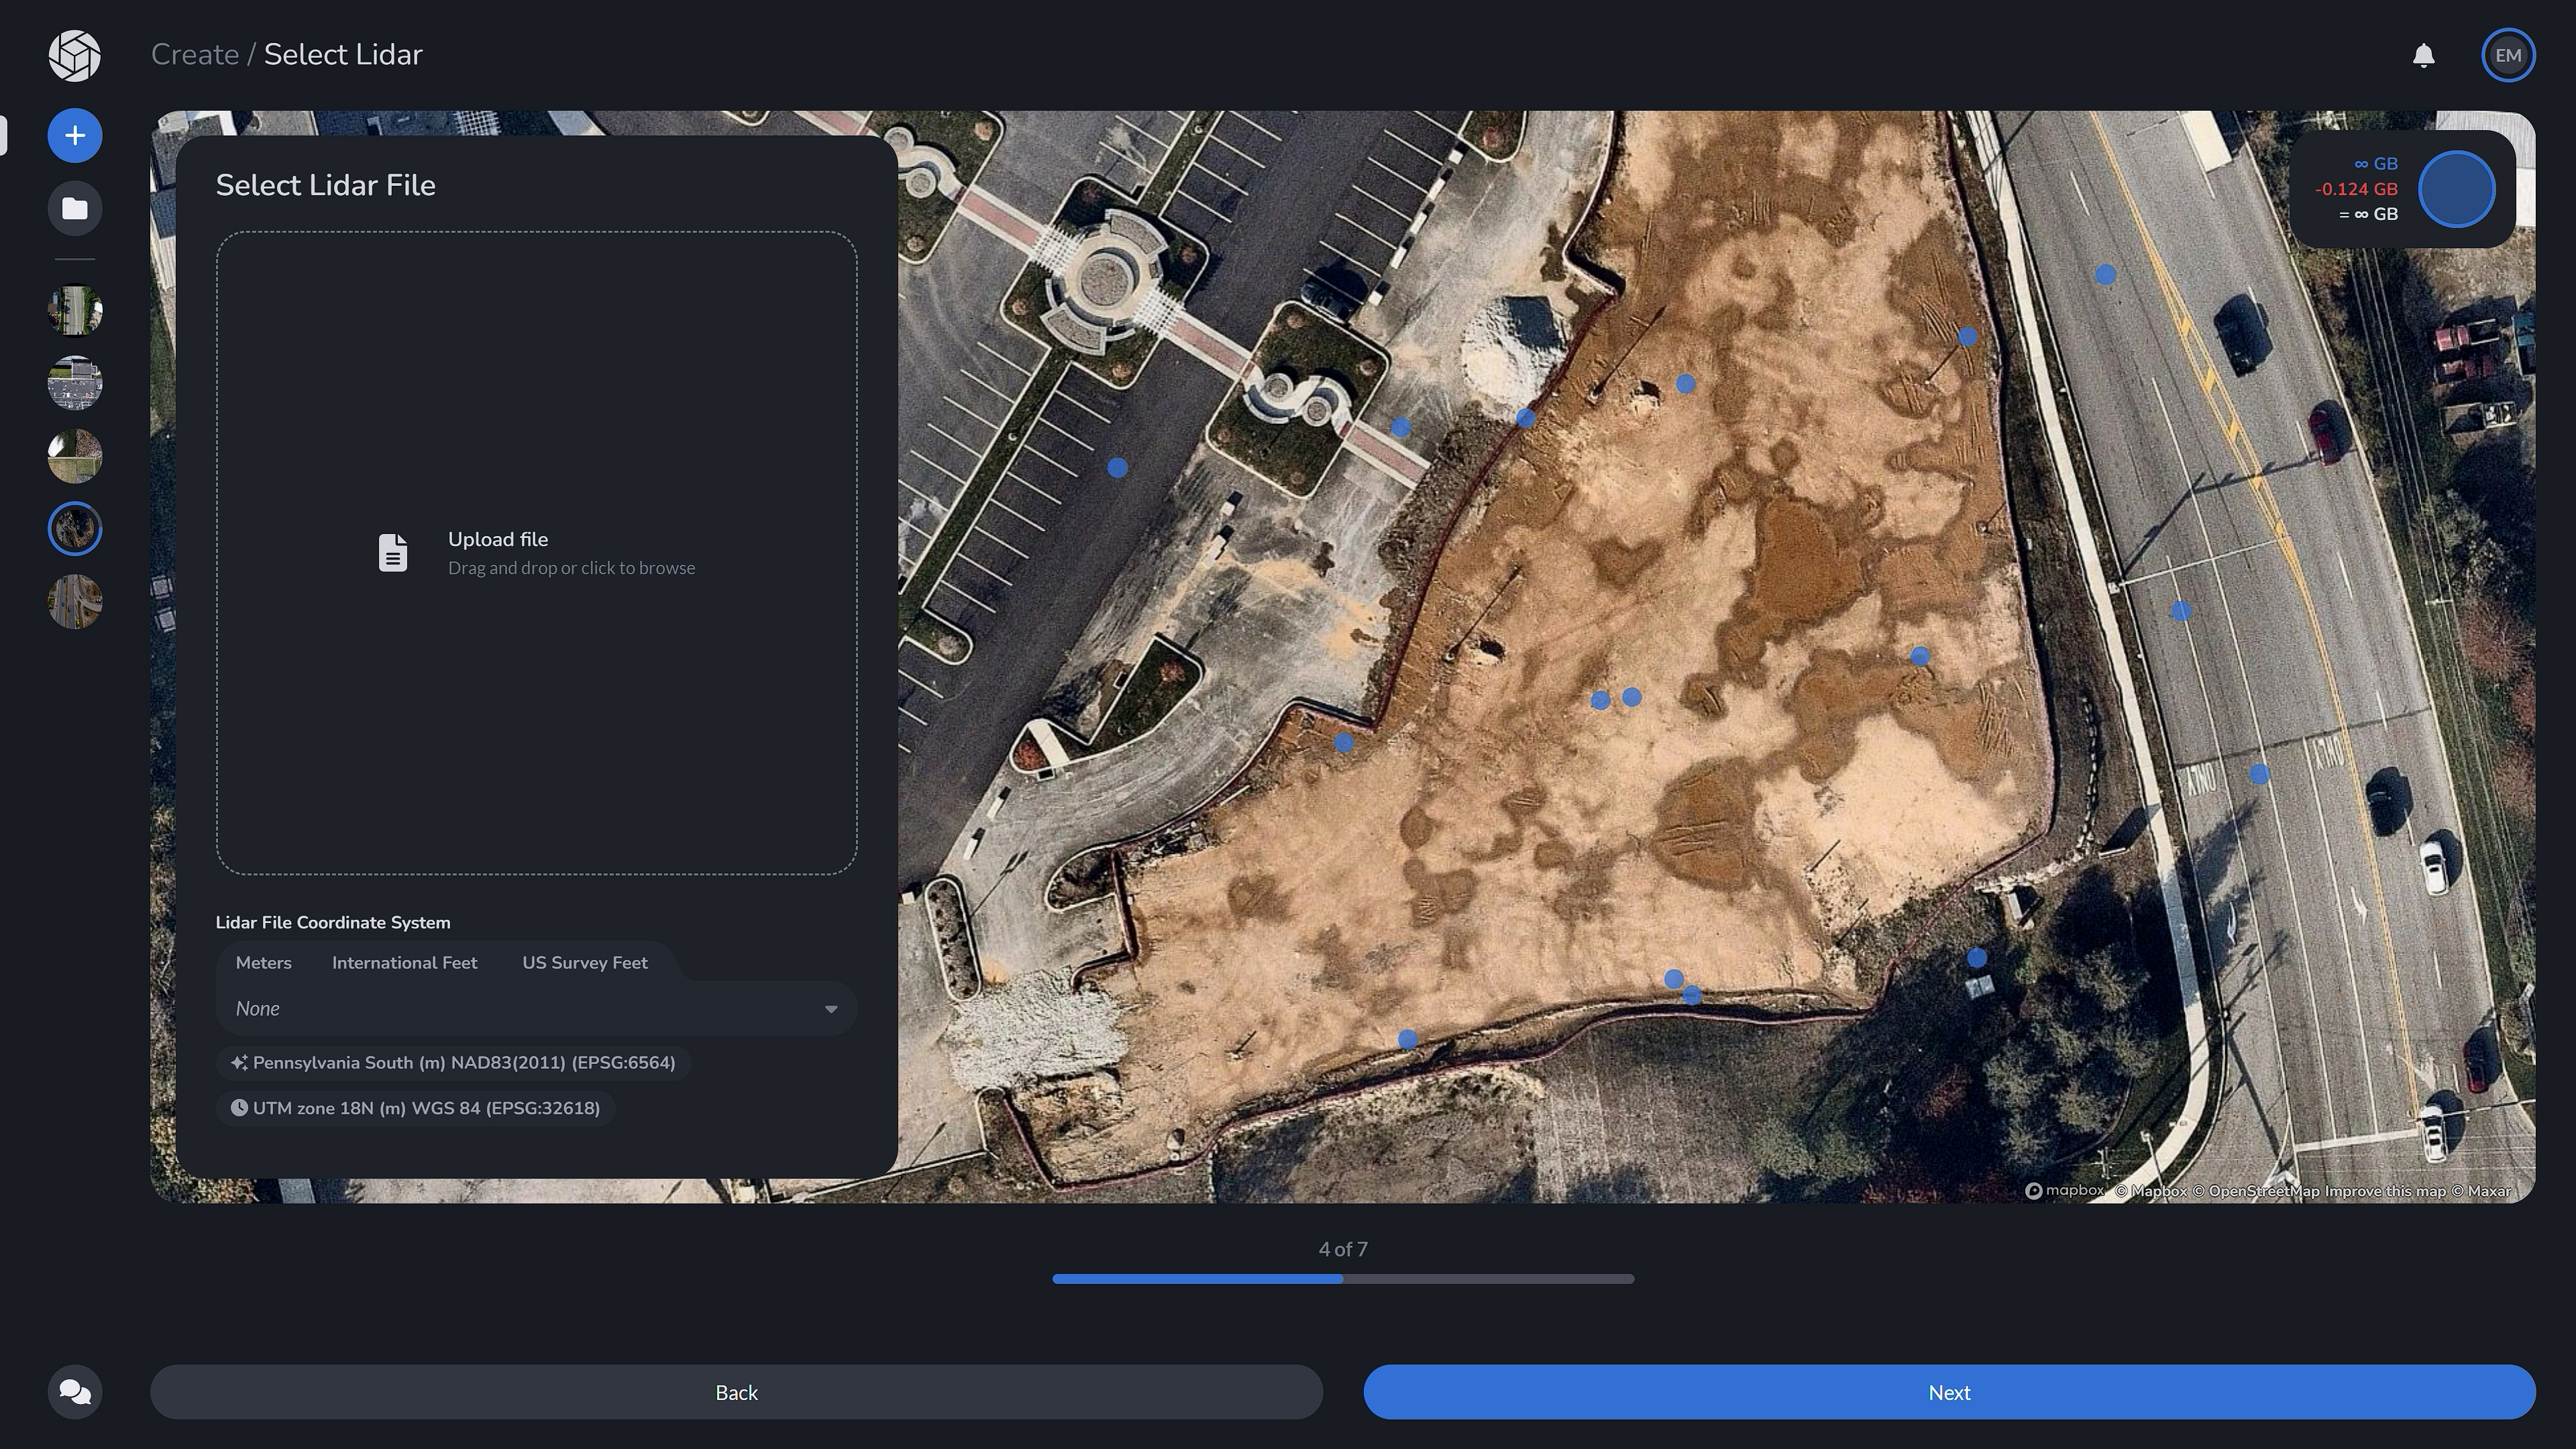
We will then be prompted to upload our LiDAR file which may be a “.las” or “.laz” file. We will then need to choose our coordinate system. Since LiDAR has its own coordinates within the file, we can use the “Embedded System”. Be sure to select the appropriate coordinate system when uploading your files. We will then select our output coordinate system which PixElement normally will automatically identify for you.
Just like with the solo imagery project we then have the ability to name our project, select if we want support and what email notifications we would like, as well as what deliverables we would like for the program to render.
When we are ready we can confirm our overview and begin the processing.
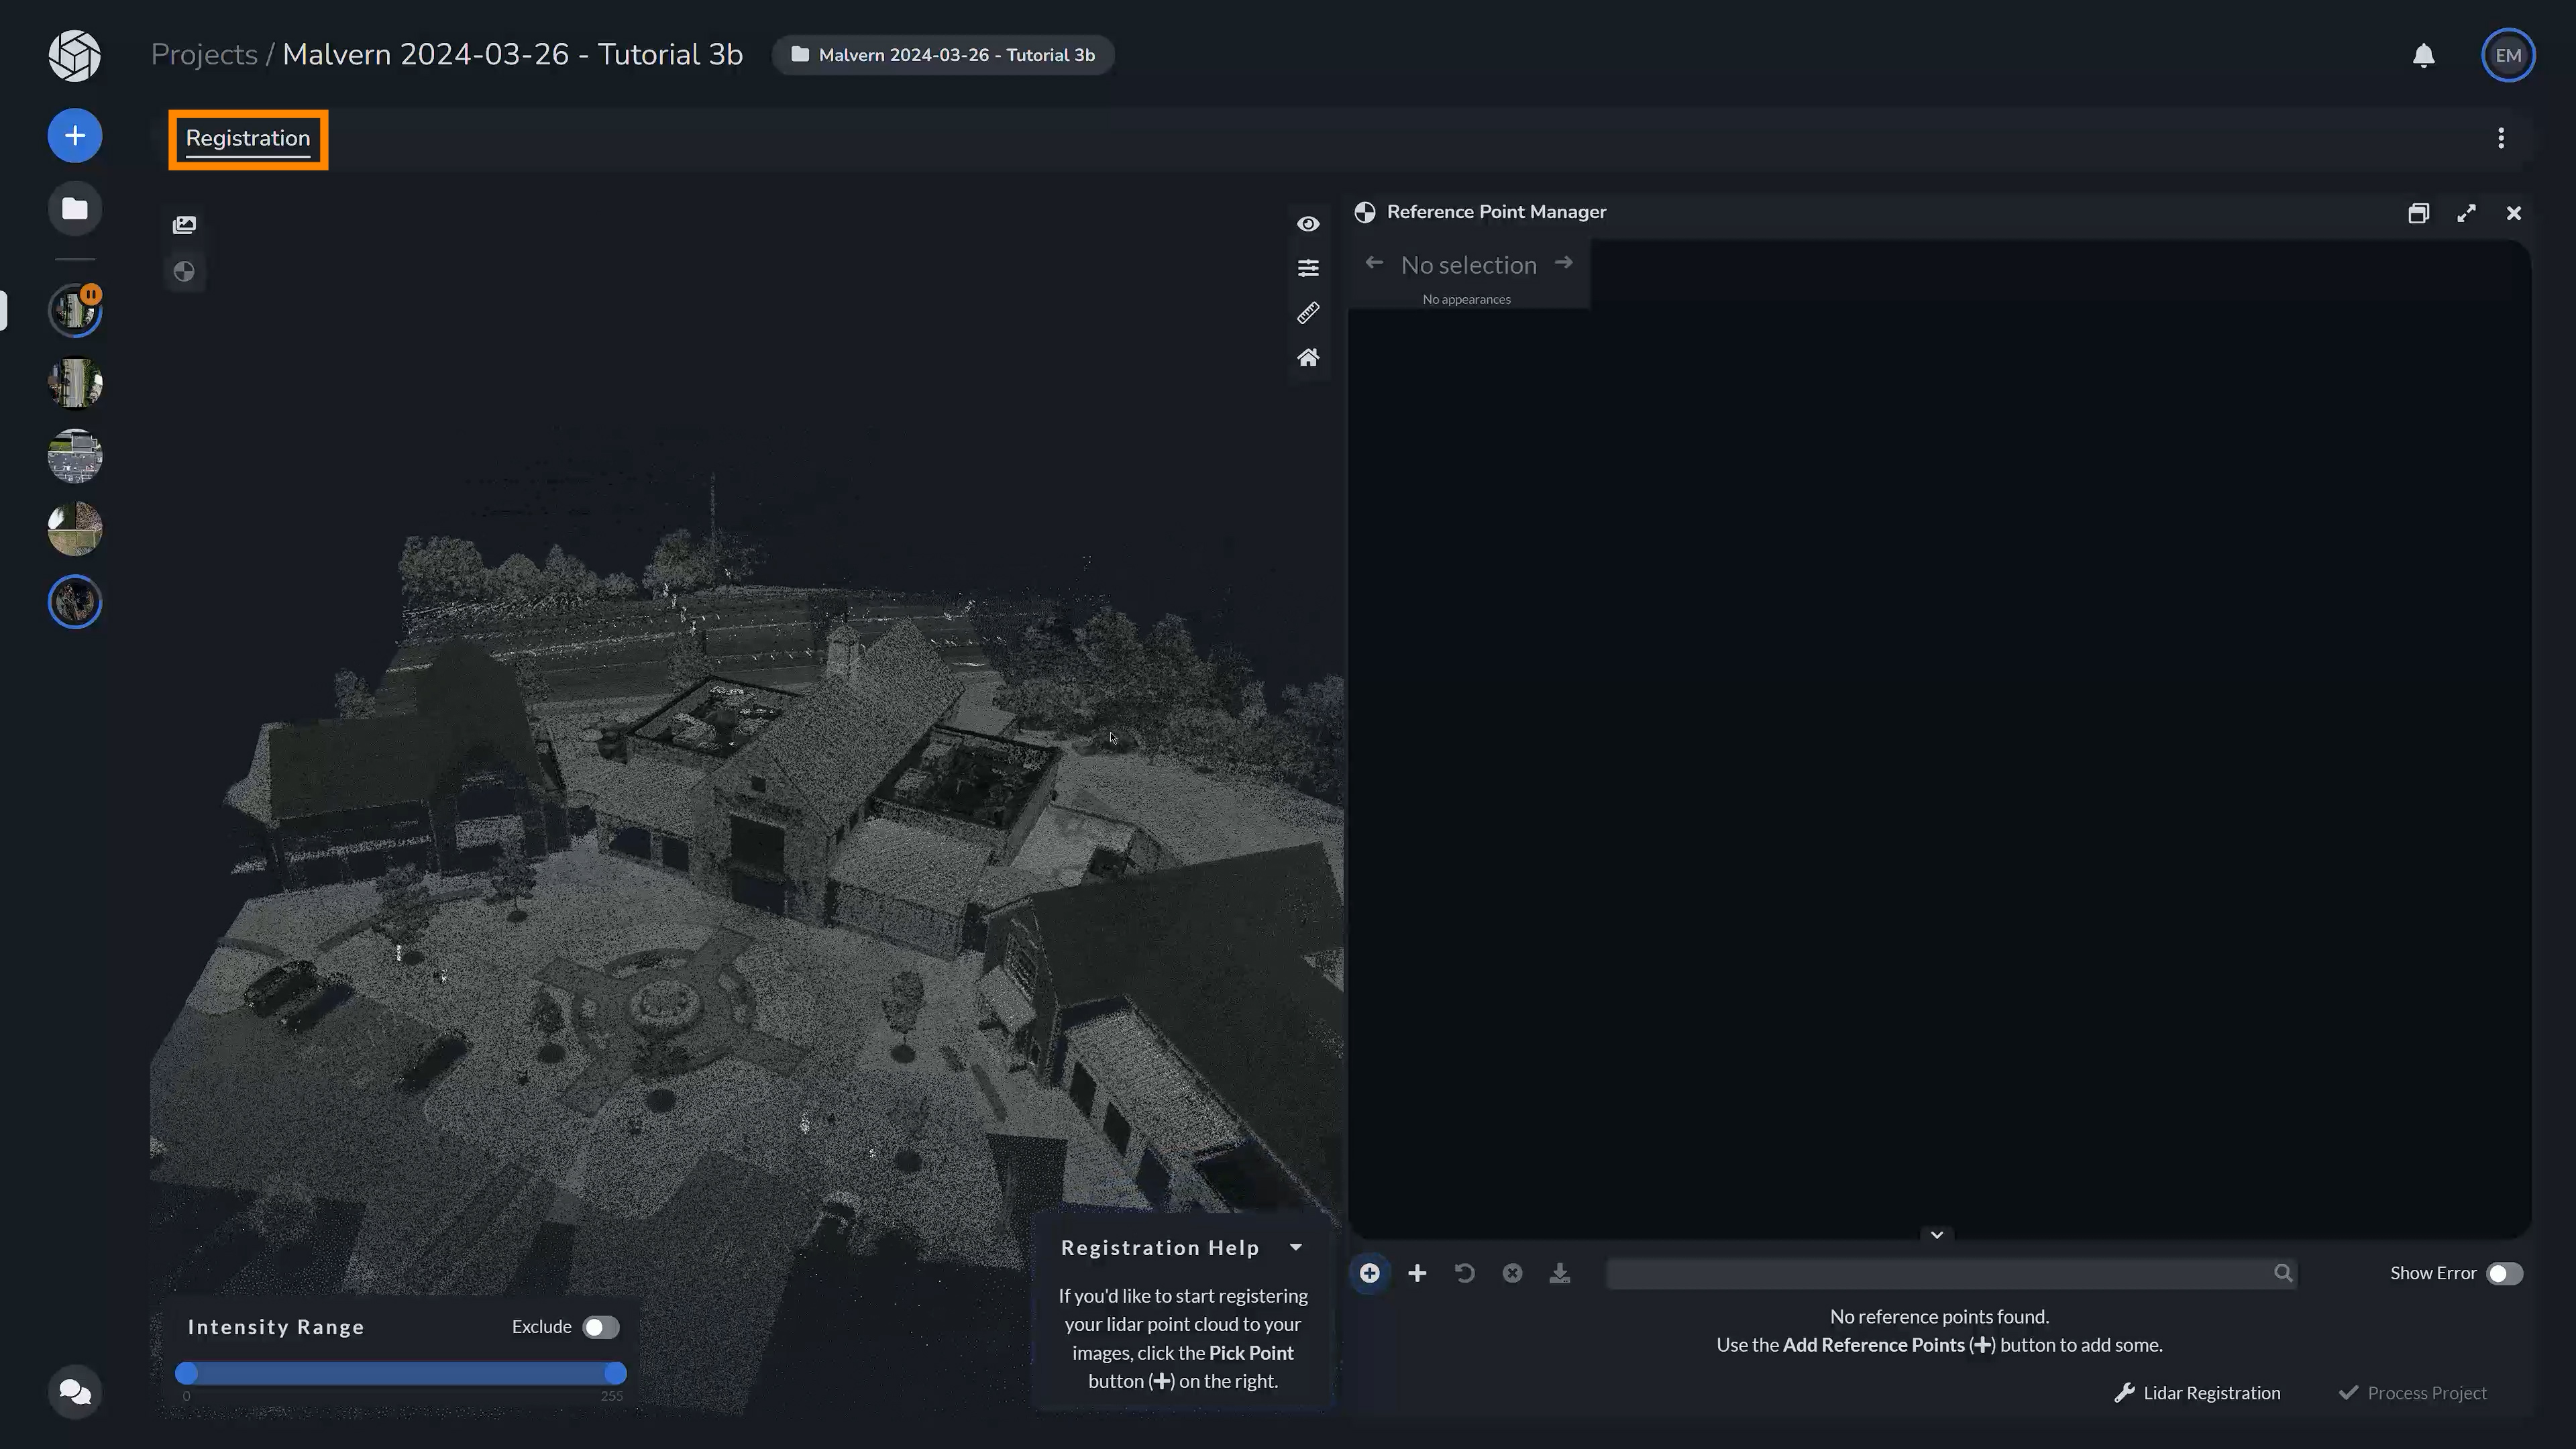
Once your project is uploaded, you will be taken to the registration tab where you will be able to add GCPs if you have them, as well as add checkpoints and tiepoints. For a LiDAR + Imagery project, you will need to add either GCPs or manual tiepoints within your project to align the photos with the LiDAR data.
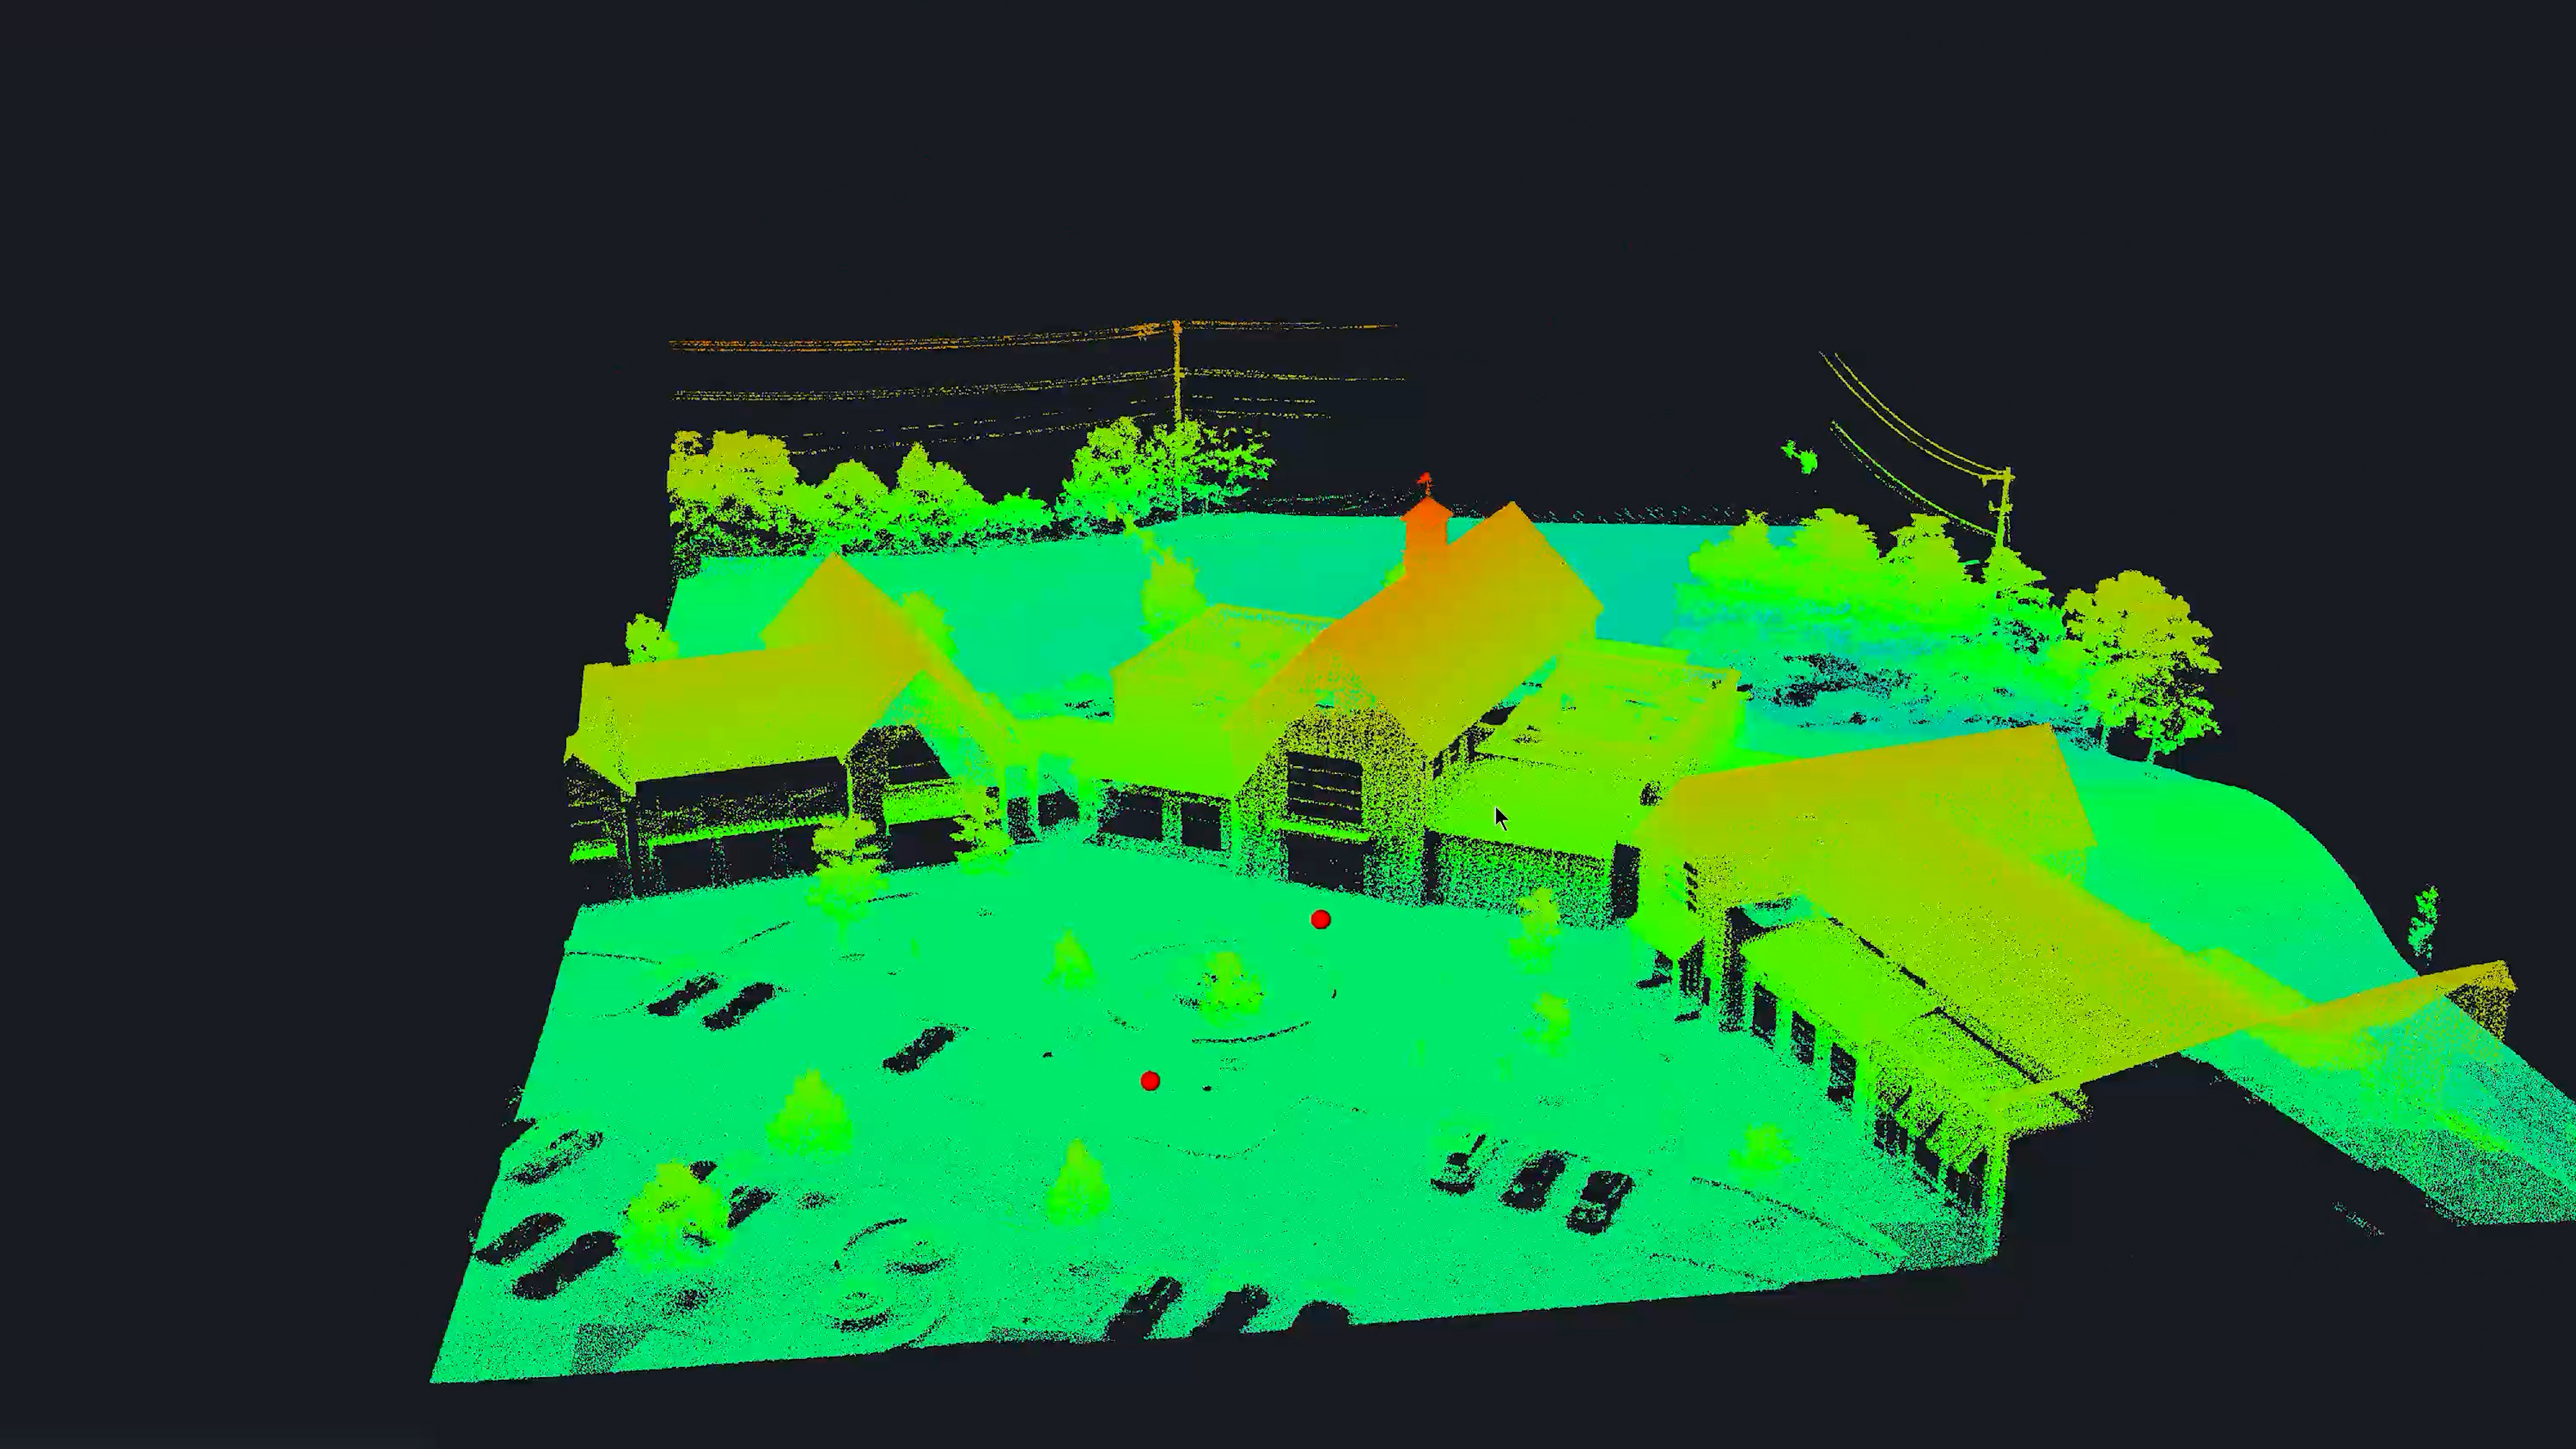
You can see that we have an extra tab for “Registration” for the LiDAR workspace. This tab is the point cloud created by the LiDAR file that we uploaded.
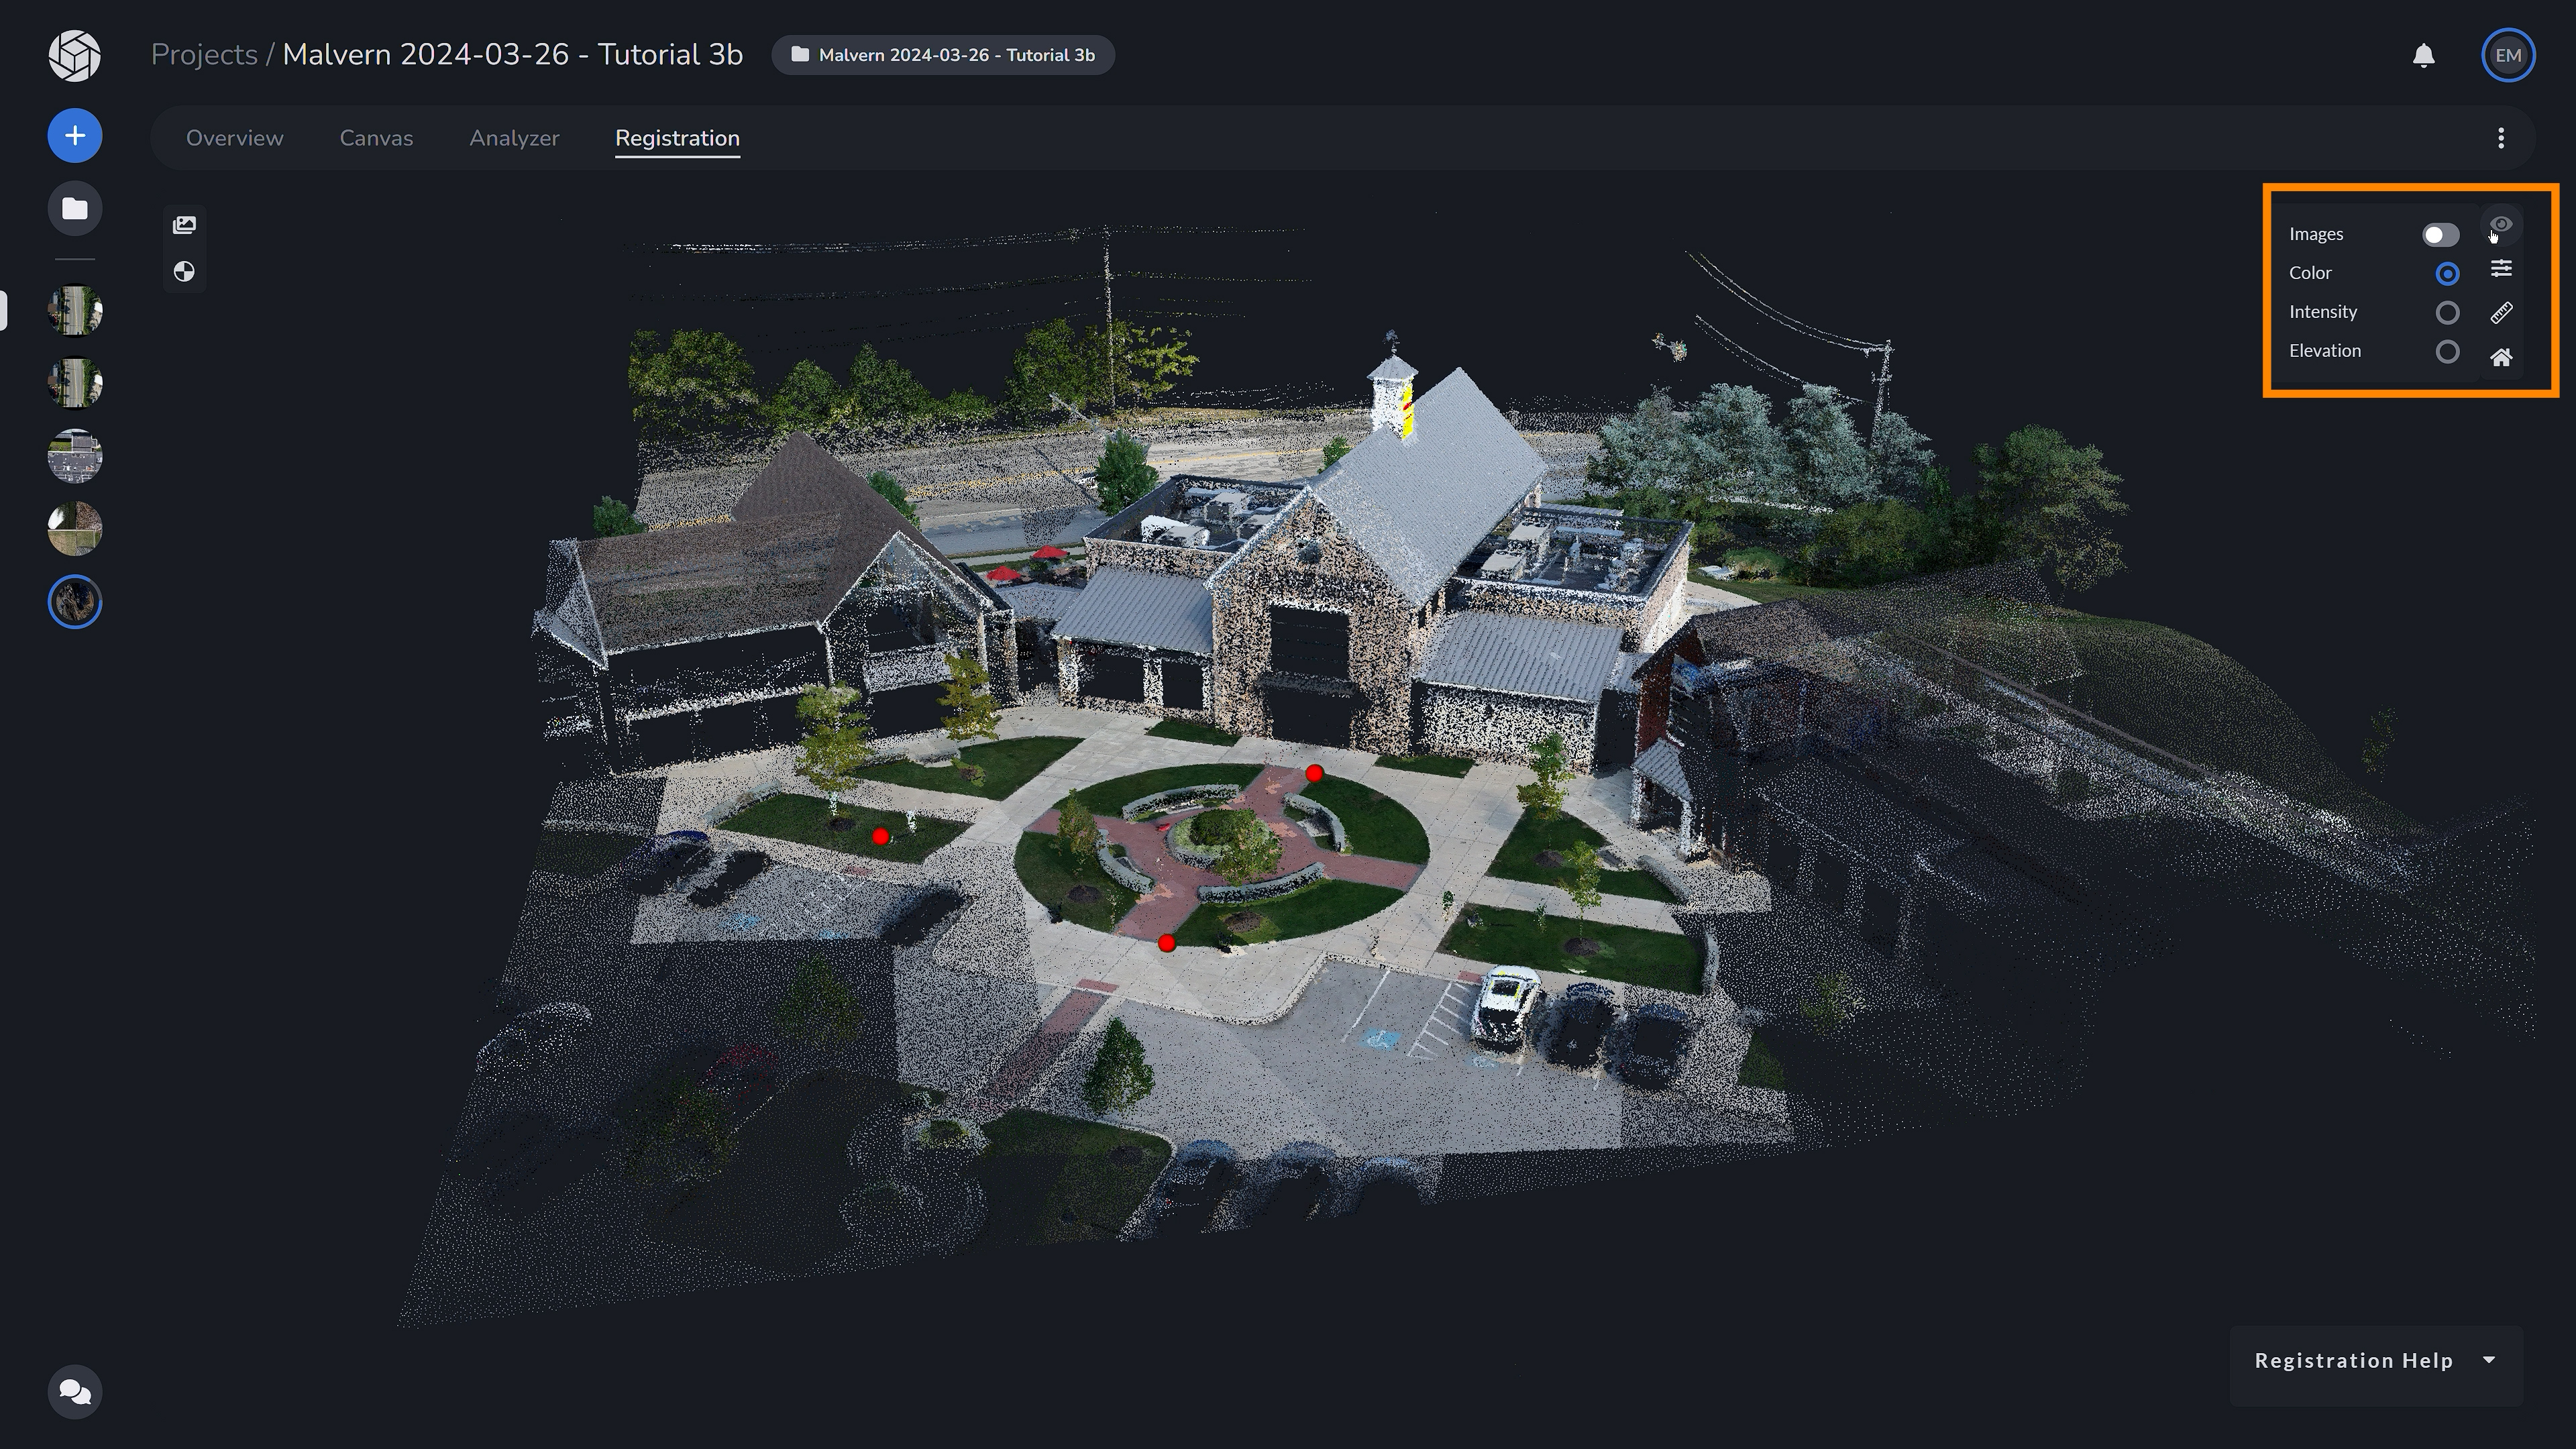
You are also able to switch views to color, intensity and elevation. In the LiDAR menu you can toggle the photos taken, change the LiDAR point size and the point picker snap radius - if you want to be more precise.

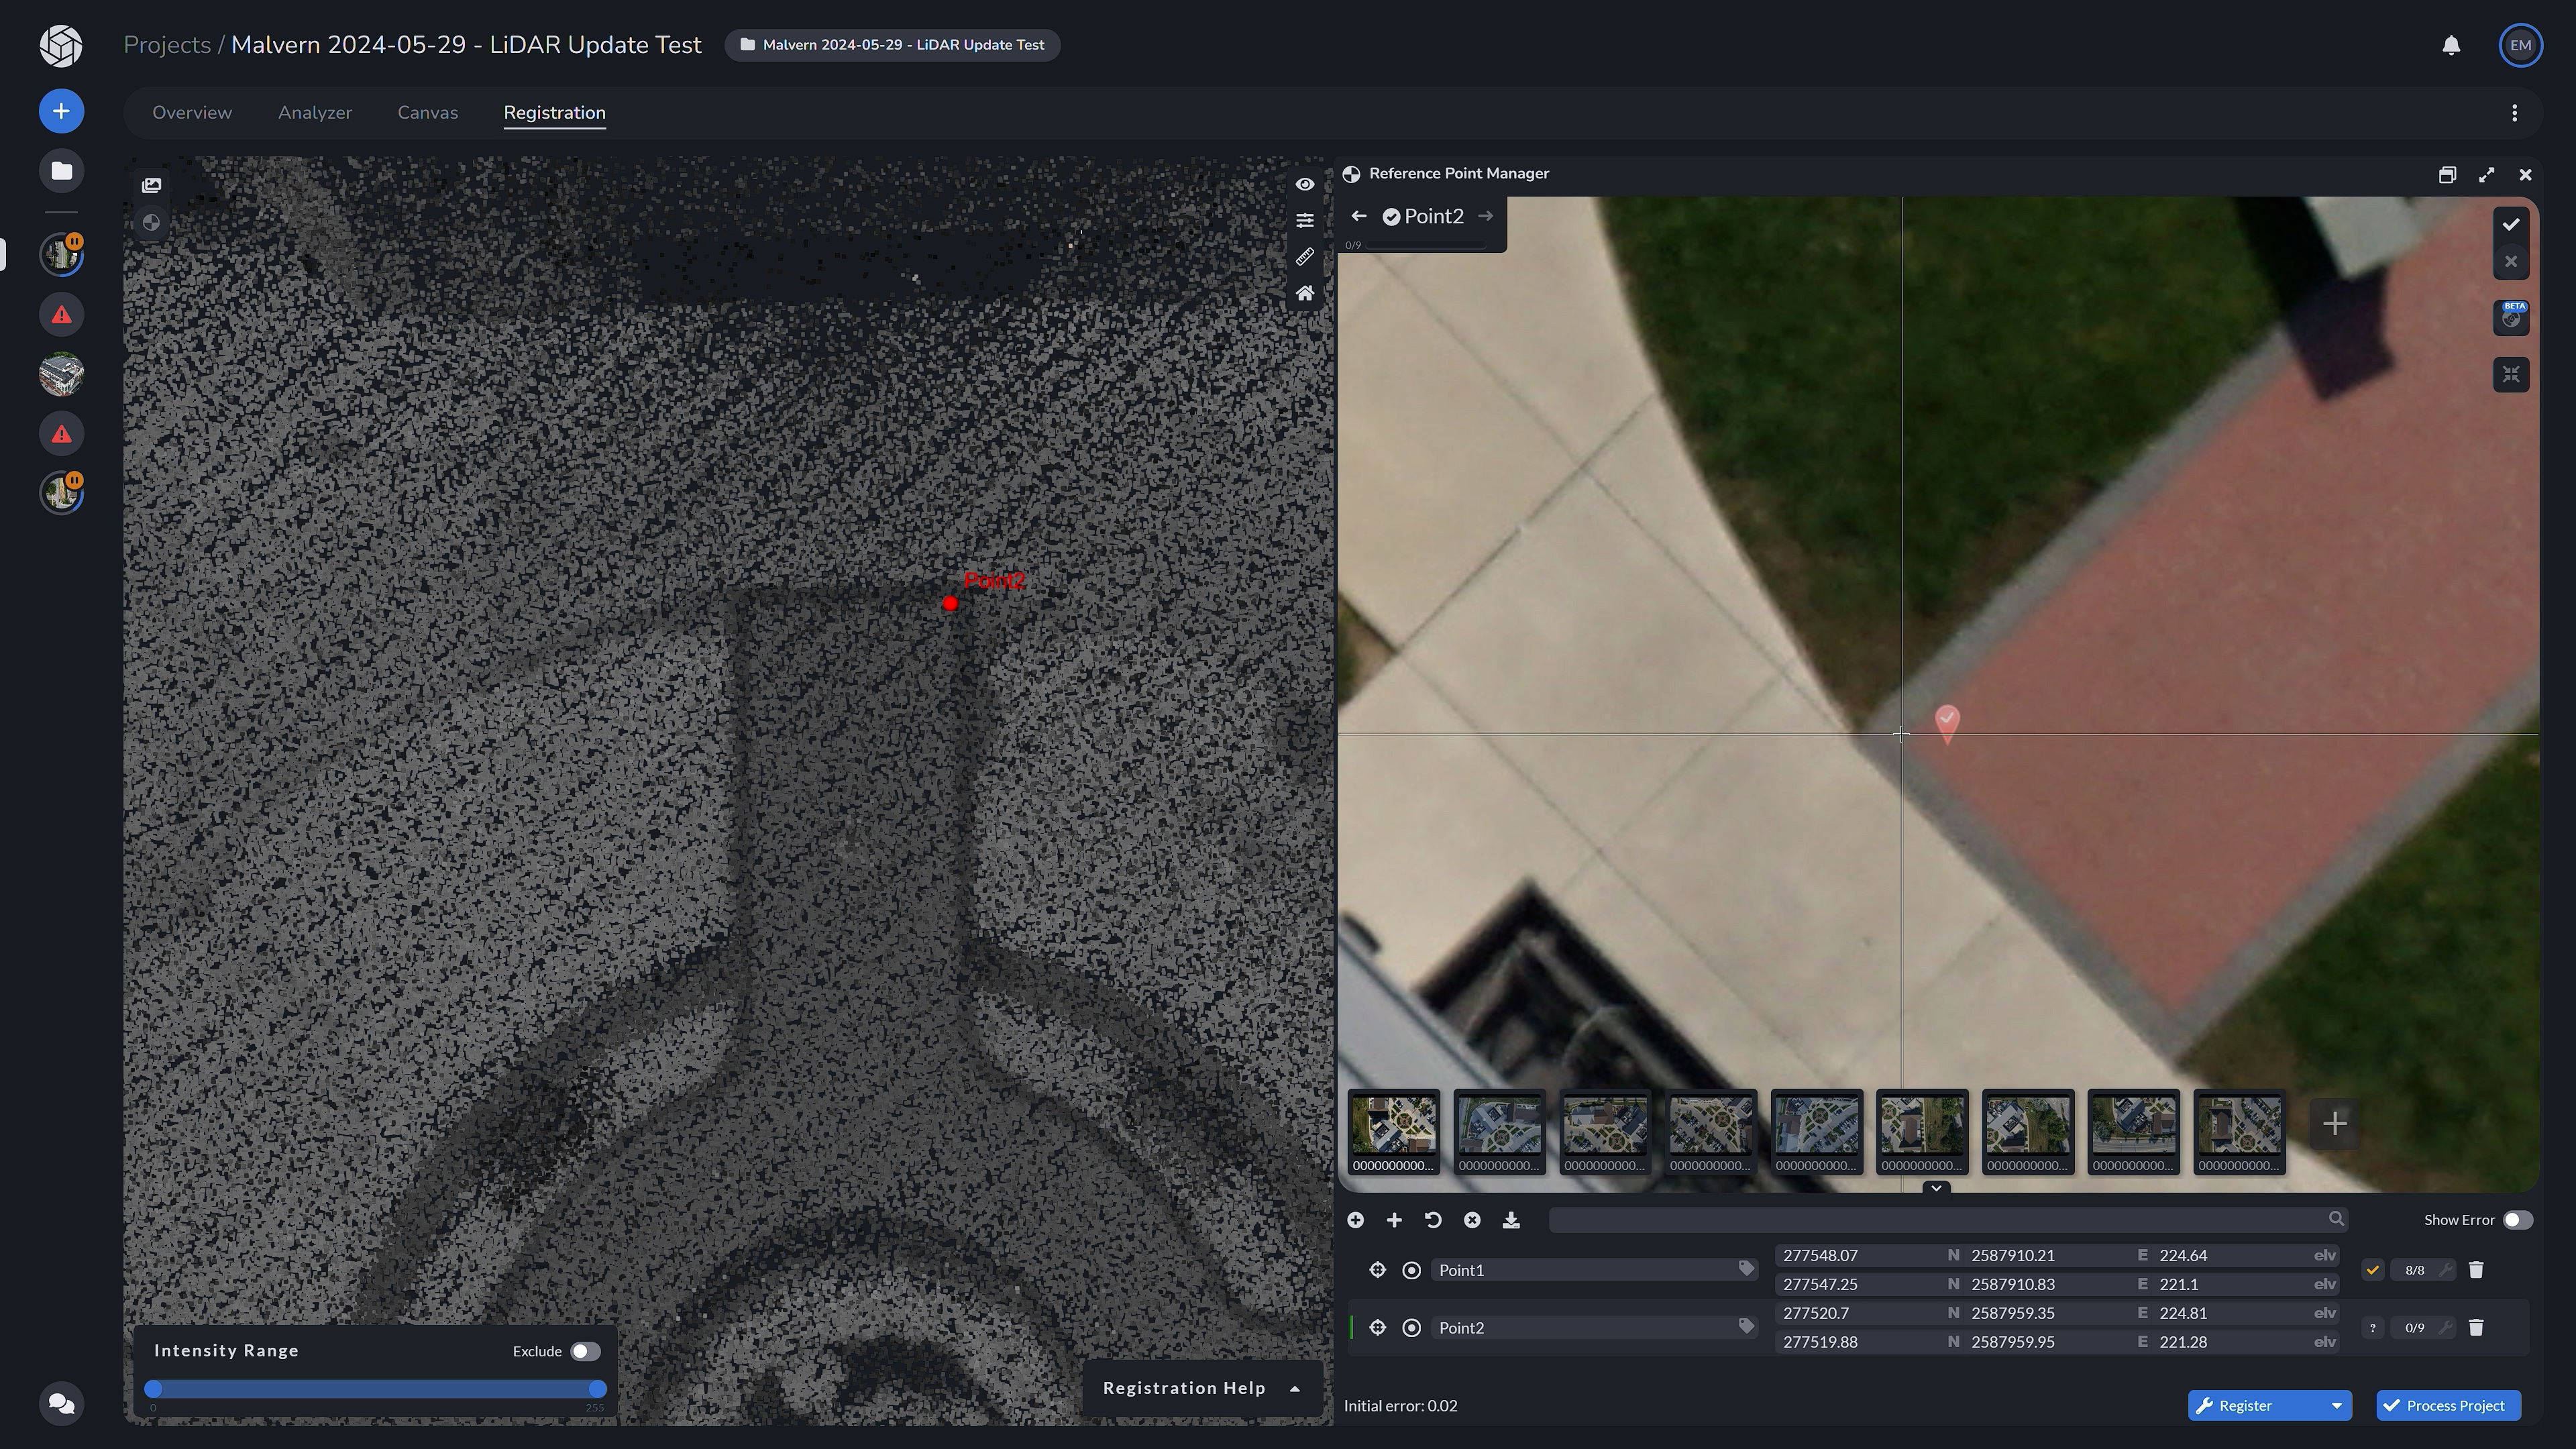
Since we do not have any GCPs available with this dataset we are going to make some tiepoints. Which you can add to the Reference Point Library by hitting the plus button and selecting the photos you would like to reference. If you have a new file you would like to import, or if you would like to put in the points manually, you can hit the second plus button.
It is very important that in able to align the point cloud with LiDAR data, you will need to match the point in the photo with the point cloud to create a complete and accurate model. Typically, you would use GCP targets to align the LiDAR and photos together, but if you do not have them, you need to choose points both recognizable in the photos and LiDAR point cloud.
It is important to note that when you register the LiDAR data with the photos, it is much easier to pick your points in the LiDAR cloud while using the intensity or the elevation heatmap, versus using the RGB data.
Understanding Error Corrections in PixElement
LiDAR data on its own contains no color (or RGB) information, only intensity values. However, many drone LiDAR platforms will claim to provide “colorization” of their point clouds. This is often accomplished by integrating a camera with the LiDAR sensor and performing a boresight calibration to determine the alignment between the LiDAR sensor and the camera sensor. The same navigation solution that is used for the LiDAR sensor is also leveraged by the camera to colorize the point cloud data.
However, after now working with datasets from numerous drone LiDAR providers, a near universal constant is RGB colored point clouds that are geometrically incorrect.
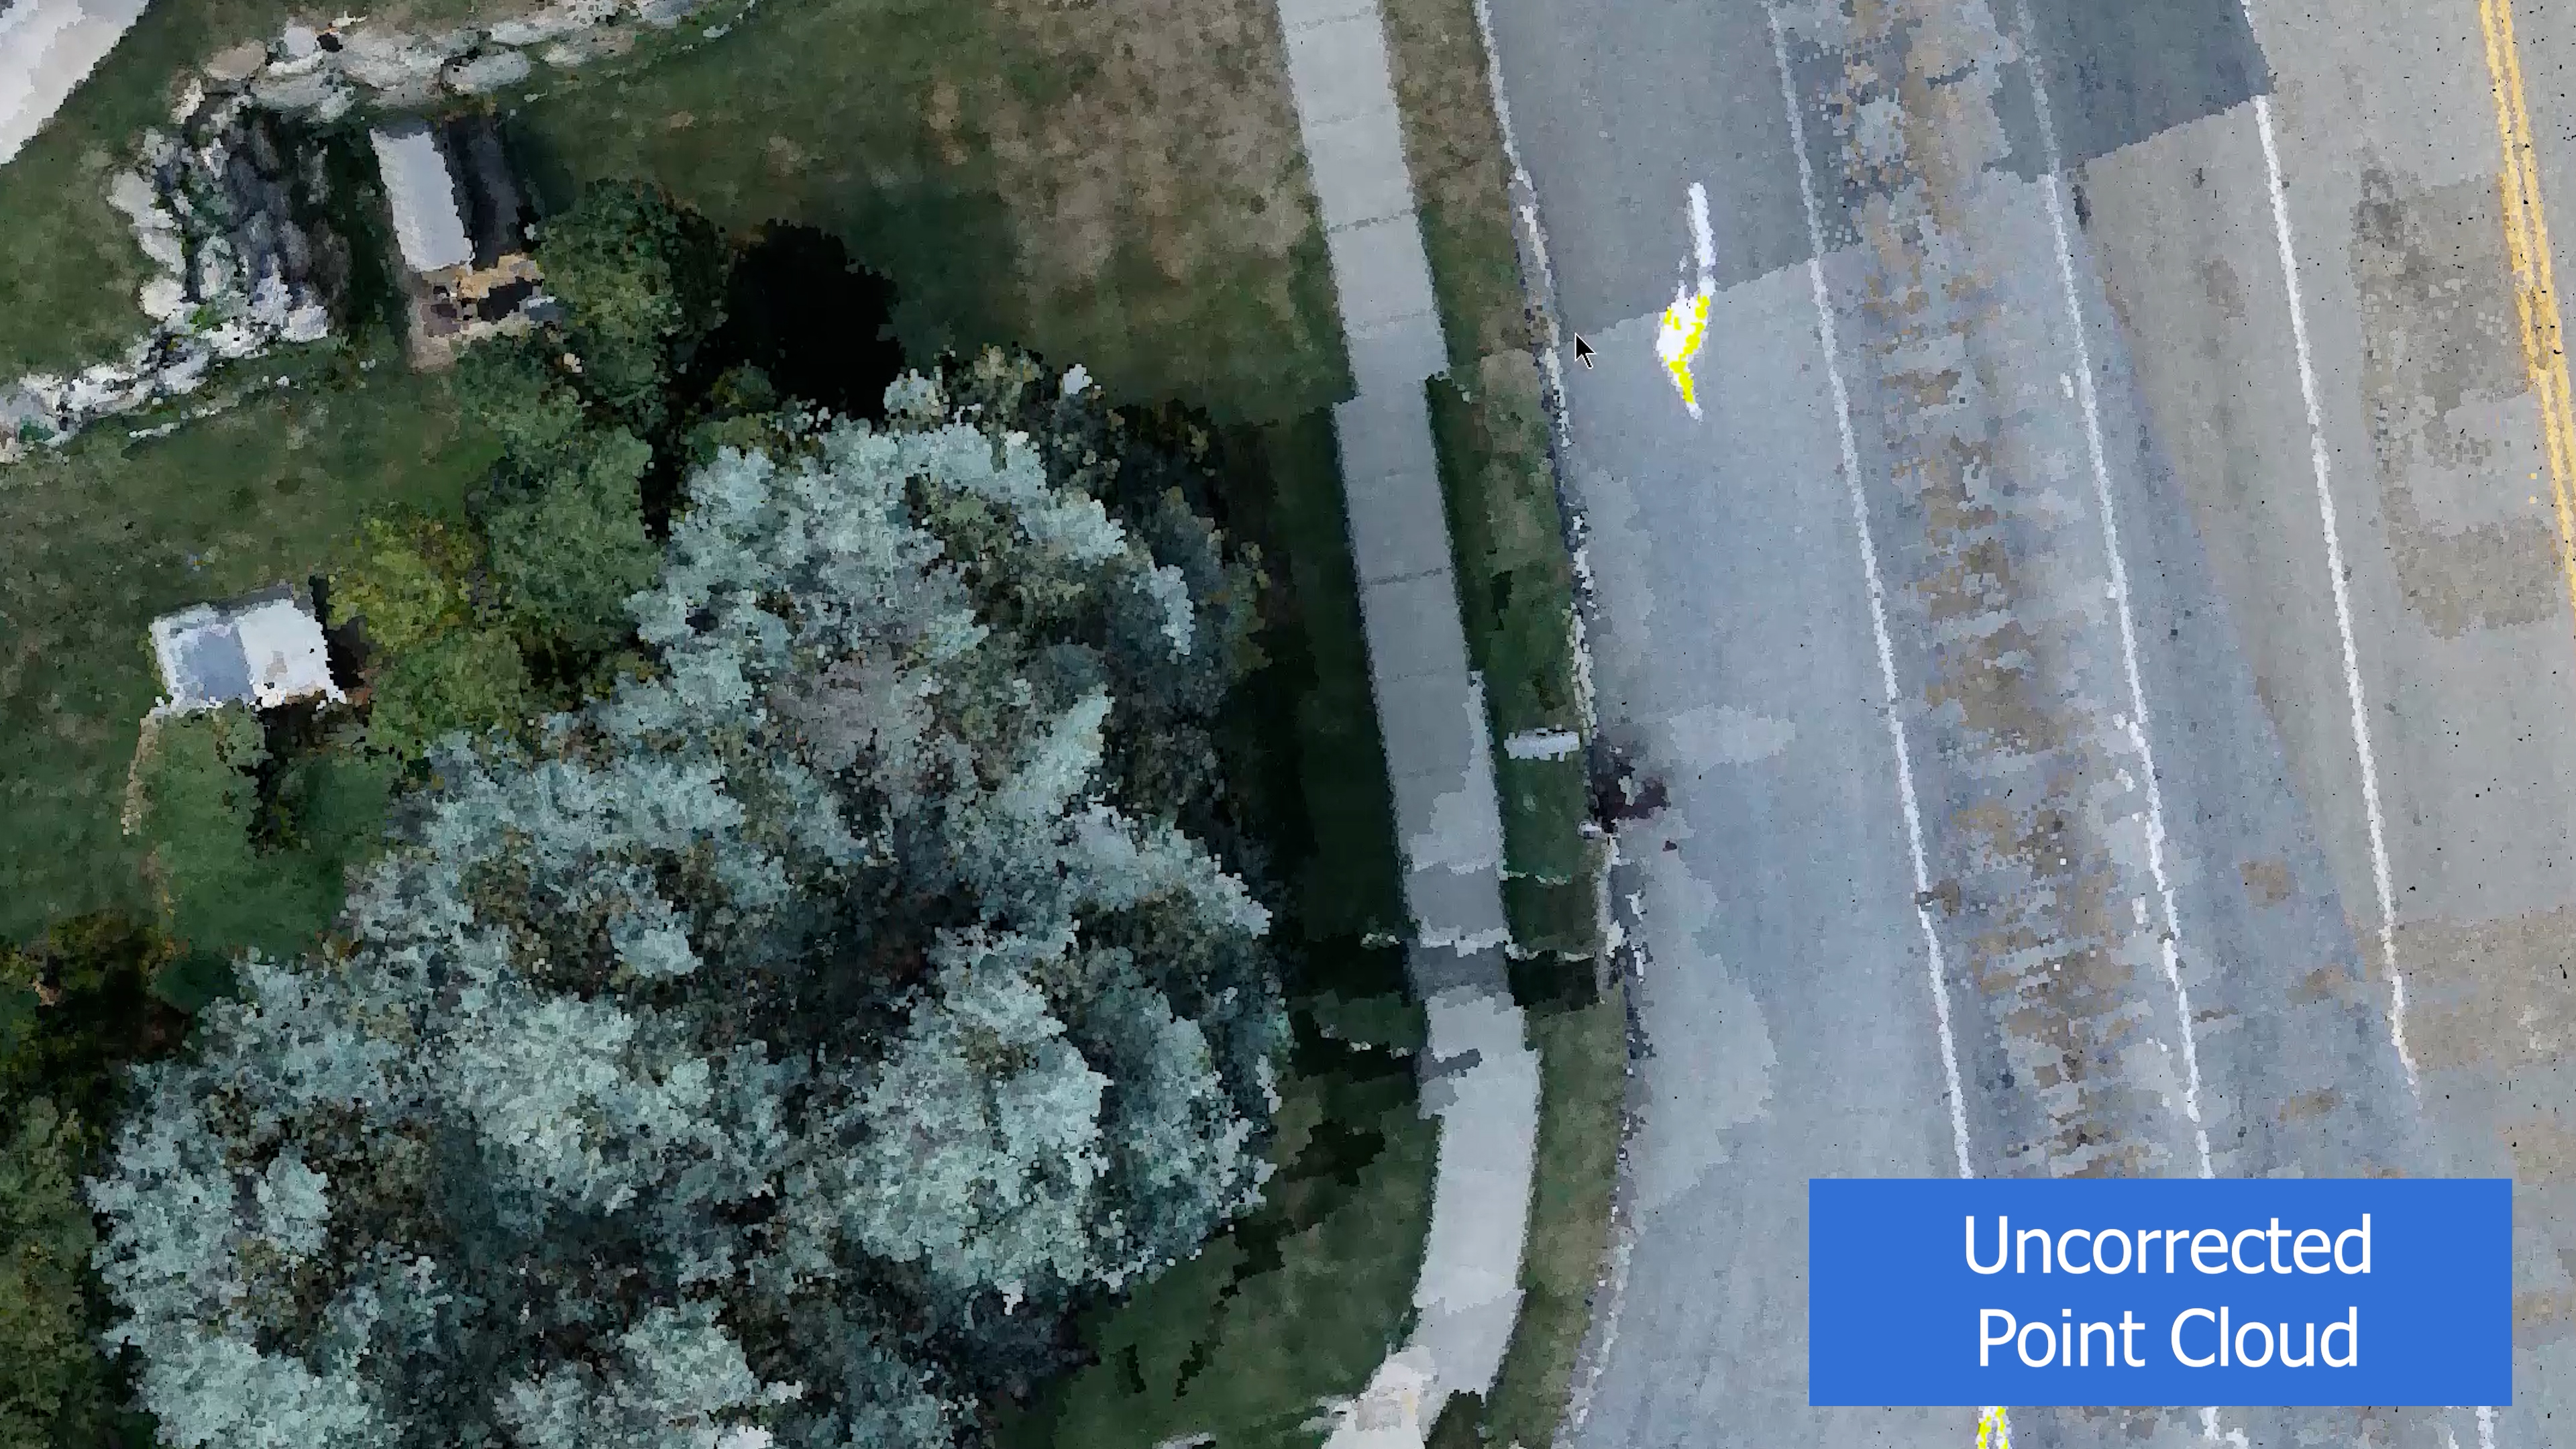
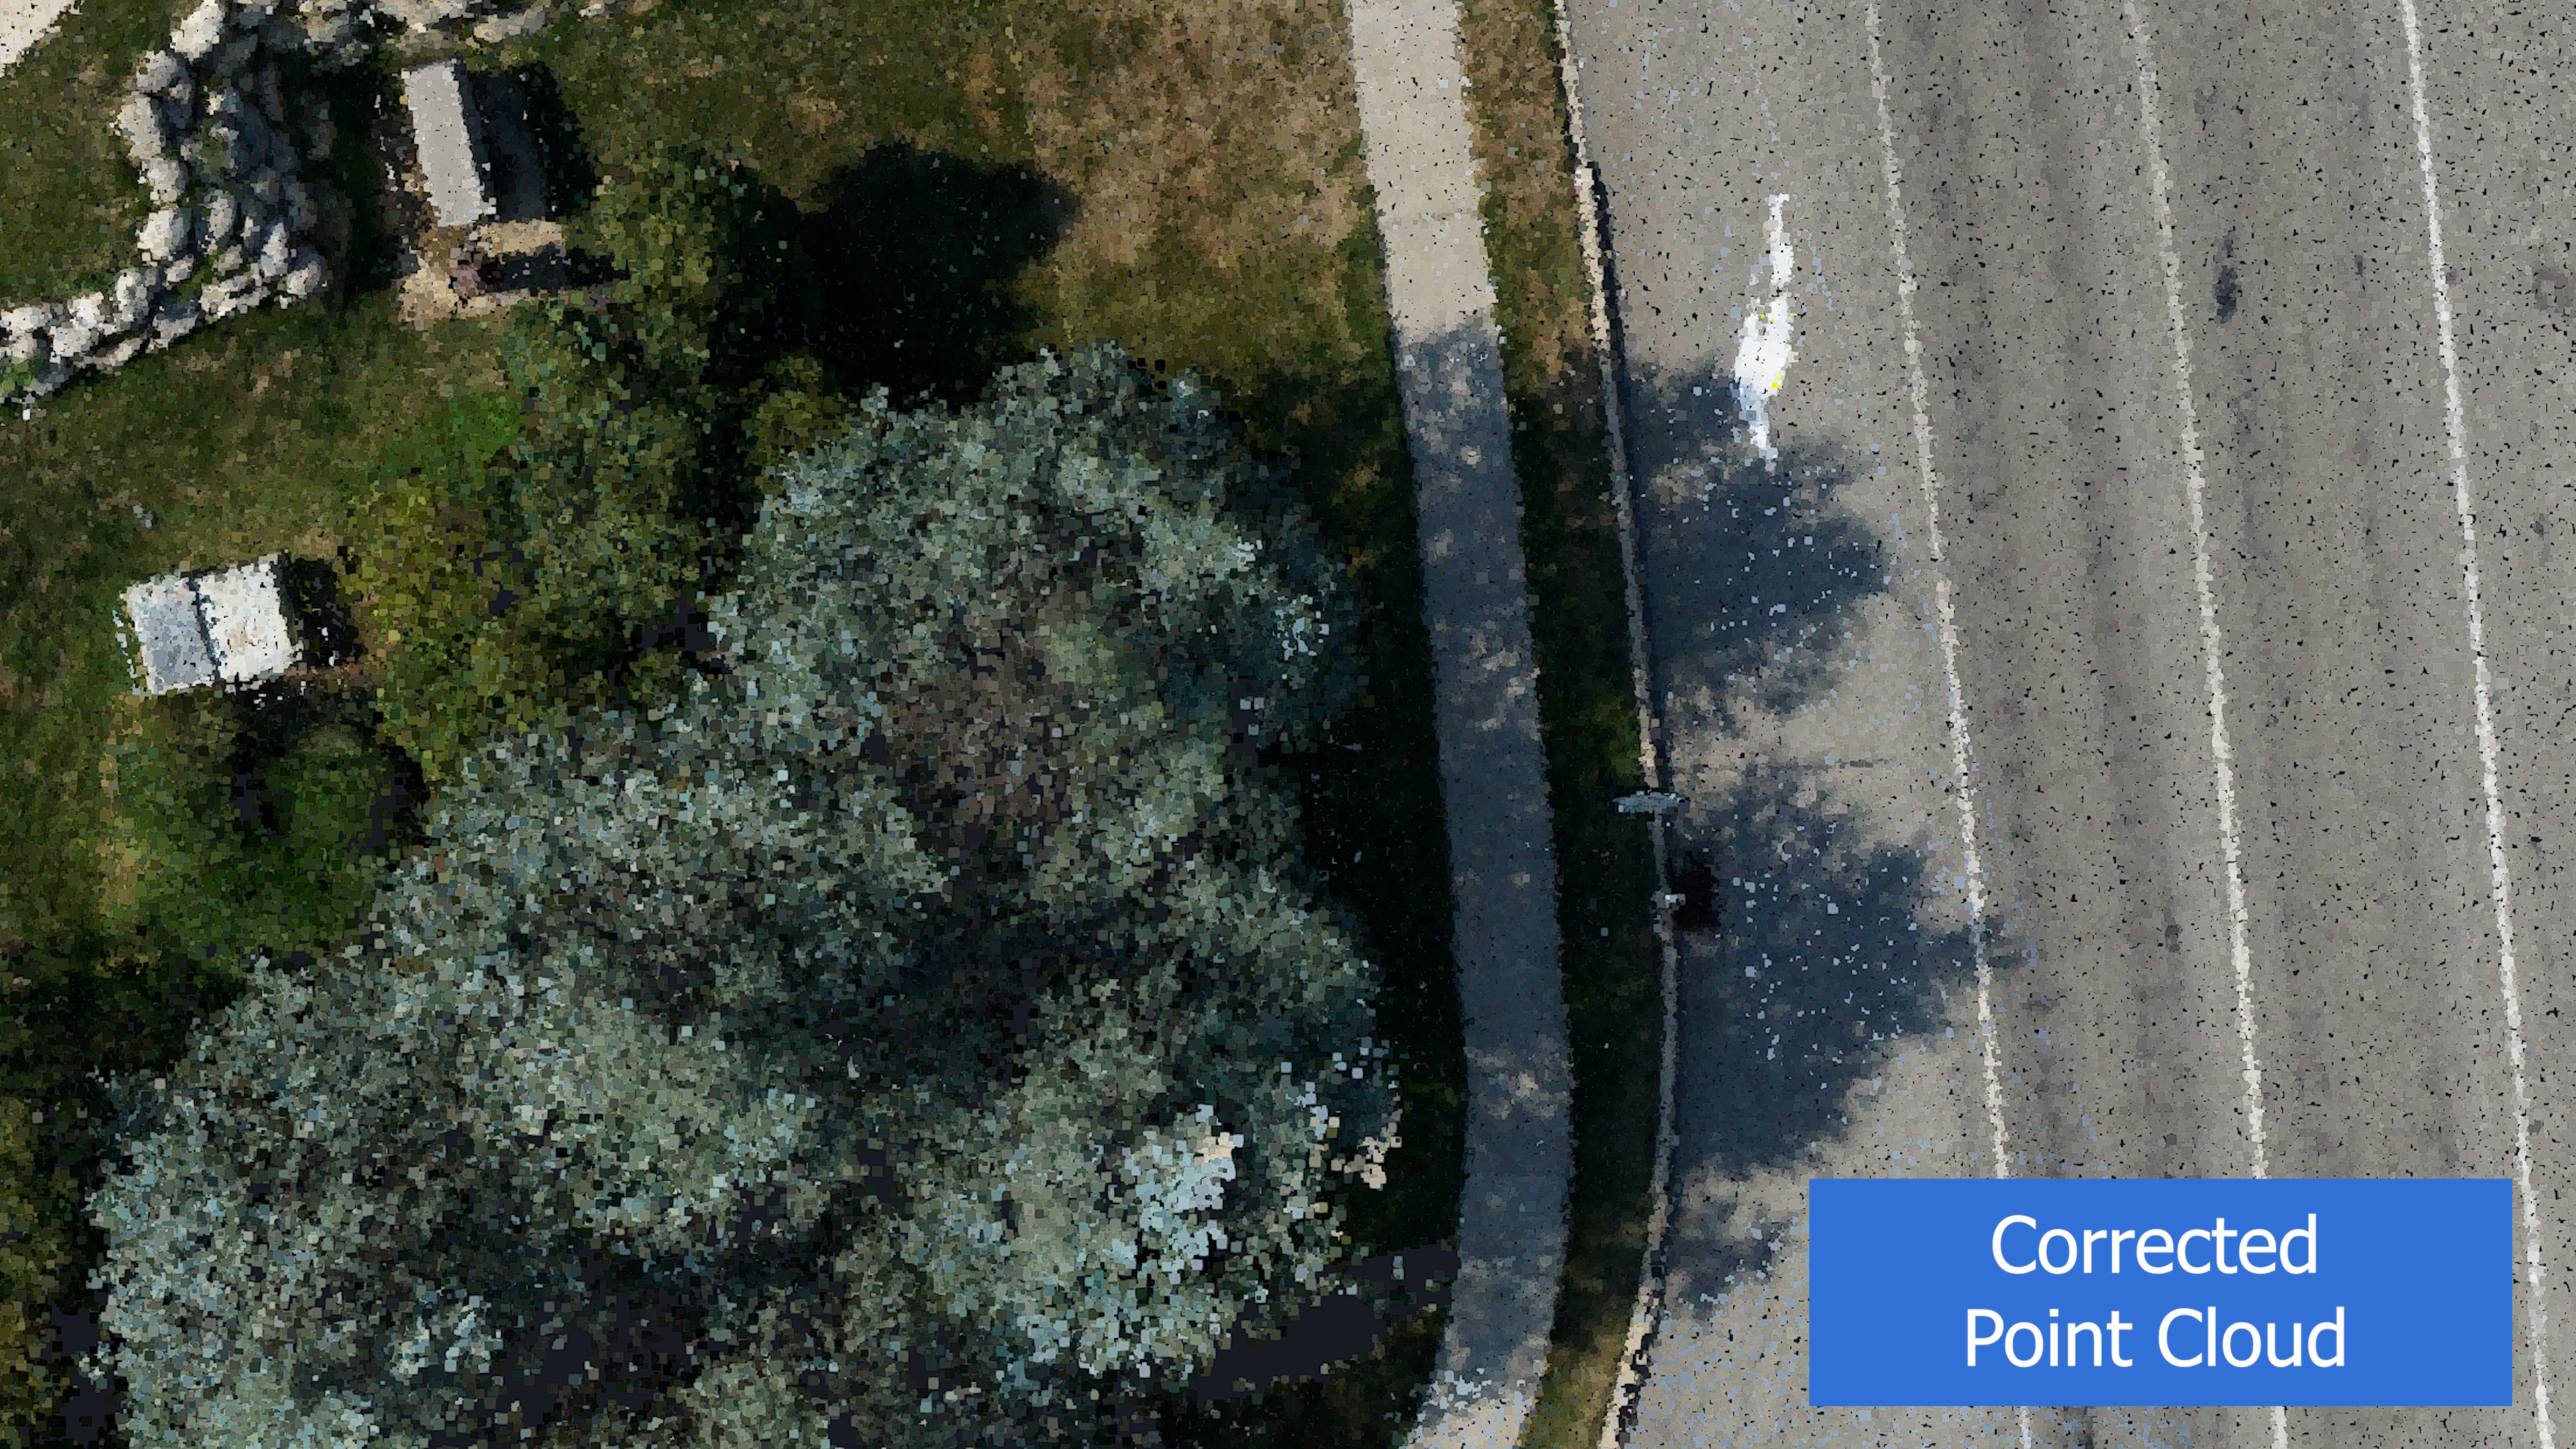
Boresight alignment and other calibration errors can cause small and large deviations between what the camera on the drone captures and what the LiDAR sensor captures. However, PixElement’s novel photogrammetric integration with LiDAR corrects for the RGB errors and produces geometrically correct RGB lidar files.
When registering the LiDAR and GCPs in PixElement, you are setting up for PixElement to correct for these errors. This involves adjusting the data based on the known misalignment angles to improve the overall accuracy of the model.
Importance of Control Points
If you do not have any GCPs, it is important to at least have some tiepoints and checkpoints. Checkpoints do not help improve the mapping solution - they are more like validation points to determine accuracy, not actually adjust the data. Tiepoints help improve the mapping solution and you can use any landmark (road paint corner, end of sidewalk corner, corner of building) that is consistent and in the same spot throughout the dataset.
Completion of Project Creation
Upon completion, you can view your LiDAR dataset just like the original imagery photogrammetry option along with all of the deliverables. You will receive an email once each deliverable is done processing.
You are also able to see the Bundle Adjustment Report immediately and can view how well your drone coverage was for your project. Please see our next video/blog “Types of Data Deliverables” and our other videos in the tutorial playlist to learn more.
Note, it is very important to note that the quality of your data capture is pertinent to the quality and outcome of your project models in PixElement. So be sure that you are following the best flying practices for capturing your project site.
Please see our Tutorials Playlist on YouTube, or our blog posts for more tutorials on photogrammetry and how to use PixElement.