Getting Started with PixElement? 5 steps to beginning your journey!
So, you’re ready to start your PixElement journey - congratulations!
If you’re new to PixElement and not sure where to start, you’re in the right place. In this article, we will show you how to start a project and get mapping.
Don’t have an account with us? Sign up for a free 14-day trial account here.
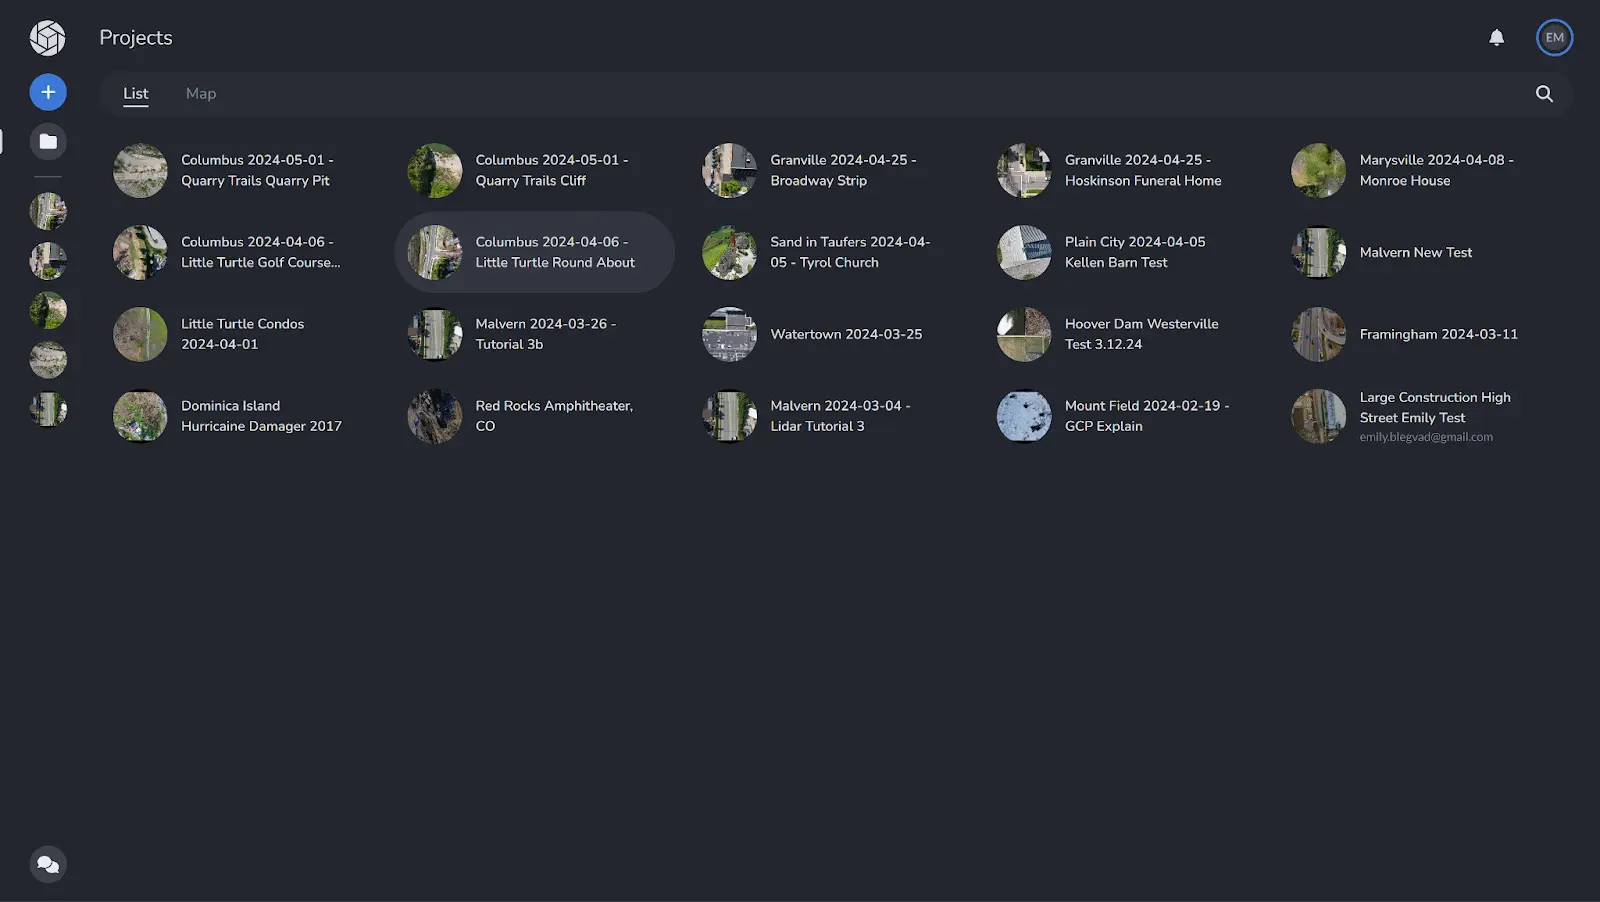
Once set up, go to my.pixelement.com and login. Once you do, your project dashboard will appear where all of your projects will appear under the list tab. No software download, no slow install - just login and go!
One thing that makes PixElement special is that it is entirely cloud-based. That means that you can connect directly to the cloud and run all of your processing, analytics and annotations directly inside the web-based program. All data uploaded will be able to be accessed and re-downloaded as needed.
Starting a Project
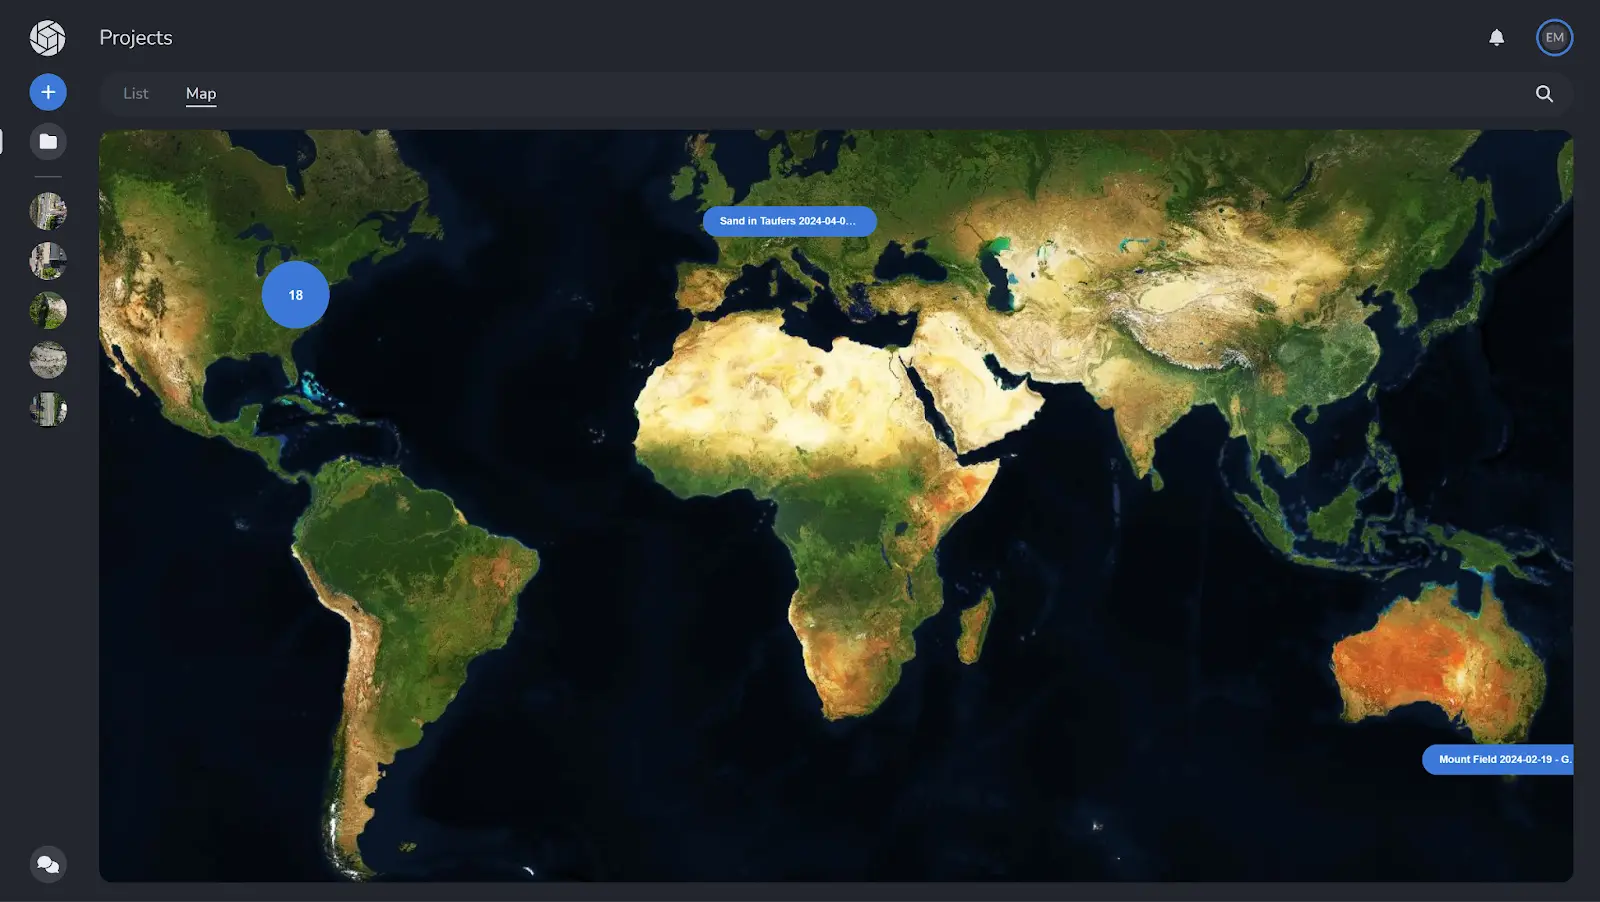
Upon logging in, you will be brought to your projects dashboard, where you are able to view all of the projects you have created in the list view, with your most recently opened ones being in the column on the left, as well as on the world map tab.
Step 1: Select Project Type
Select whether you are going to be uploading an imagery or a LiDAR + Imagery project. PixElement has the ability to create projects off of photogrammetry datasets alone, or photogrammetry datasets plus your LiDAR data.

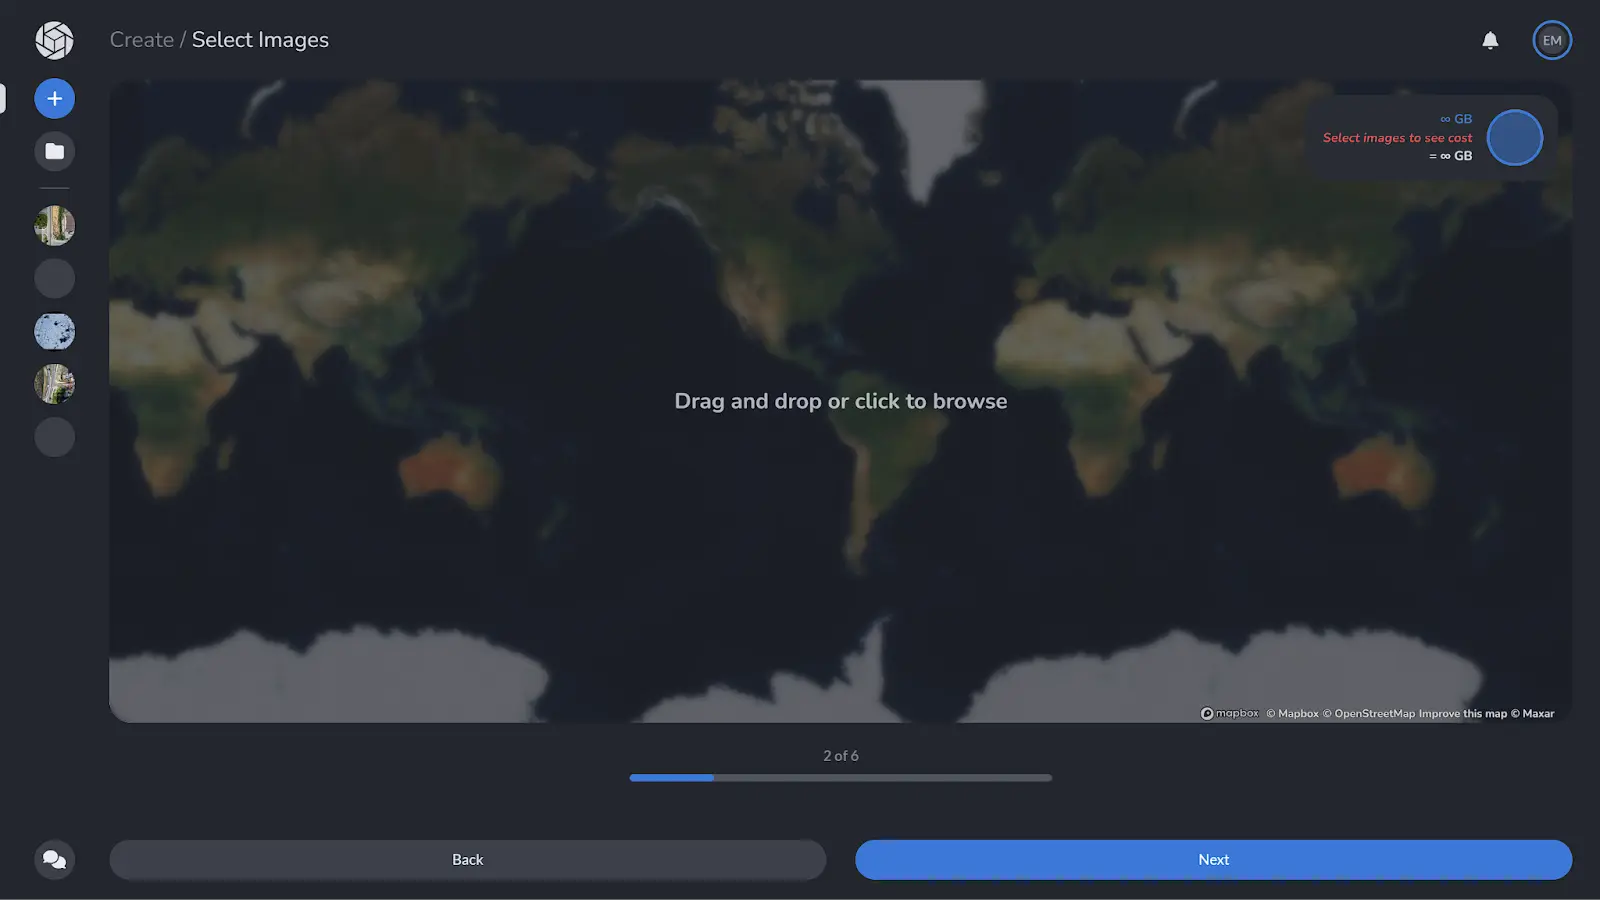
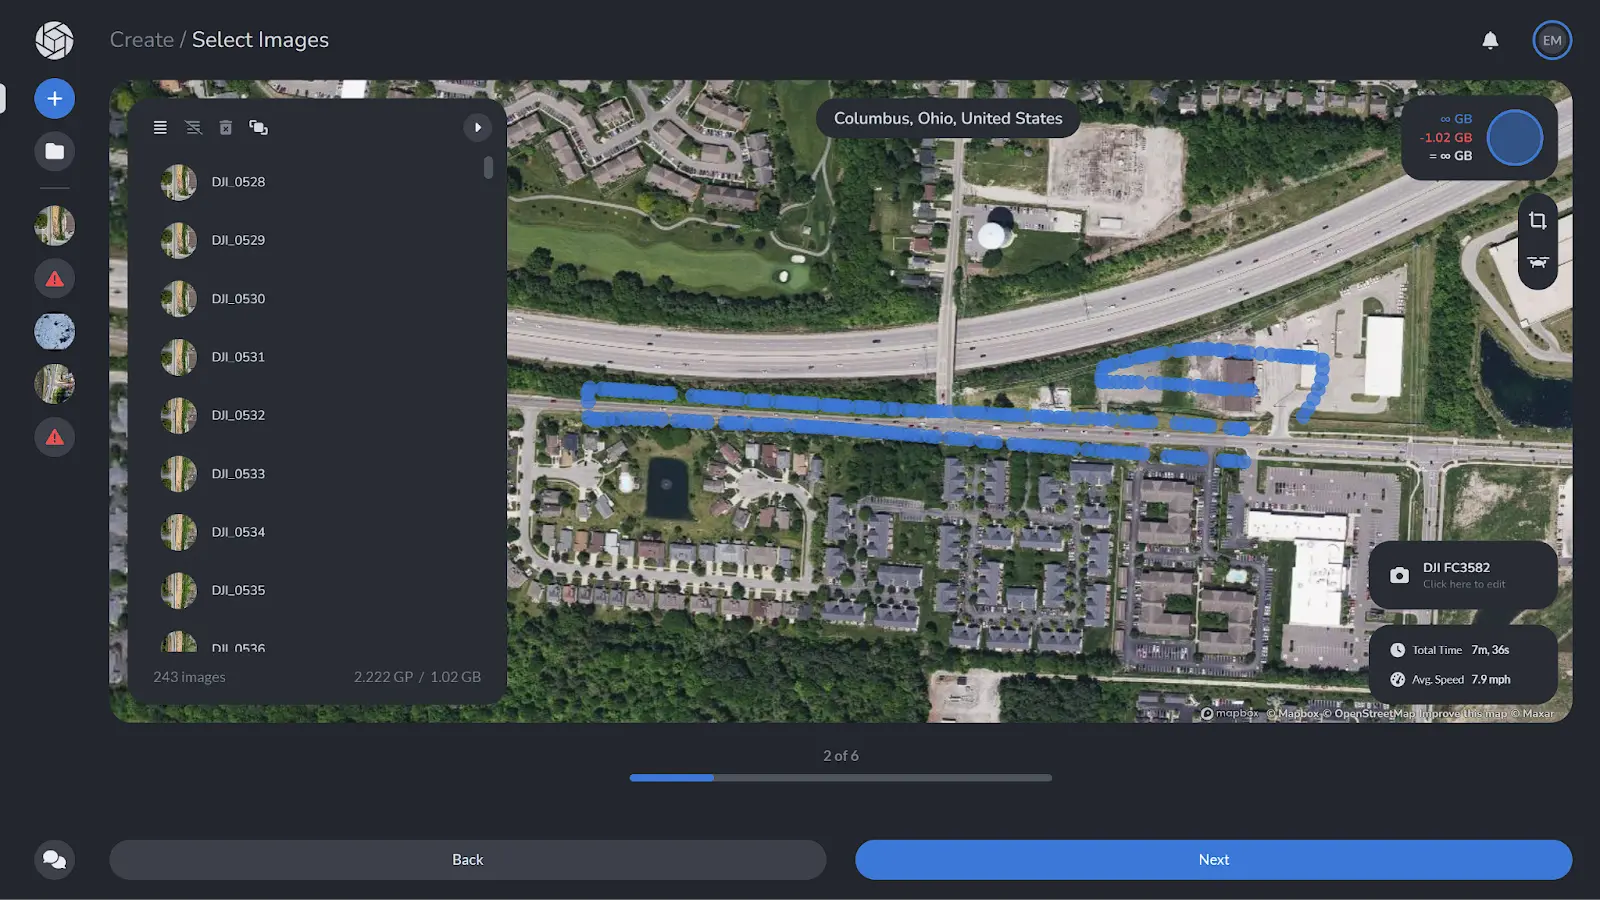
Step 2: Select Images
Either drag and drop your files, or click to browse to upload your dataset photogrammetry images. Upon loading your images in, the photos will be geolocated given the metadata in the photo files and a flight path overlay will appear. Here you are able to scroll through all of your photos uploaded, select which images you would like to view which will then be visible on the map, adjust the overlap of the images, edit the sensor width and focal length, select images en masse by drawing a polygon around the images you want selected, and toggle the view mode (flight path or image footprints or RTK solutions if your drone is equipped with RTK data). To continue in the project, you must have at least four images selected. Selected images will be highlighted in the left scroll menu as well as on the map.
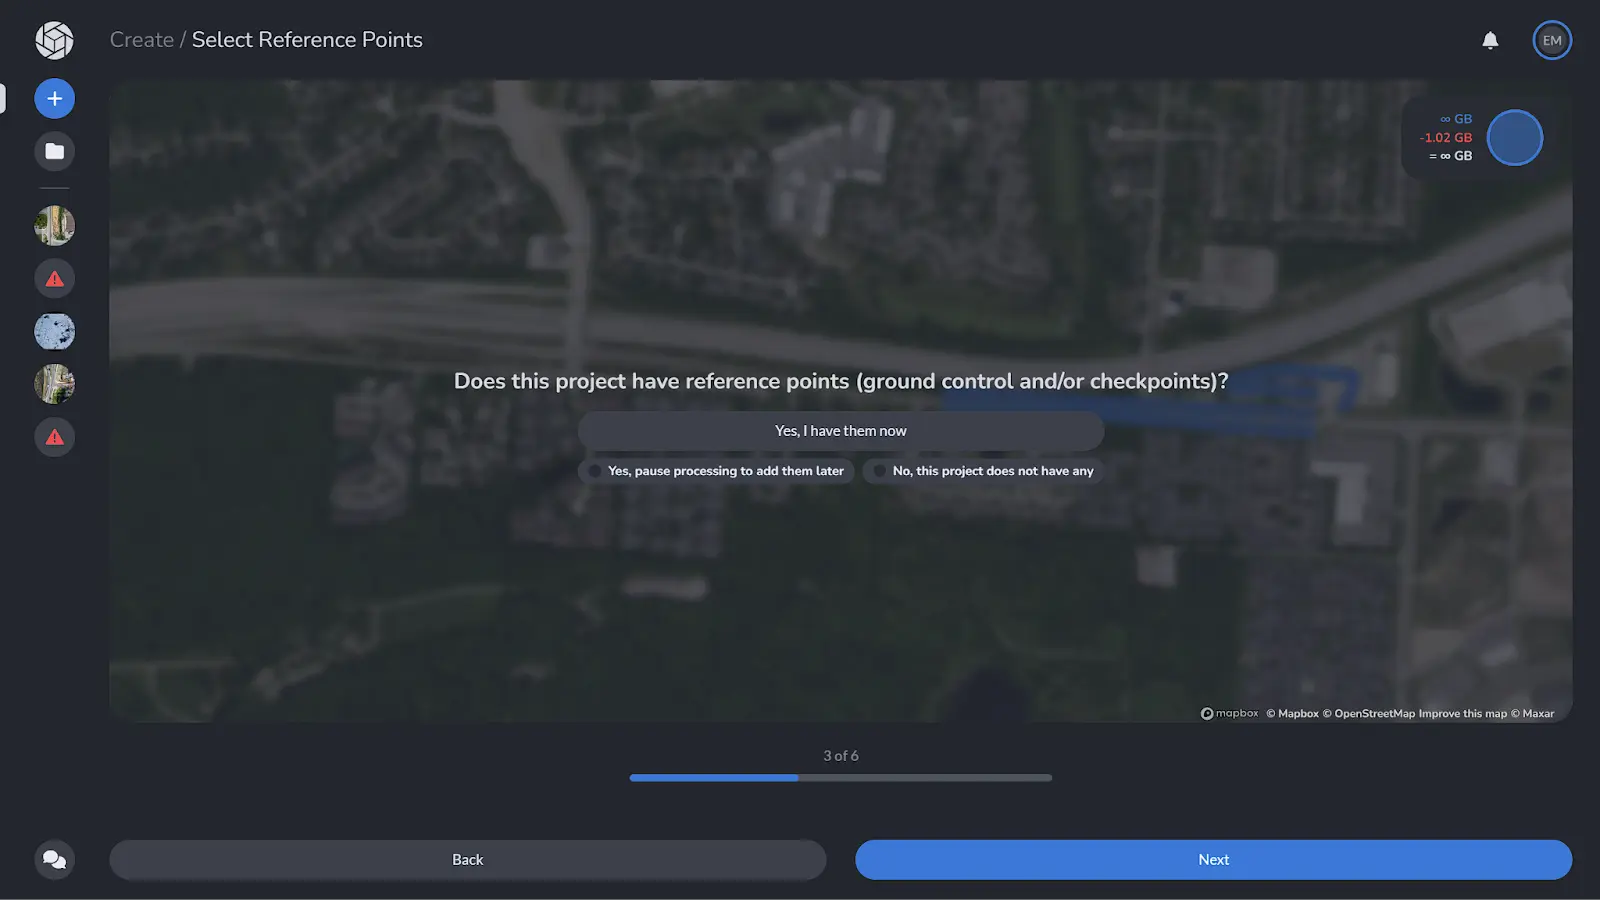
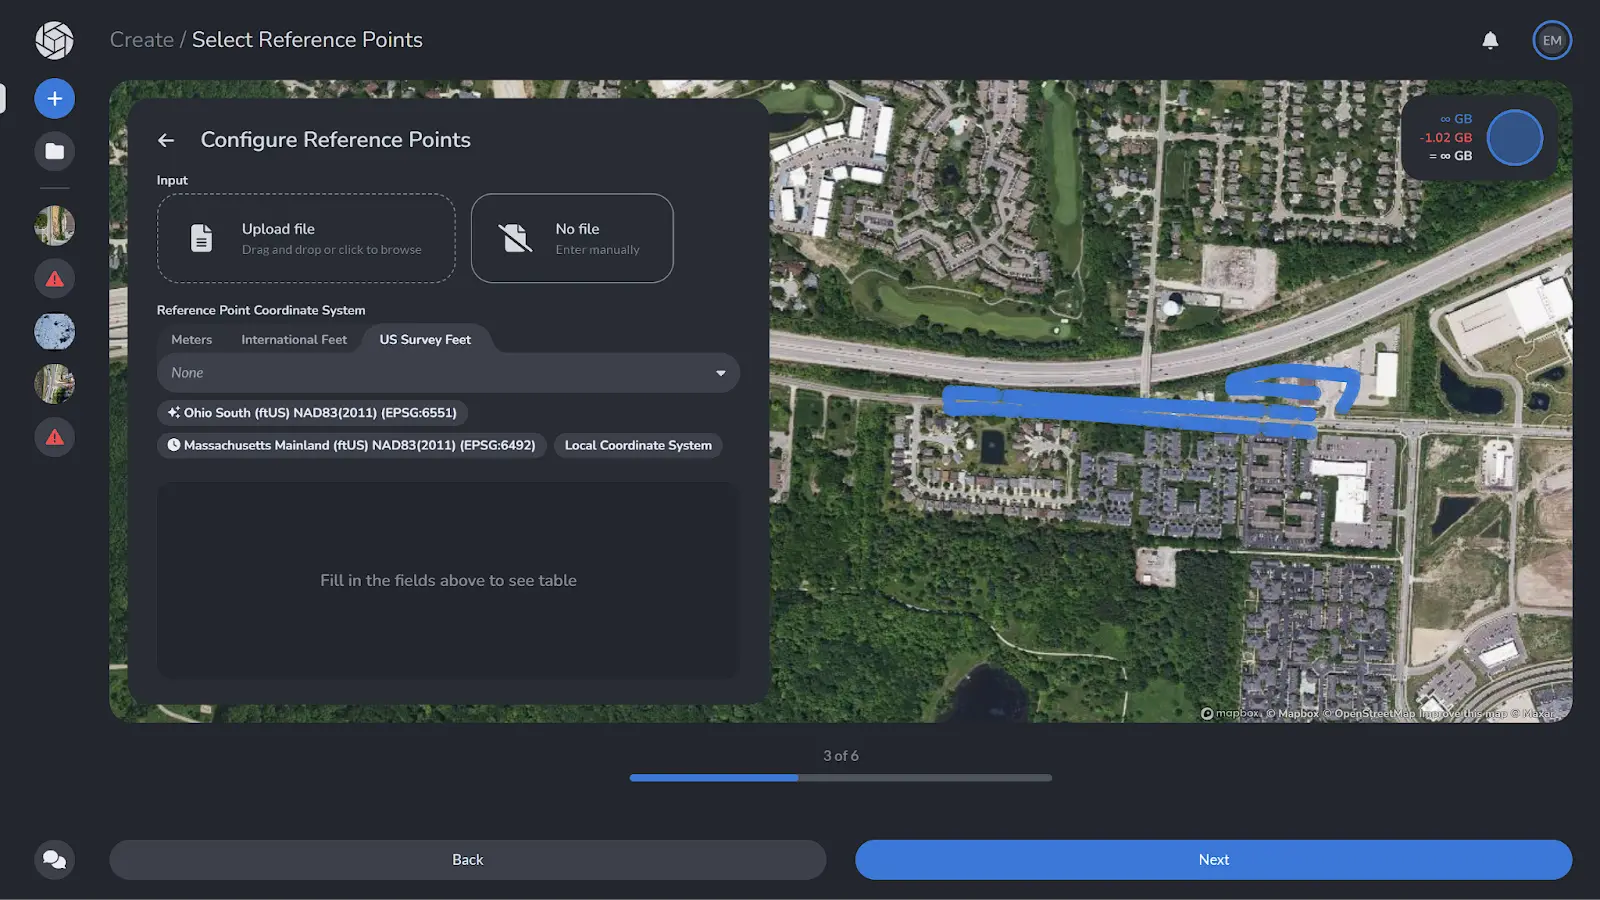
Step 3: Select Reference Points
If you collected reference point data for your project, you may upload it and select the appropriate coordinate system that the measurements were calibrated to. If you do not have reference points, you may select the “No” option. If your project does not have any reference points, be sure to create tiepoints and checkpoints in the analyzer tab once your project has been processed.
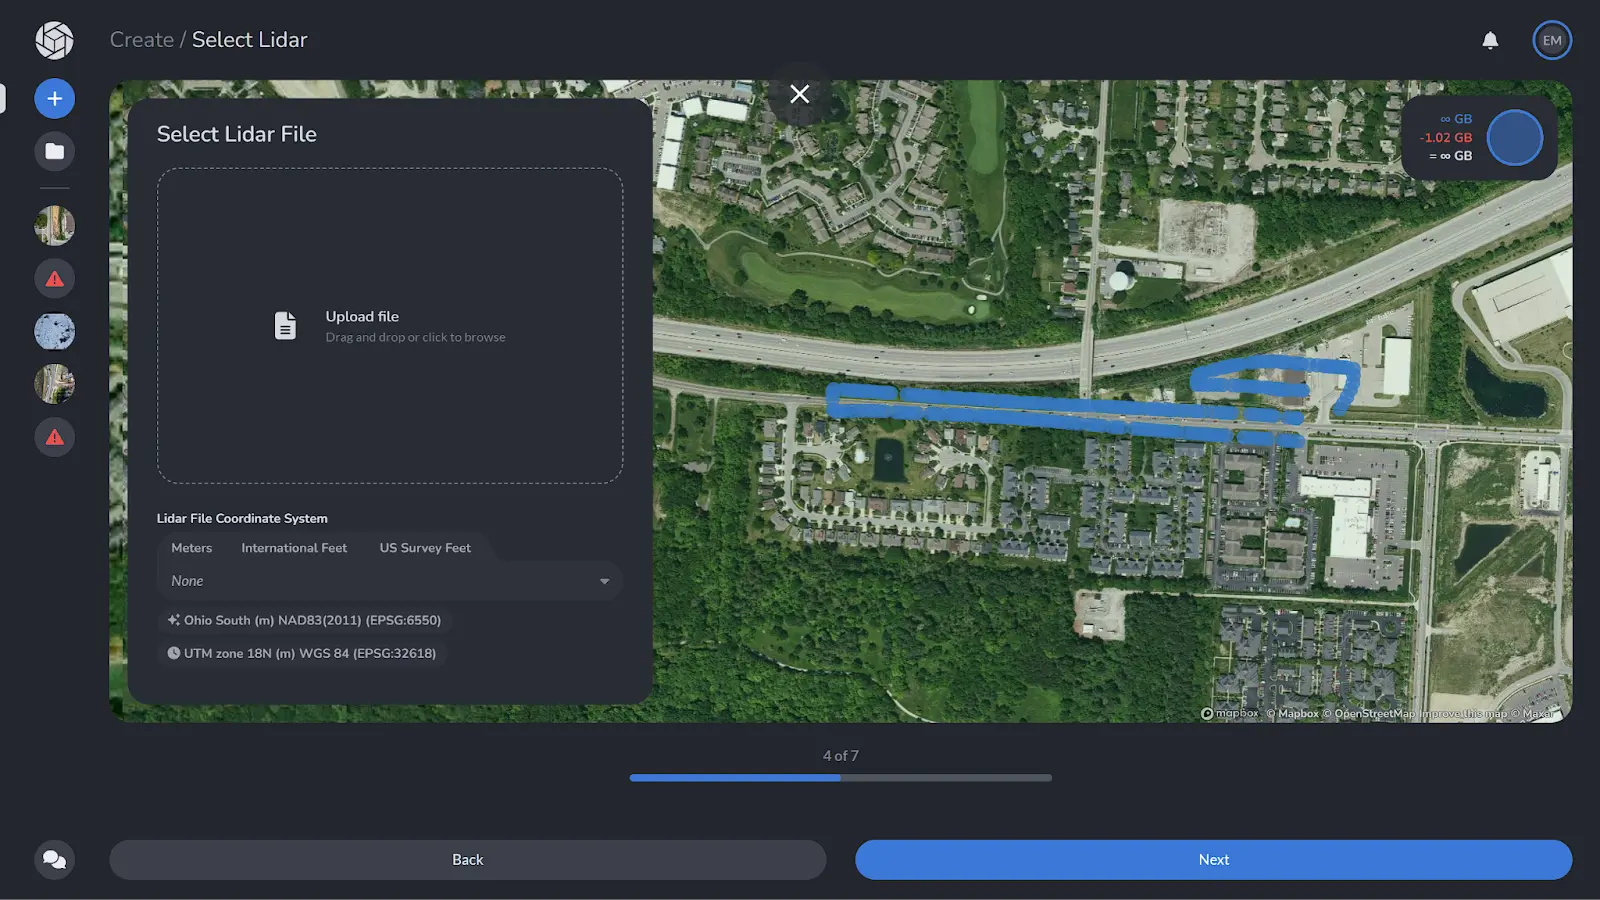
IF you have selected to create a LiDAR + Imagery project, you are prompted here to upload your LiDAR project file and select the coordinate system that the LiDAR file is in. In many cases, it will be in Latitude/Longitude.
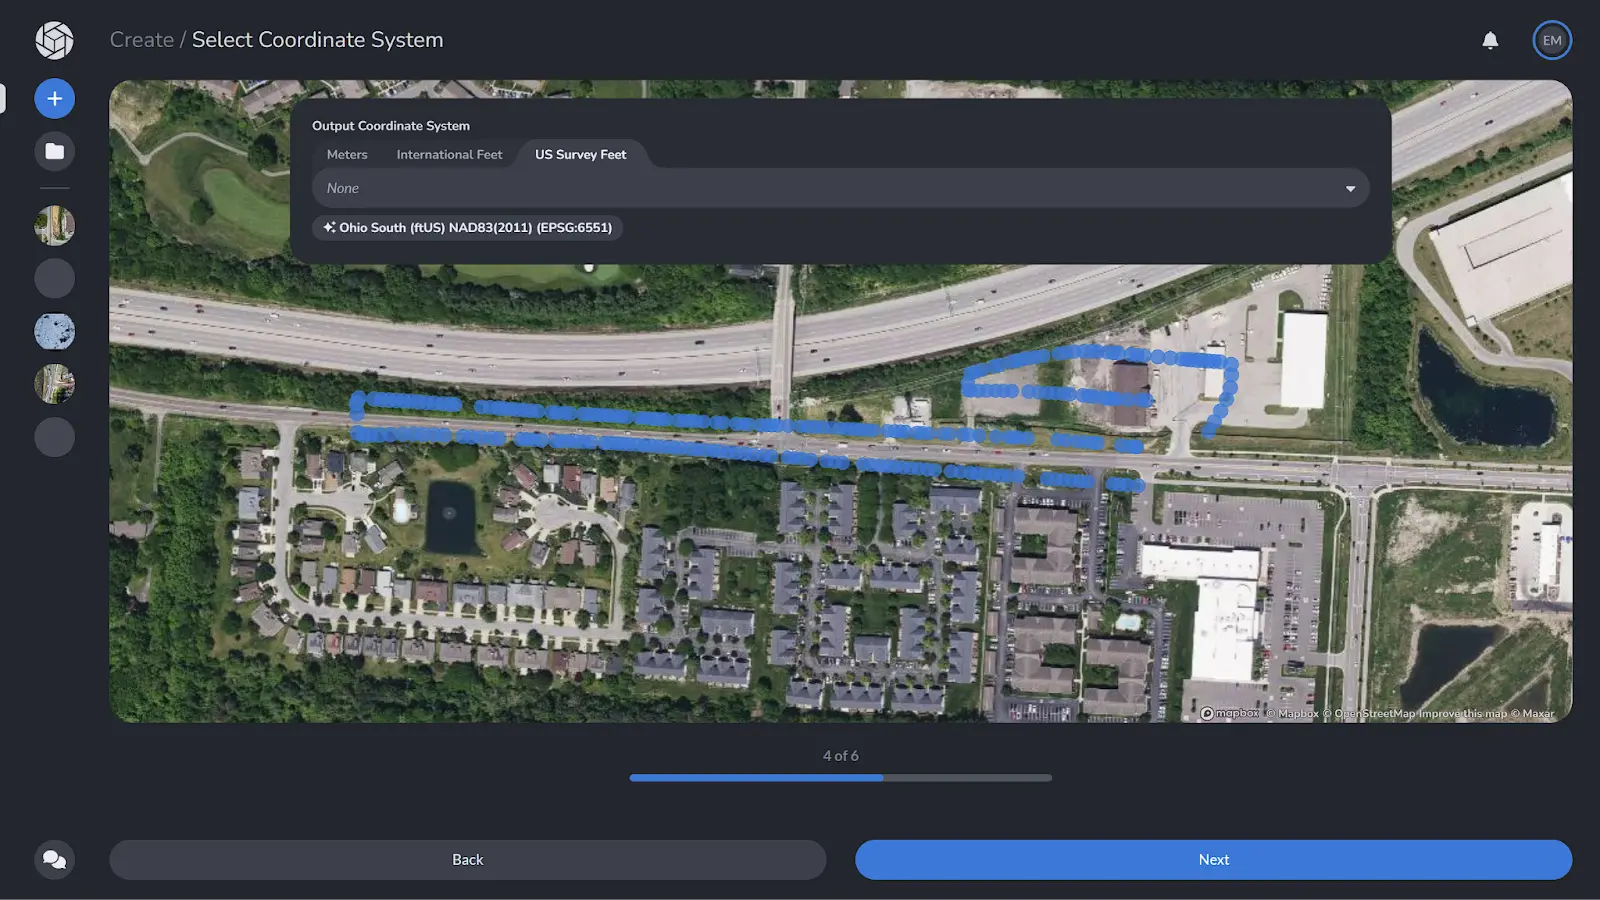
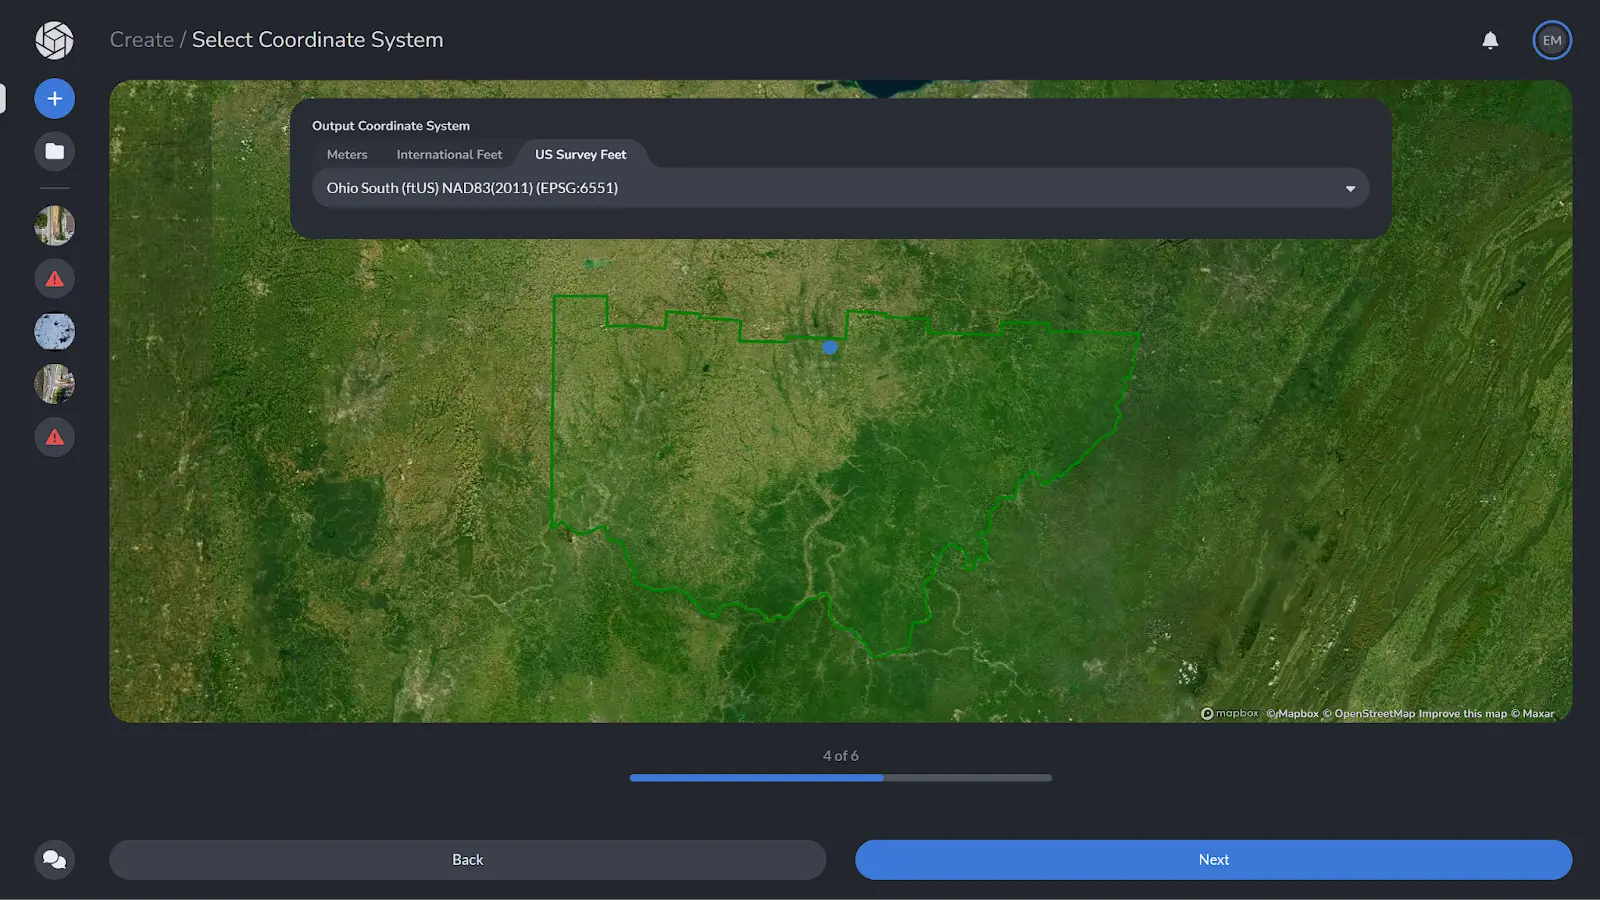
Step 5a: Select Coordinate System
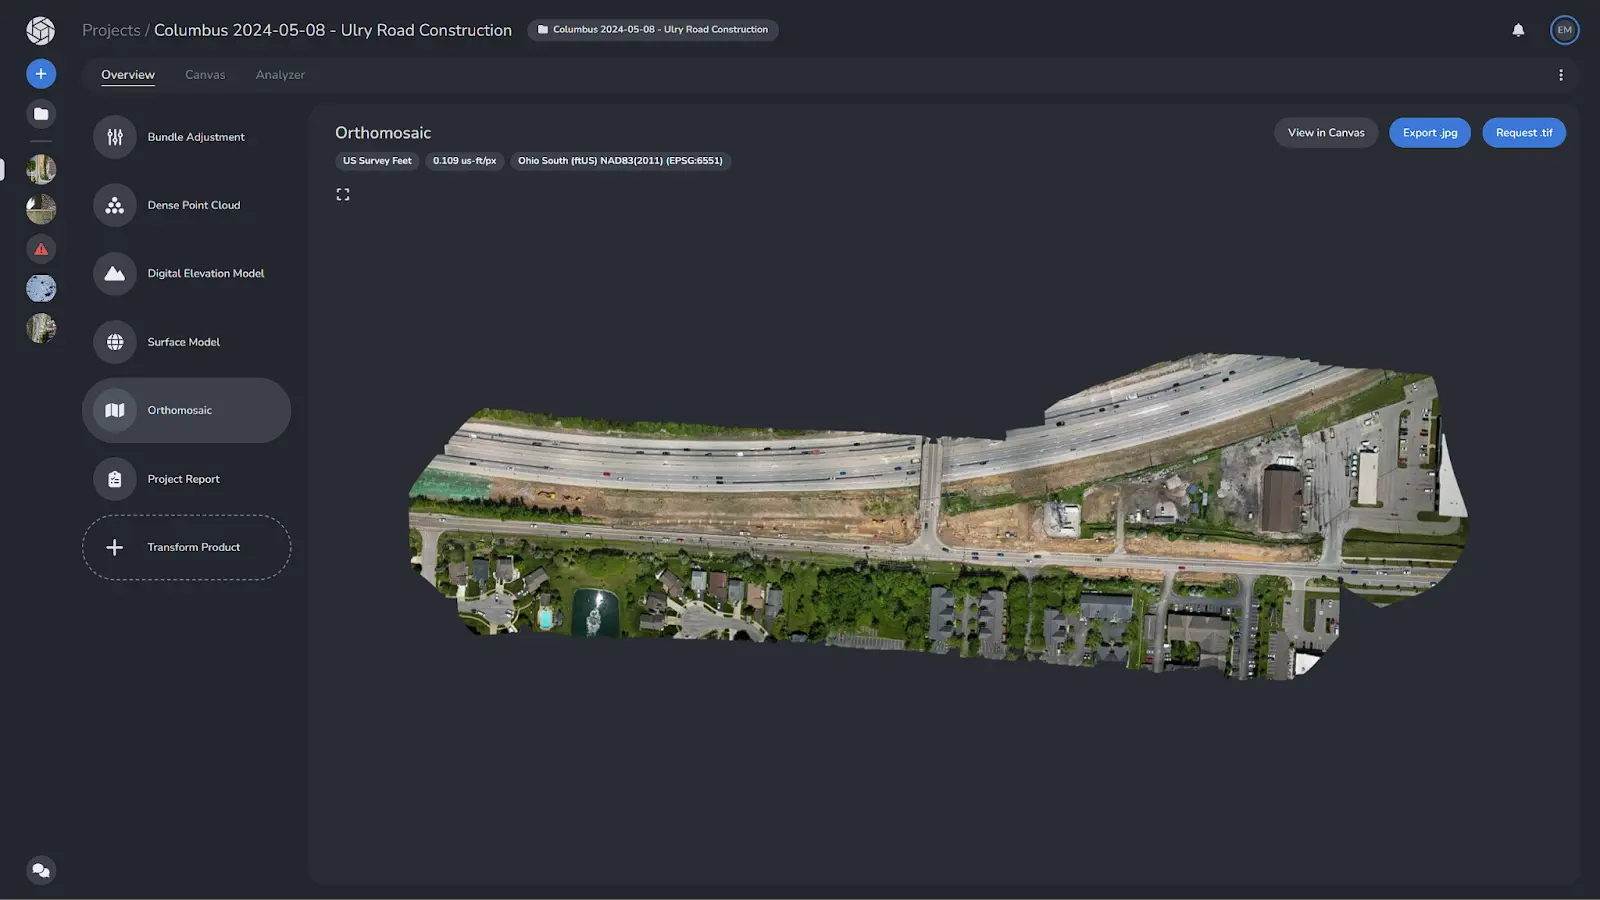
PixElement will automatically detect which output coordinate system the aerial system used. This is recommended to you and will appear below the selection bar and you may select it. In this case it is “Ohio South (ftUS) NAD83(2011) (EPSG:6551)”. If you have a different coordinate system you would like to use, you may browse for it in the dropdown menu for each unit available (Meters, International Feet, US Survey Feet).
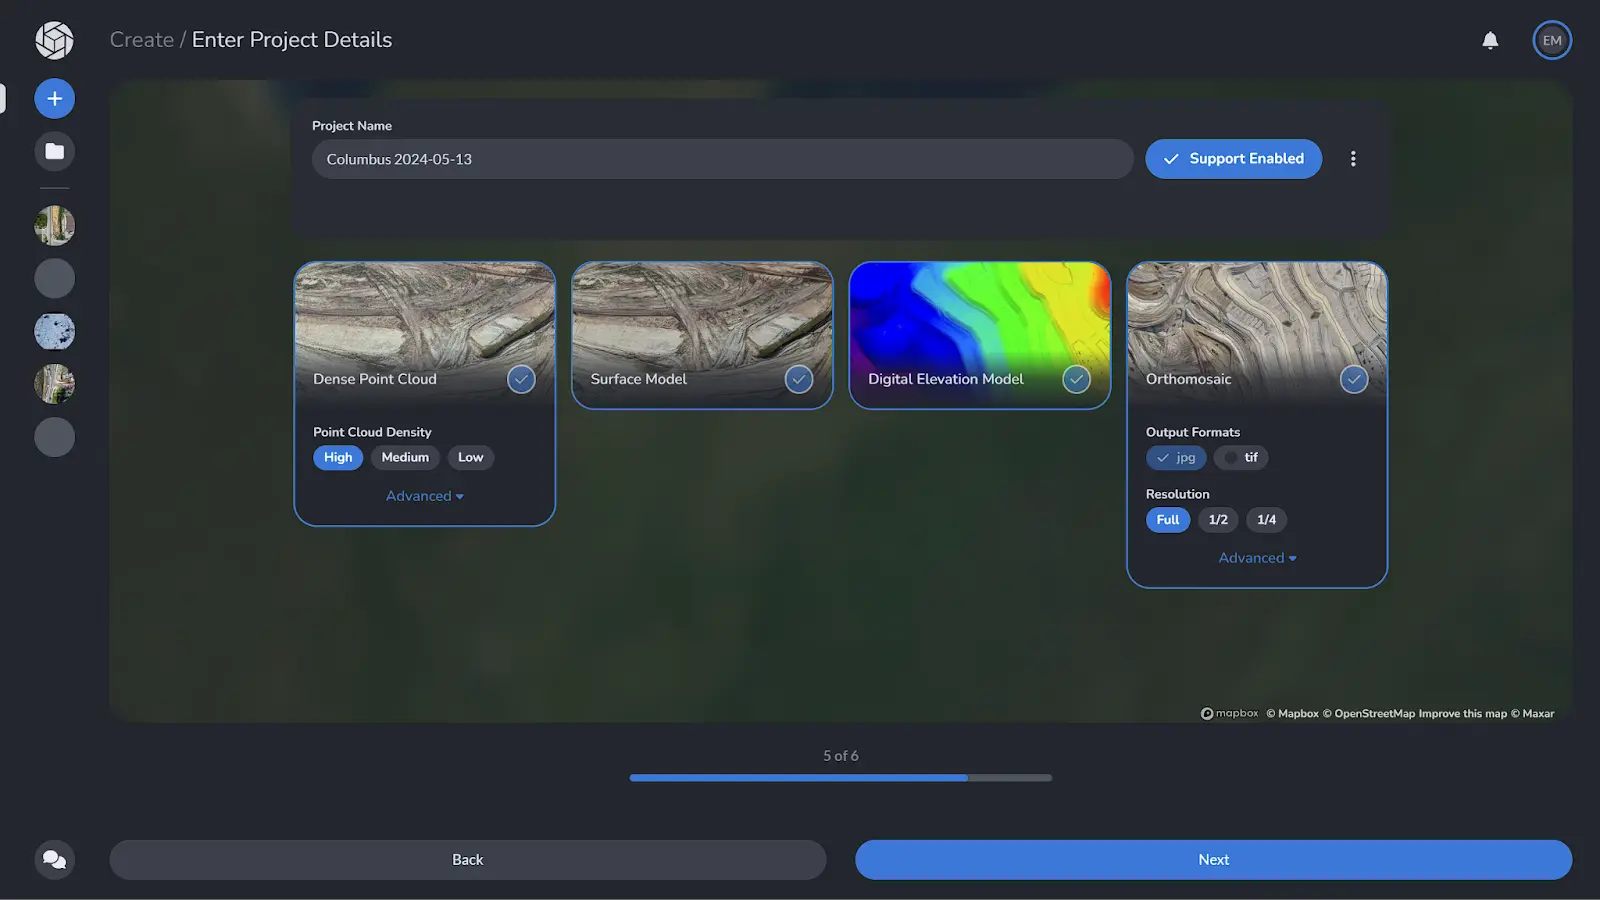
Step 5b: Enter Project Details
The next menu allows you to rename your project, toggle whether you would like support access, as well as what email notifications you would like. You are able to decide which deliverables you would like processed (Dense Point Cloud, Surface Model, Digital Elevation Model and Orthomosaic) and what quality and format you would like them exported in.
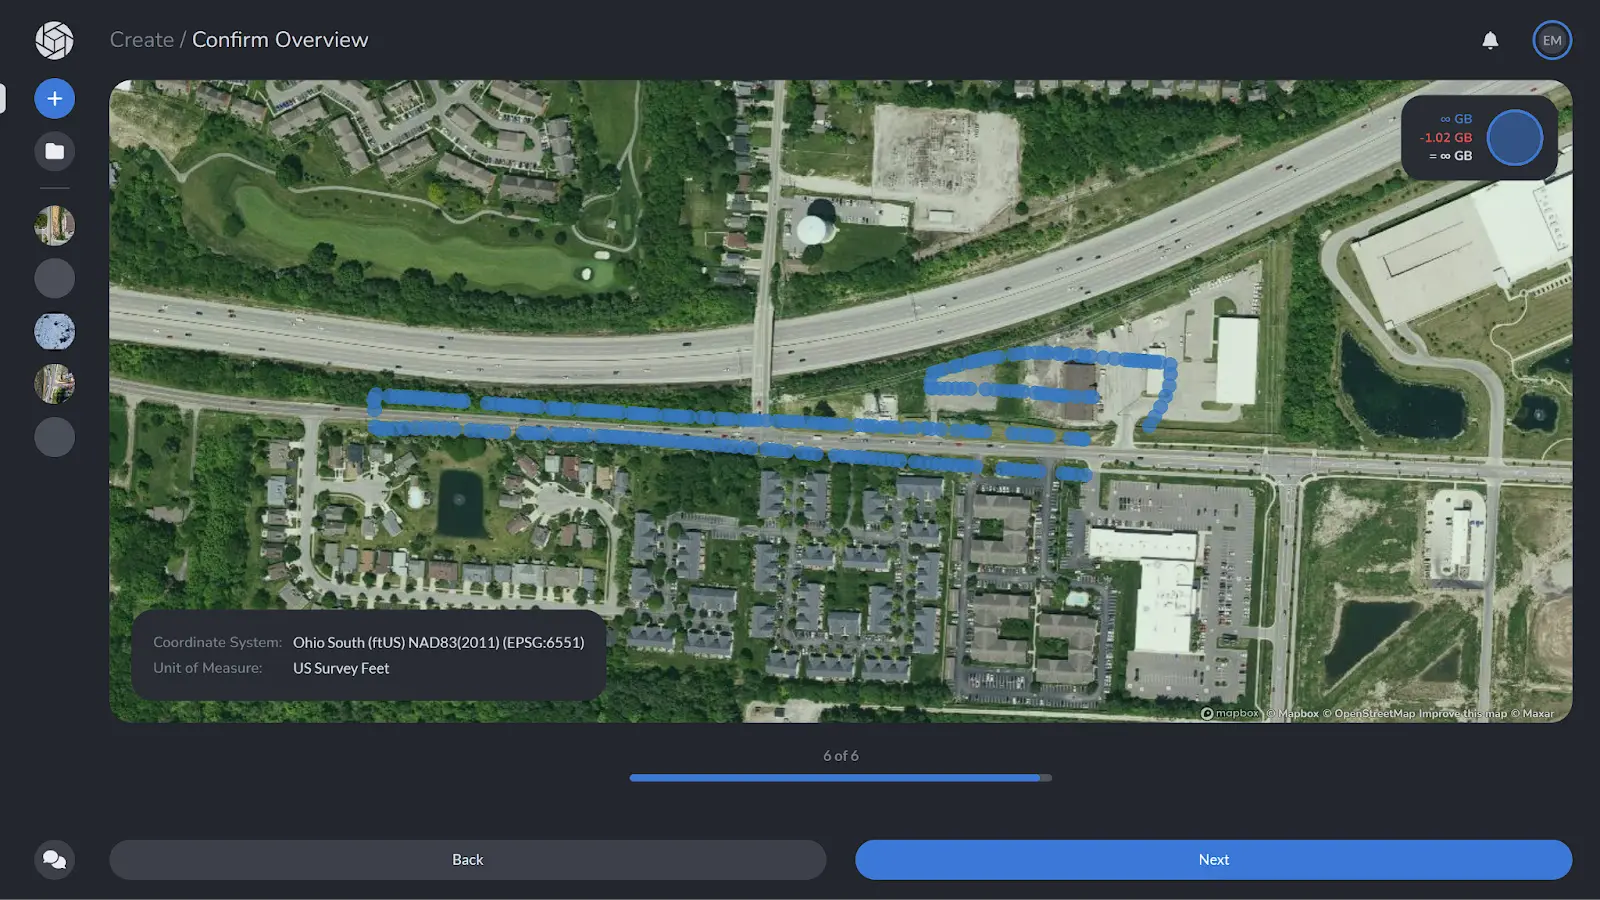
Confirm Overview
Confirm your project with the correct flight path/photos and coordinate system. Hit next to start processing your project.
Depending on how many images you have uploaded, and whether it is photogrammetry or LiDAR, processing times can vary. A progress bar will be given to you and the bundle adjustment report will be given to you to review while the rest of your project processes.
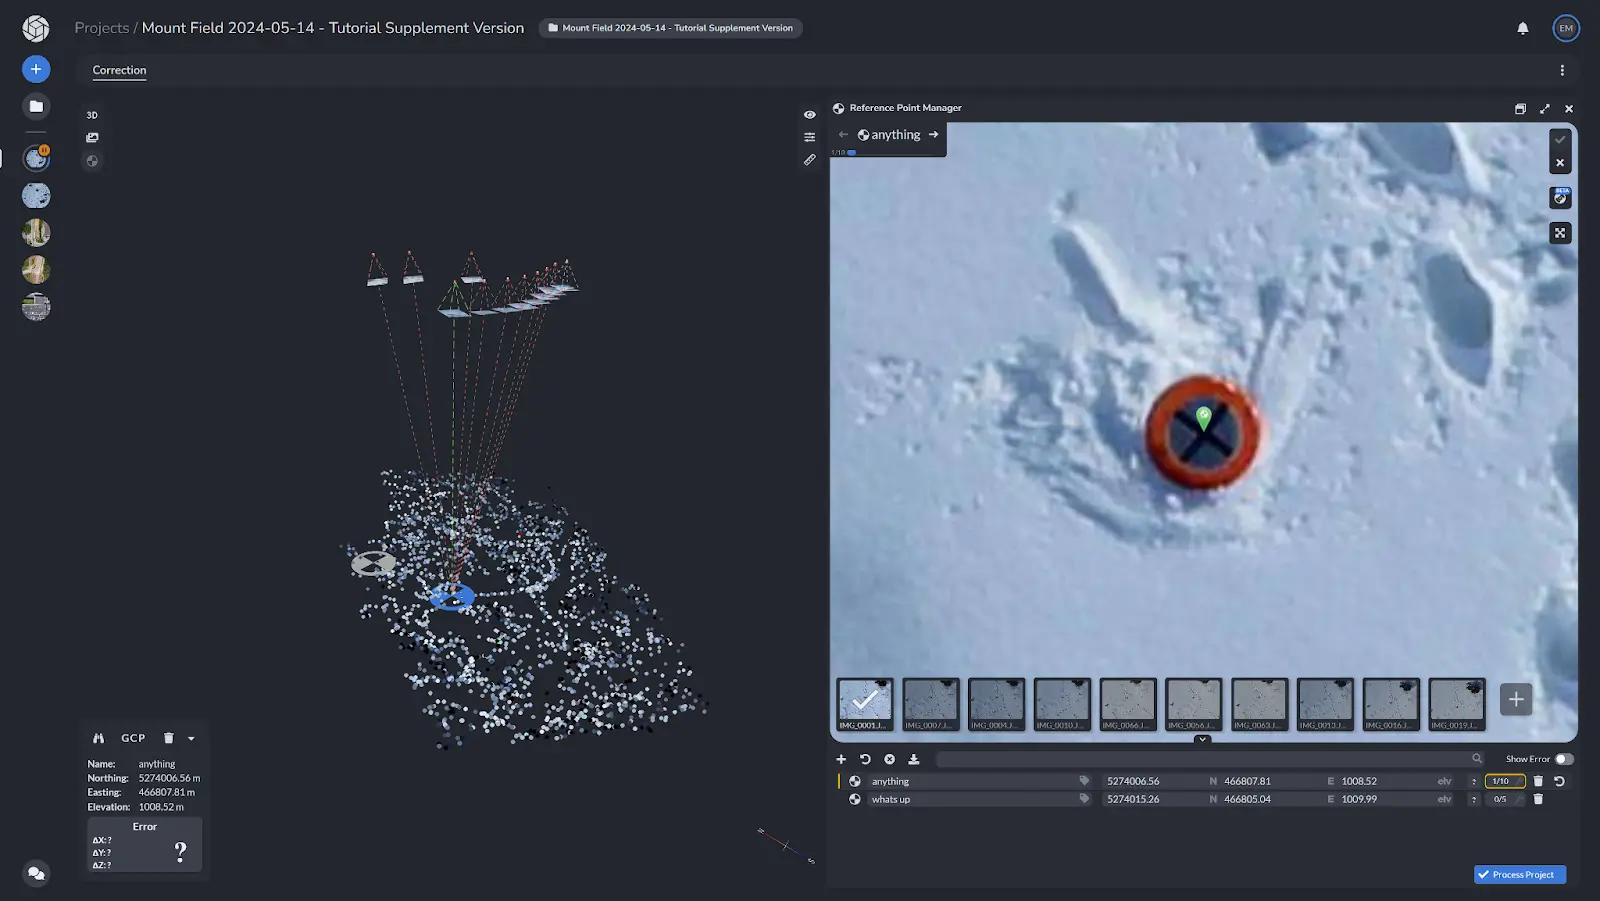
If a Ground Control Point file was uploaded, you will be prompted in the “Correction” tab after accepting your project to correct your photos to your Ground Control Points. Select the GCP you would like to correct for and place the pinpoint in each marker for each photo. You can navigate to the next photo in the timeline more quickly by right clicking on the mouse while hovering over the photo. After correcting a few photos, PixElement’s automatic reference point extraction tool identifies the GCP point in the rest of the photos, however, still needs to be confirmed by the user. As the photos are successfully corrected, the reference point to photo streamlines will turn green. Once all photos are correctly paired with their respective GCP, you may continue to process the project.
Upon process completion you have access to all of your deliverables that are available for download in various file formats.
This is the main project area that will open up when you open an already created project. You have accessibility to the overview tab with all of your deliverables, the “Canvas” tab, which is your 3D workspace to annotate and analyze your dataset as well as the “Analyzer” tab, which is used for viewing the sparse point cloud, editing your reference points and viewing the photos taken by the aerial system.
Congratulations! You’ve now taken your first steps into the world of PixElement, armed with the knowledge on how to start and process your projects.
Remember, Pixelement is not just a tool; it is a platform designed to simplify your workflow and get insightful results. Whether you’re a seasoned professional or just starting out, we’re here to support you every step of the way.
So, what are you waiting for? Dive in and explore! Happy Mapping!
If you would like to view a video version of this tutorial, check out our other post. To see our other tutorials, please reference the PixElement Tutorial Playlist